


Friday, September 1, 2017
Transmission Overhaul Pictures
The owner of the shop that overhauled my transmission finally sent me some pictures of the overhaul. The quality isn't great but I figured I'd post them in the interest of completeness.
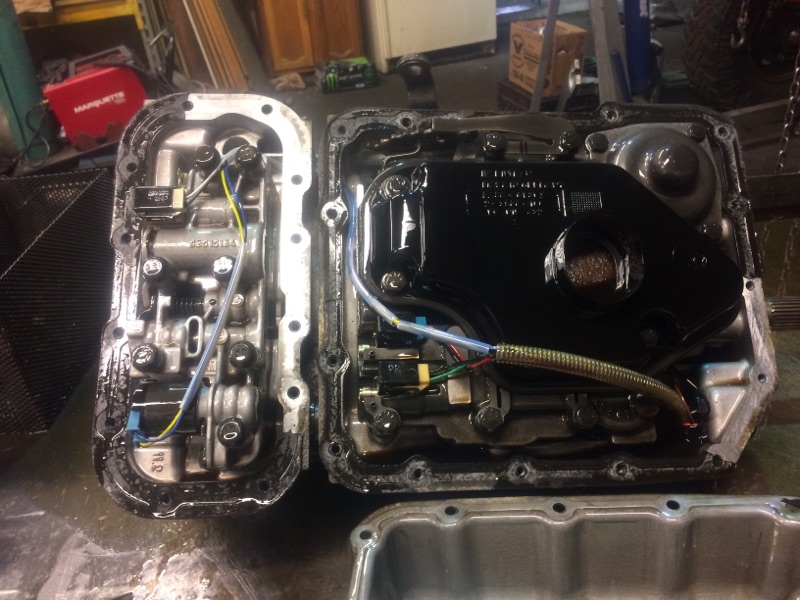 Main (right) and adapter case valve bodies exposed with the pans removed. Force motor (EPC) solenoid at bottom left is special to BMW versions of the 4L30E and requires a Bosch part |
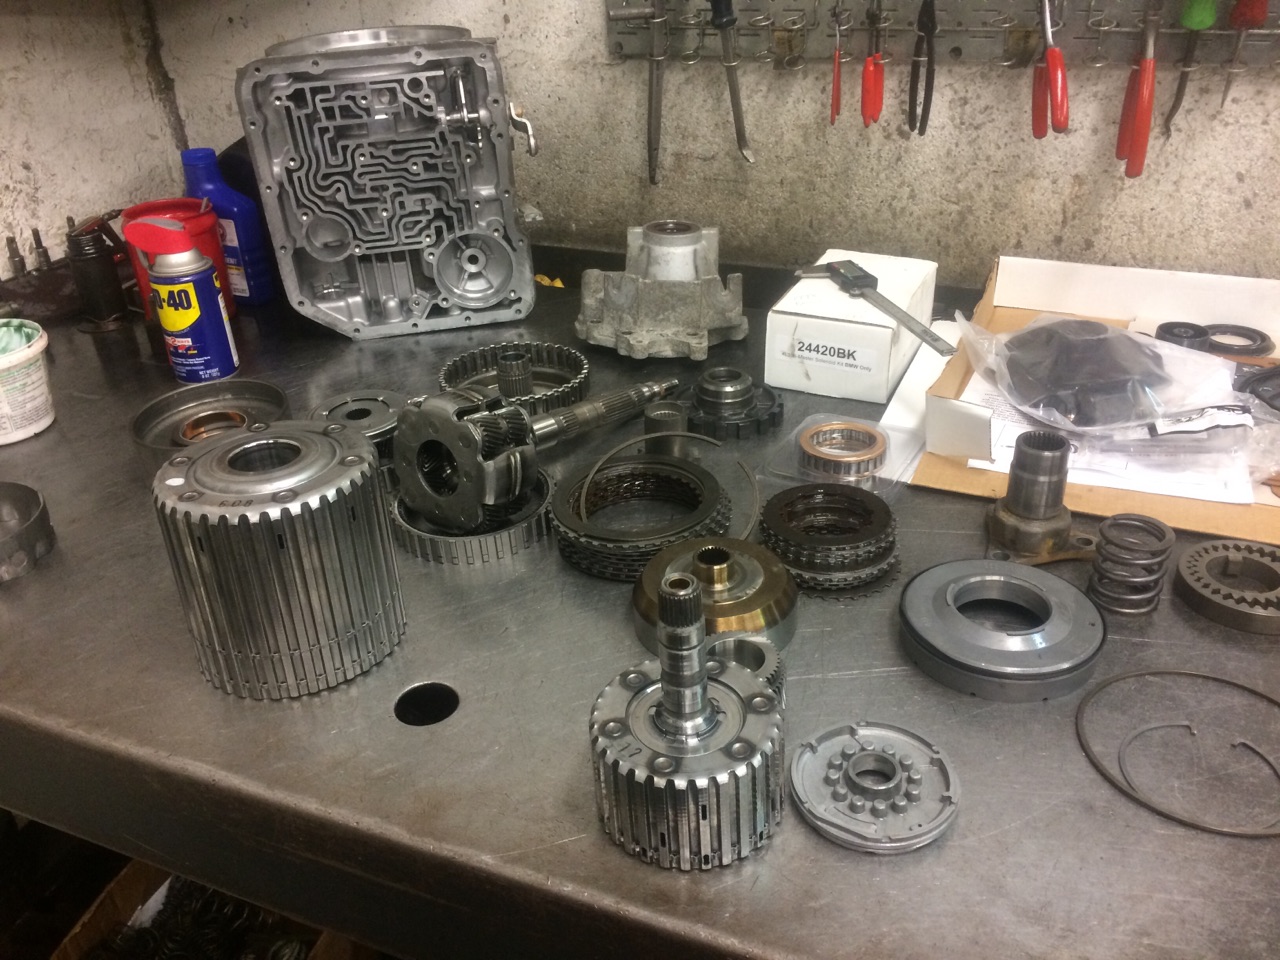
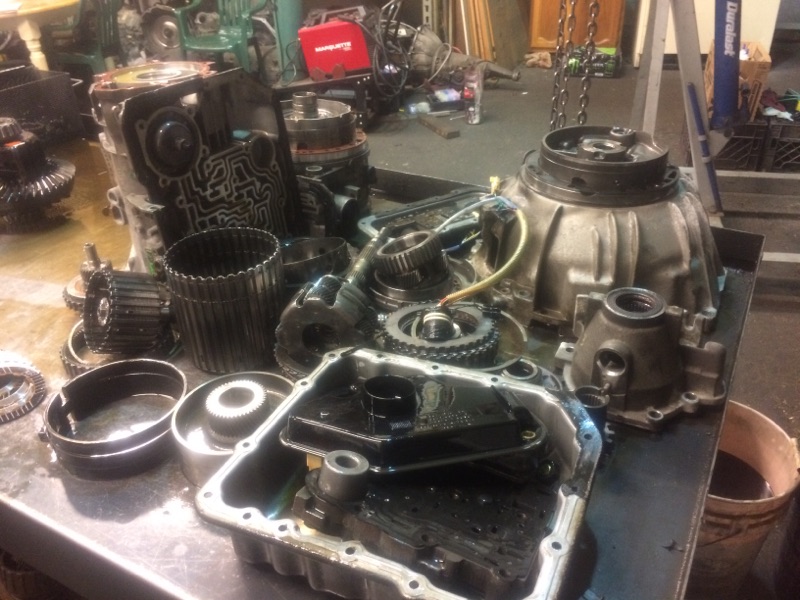 Before I decided to have a local shop overhaul this unit I learned everything I could about it. As a result this pile of parts is a lot less daunting. In fact, because this is only a 4 speed transmission it's relatively simple. |
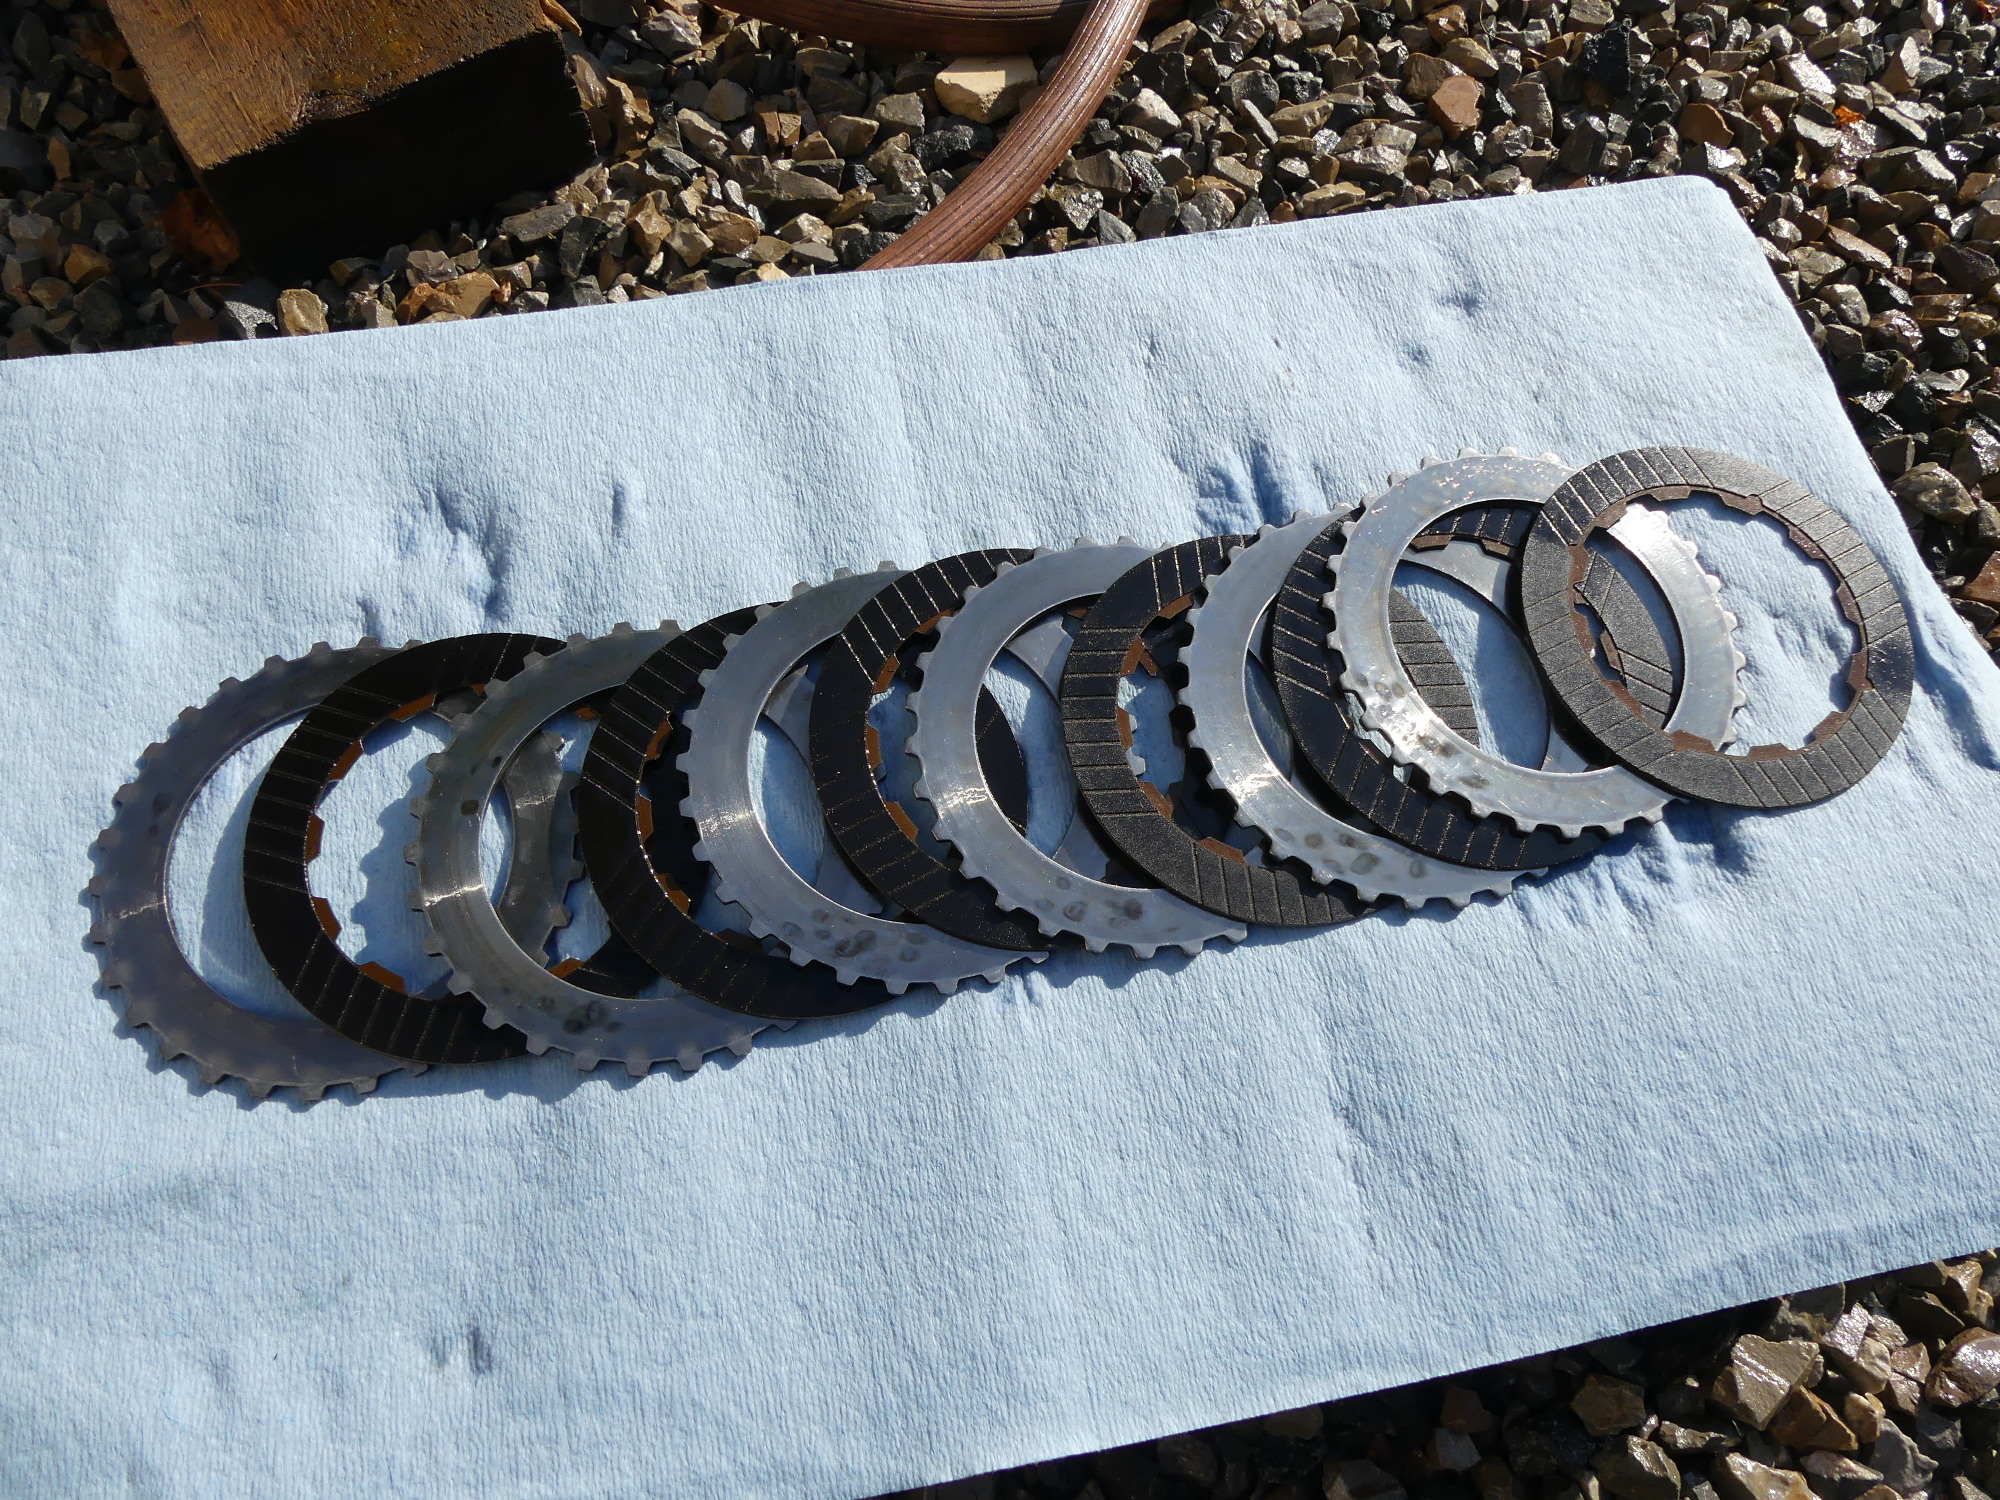 The only burnt steels in the unit were found in the overrun clutch, and these were the only steels replaced because according to the shop owner the aftermarket steels weren't as well machined as the factory steels. |
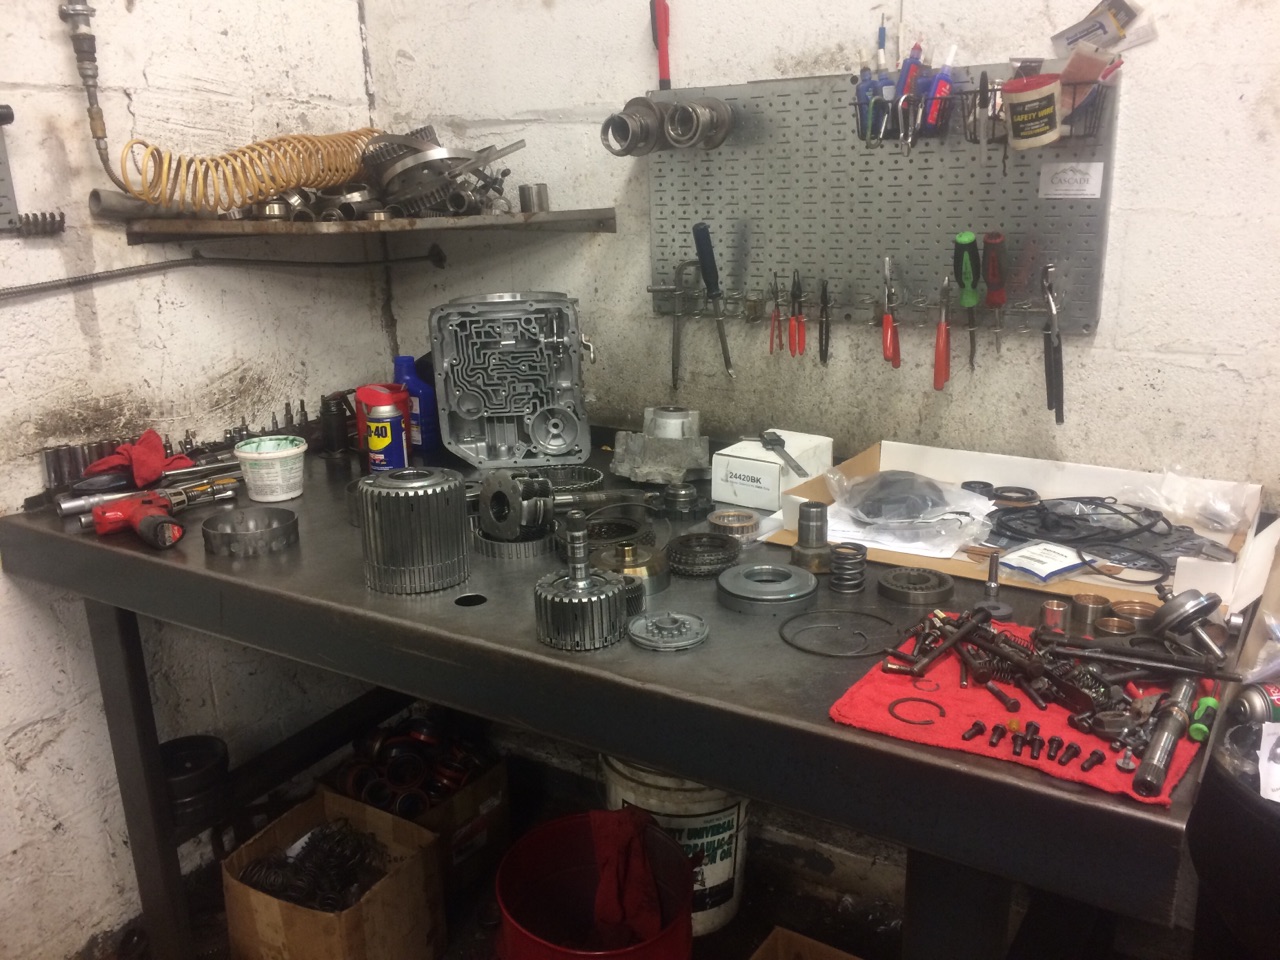 This is the shop's overhaul bench with all parts cleaned and organized for the assembly process. Organization and cleanliness are key to overhauling transmissions successfully. |
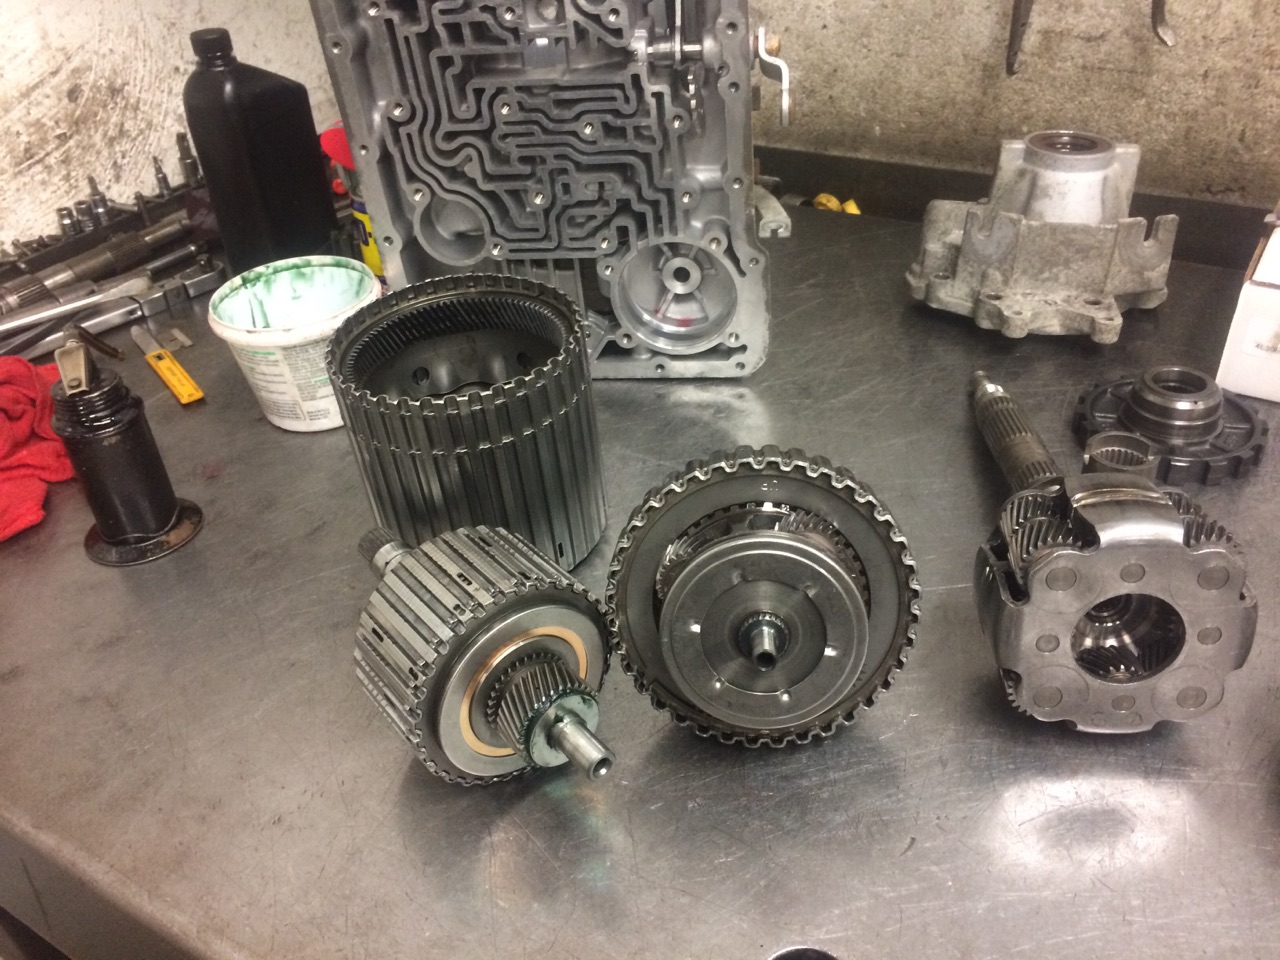
 The 2nd clutch housing is the big drum on the left. The smaller 3rd clutch housing sits to its right. The planetary gearset is behind the 2nd clutch housing. Various clutch packs, pistons, and snap rings are also shown. |
 Assembly almost complete. The smaller third clutch housing fits into the 2nd clutch housing behind it. The parking gear behind the planetary gearset locks the output shaft when the transmission is placed in park. |
I've already talked about the state of the transmission in an earlier entry so I won't rehash that here other than to say it was in pretty good shape for its age. I promise -- when I put another 140K on the E36 I'll do the transmission overhaul myself so I can give you the pictures and video you want to see.
More Parts, One Arrives Broken
Before leaving the house today I put together another order consisting mostly of miscellaneous hardware I have been too busy to order. Then I dropped by the dealer to pick up a few more parts that came in, including the sound insulation blanket and brake booster. These two items are, of course, related to one another in that the booster must be removed from the firewall to replace the blanket.
The first annoyance of the day came when I was told the blanket arrived slightly damaged. For some unexplained reason BMW couldn't properly package this thing for its trip across the pond. They just threw it in a huge box and sent it via FedEx. The results were predictable -- a section on the right side where the upper section mates with the tunnel section separated. My tech saw the damage and said that BMW uses an epoxy to glue the two sections together so he handed me a tube of epoxy and recommended I apply it only after I mate the blanket with the car -- implying, of course, that epoxy doesn't really have the required mechanical strength to keep the parts together.
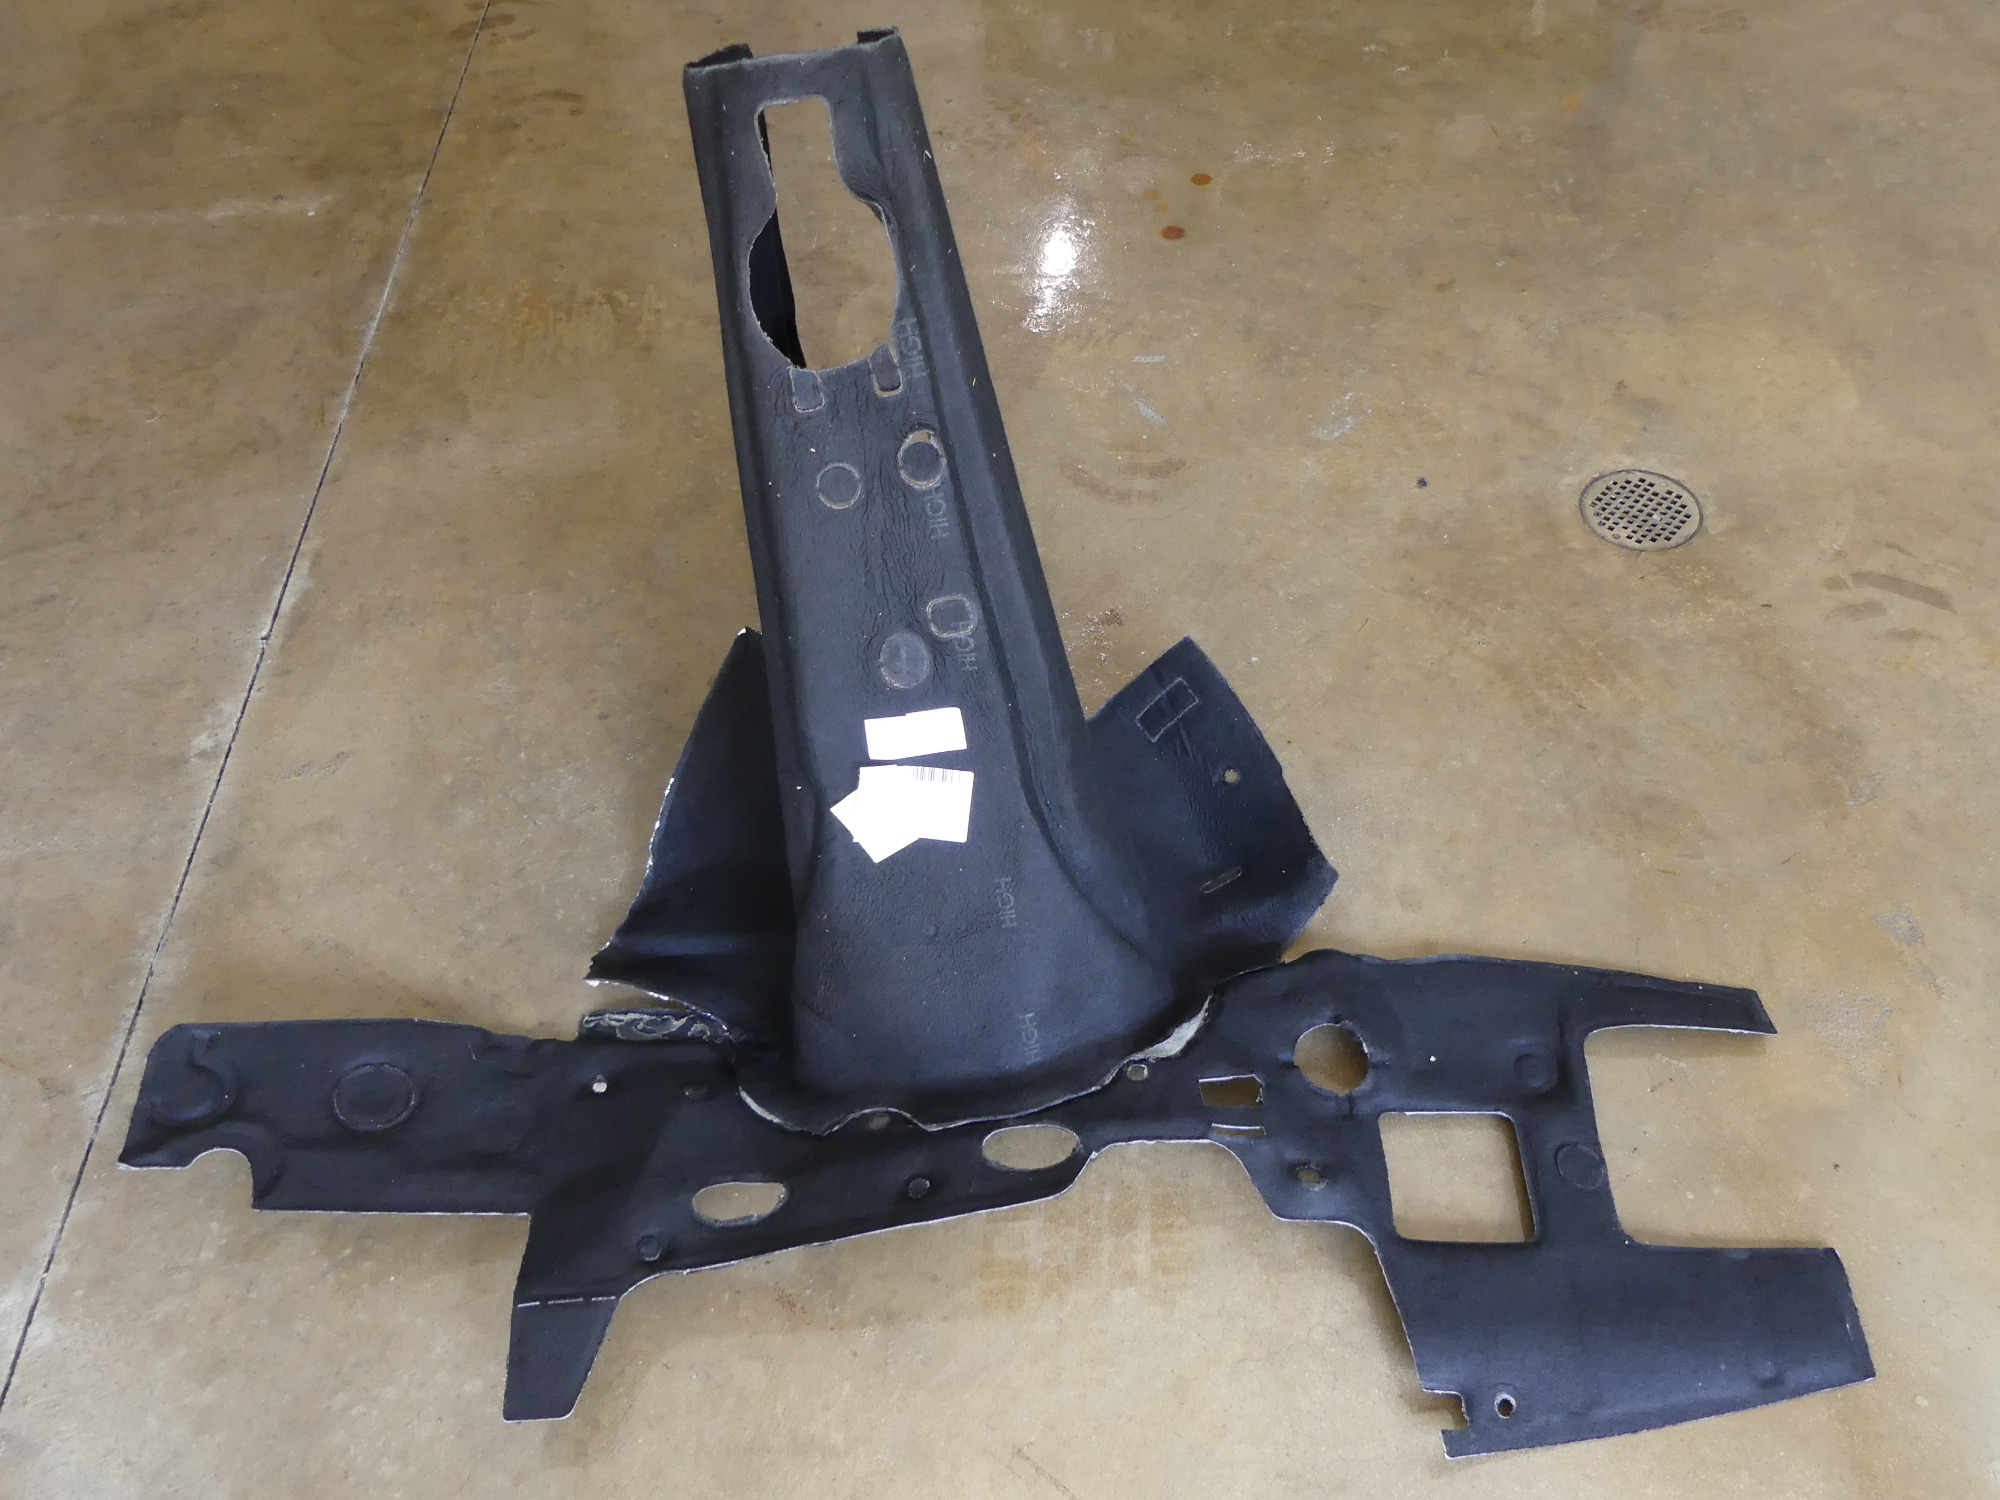 Good news: the sound / heat insulation blanket is still available. Bad News: it arrived broken. If you look at the left side intersection between the tunnel and firewall pieces you can see exposed adhesive. The parts have separated here. |
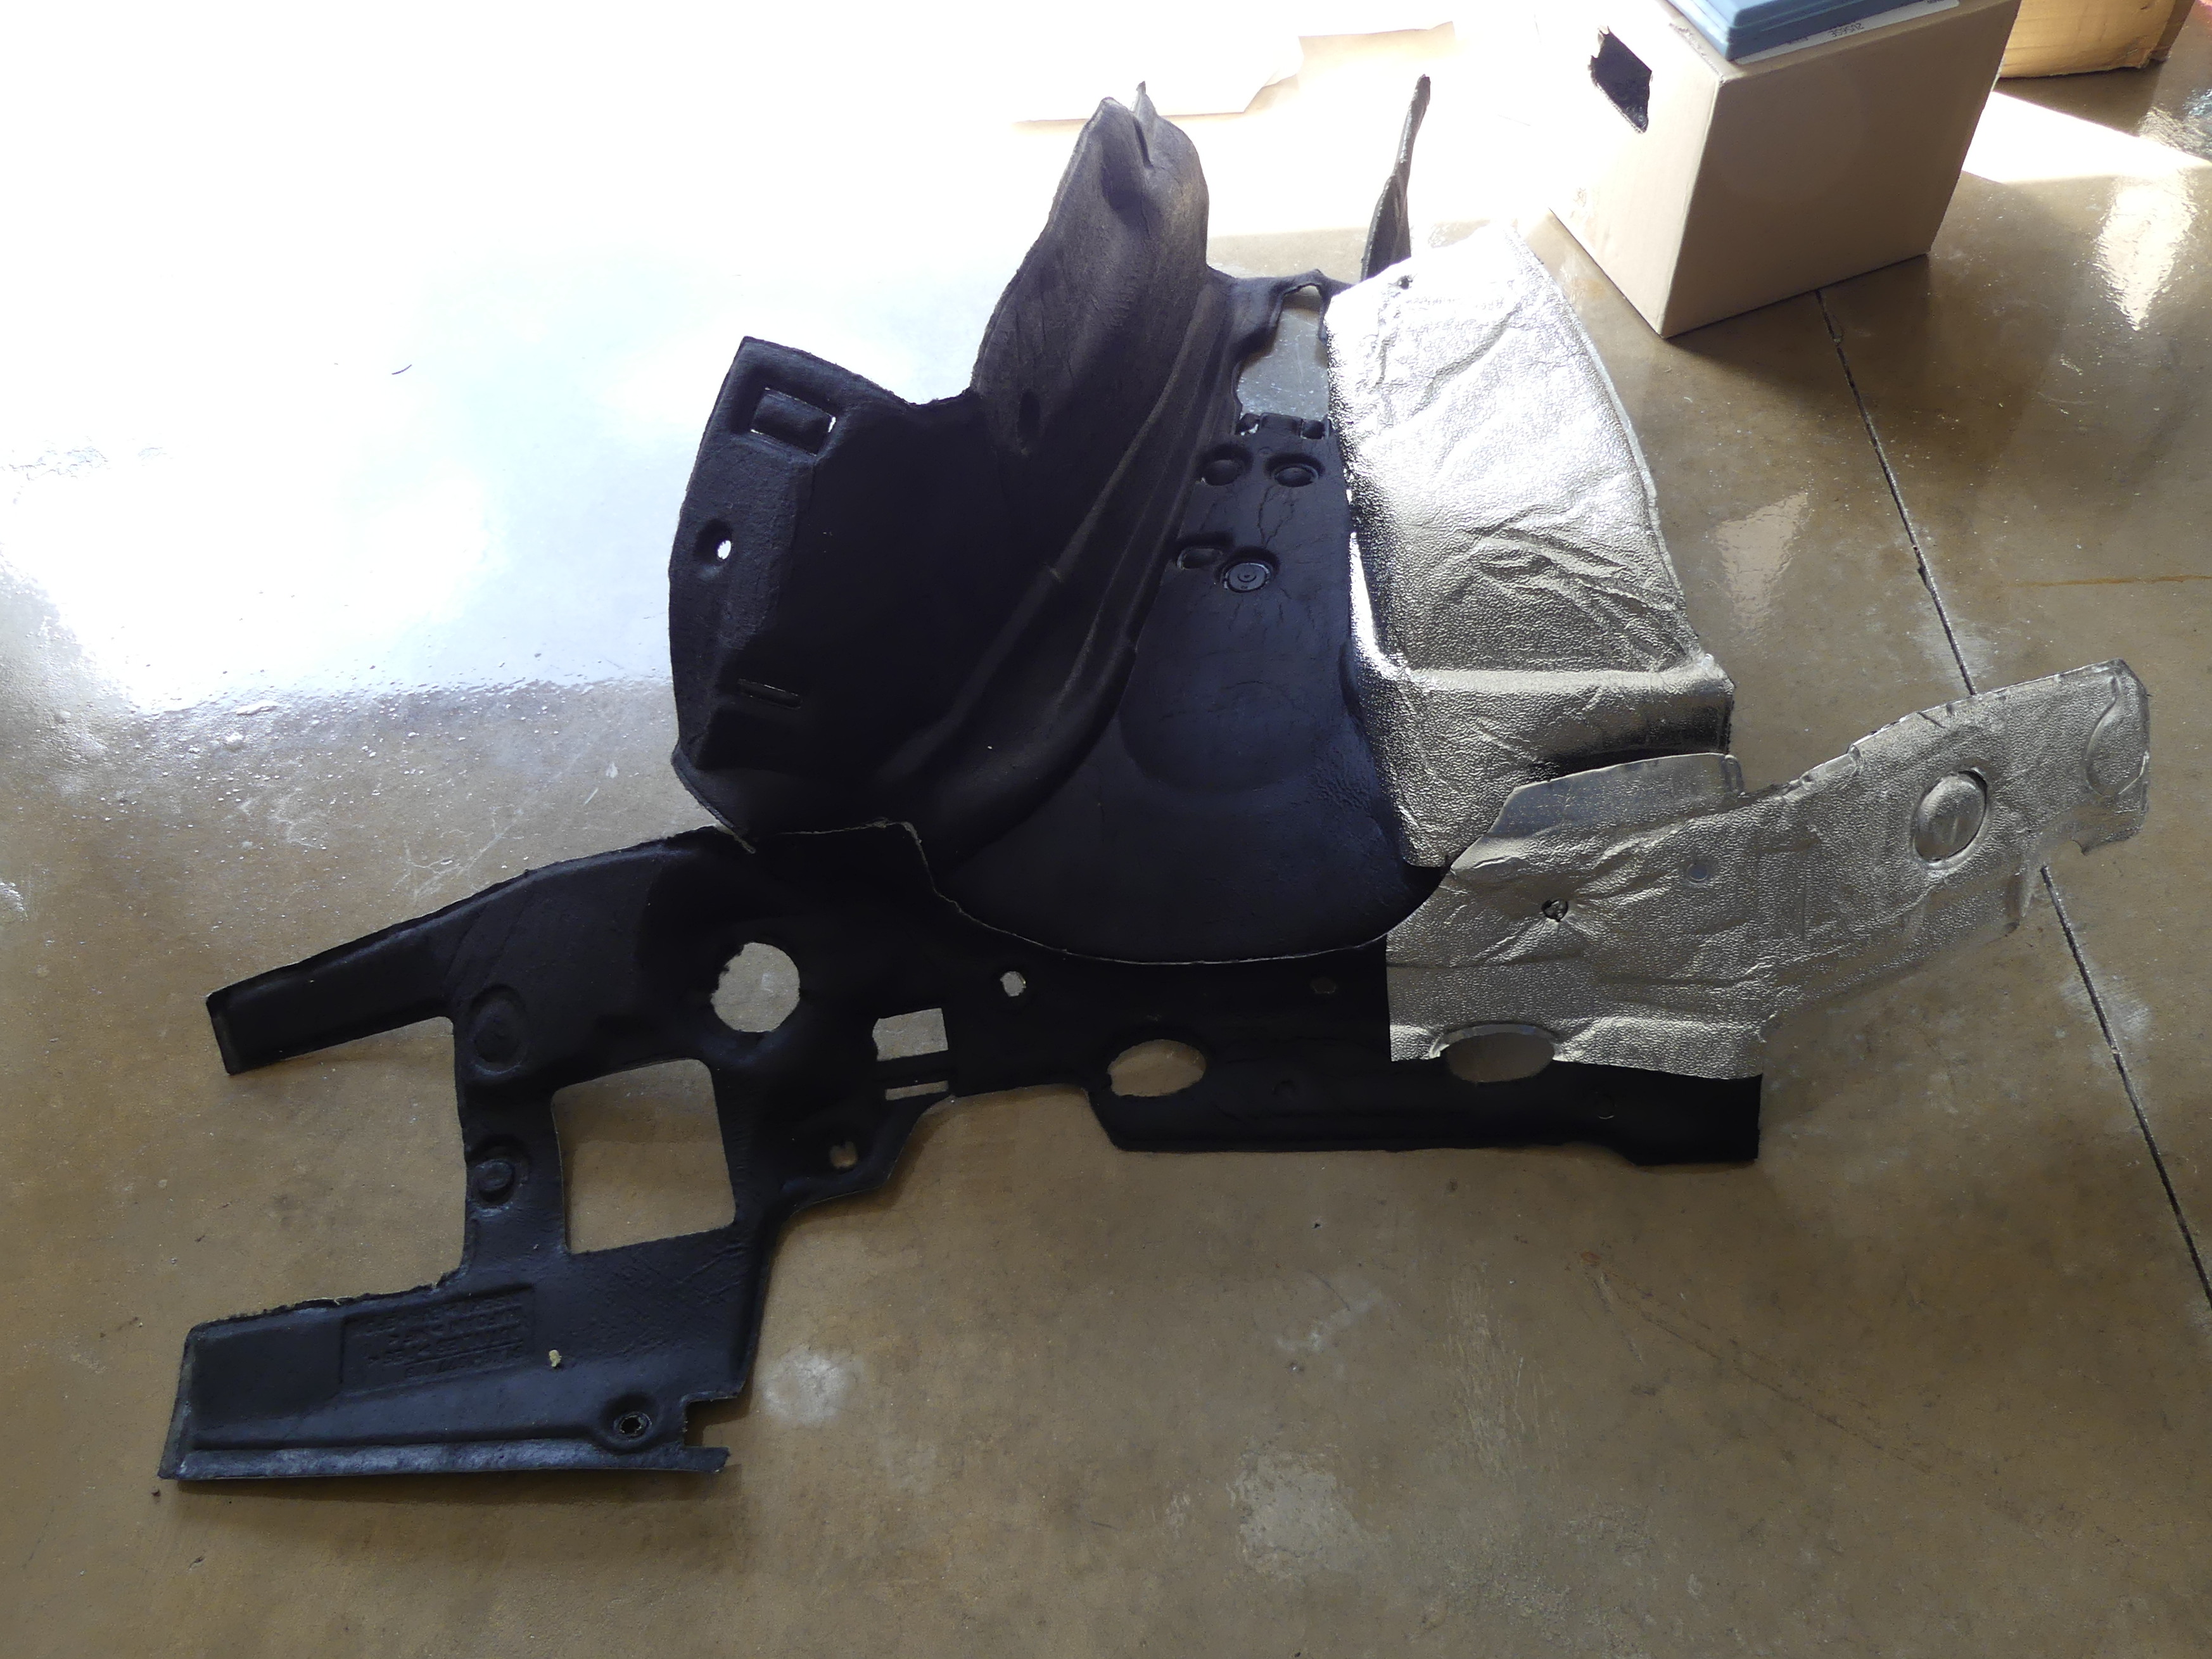 The other side of the blanket shows a rather stupid design decision on the part of BMW -- the right side (shiny) can be installed without removing anything, but the left side requires removal of the collapsible steering shaft and the brake booster. |
 The sins of the past continue to reveal themselves. In this case omission of two screws, one on each side, that help to secure the fog lights to the anodized aluminum bumper support. Fortunately I had extra 8mm hex screws to install on a whim. |
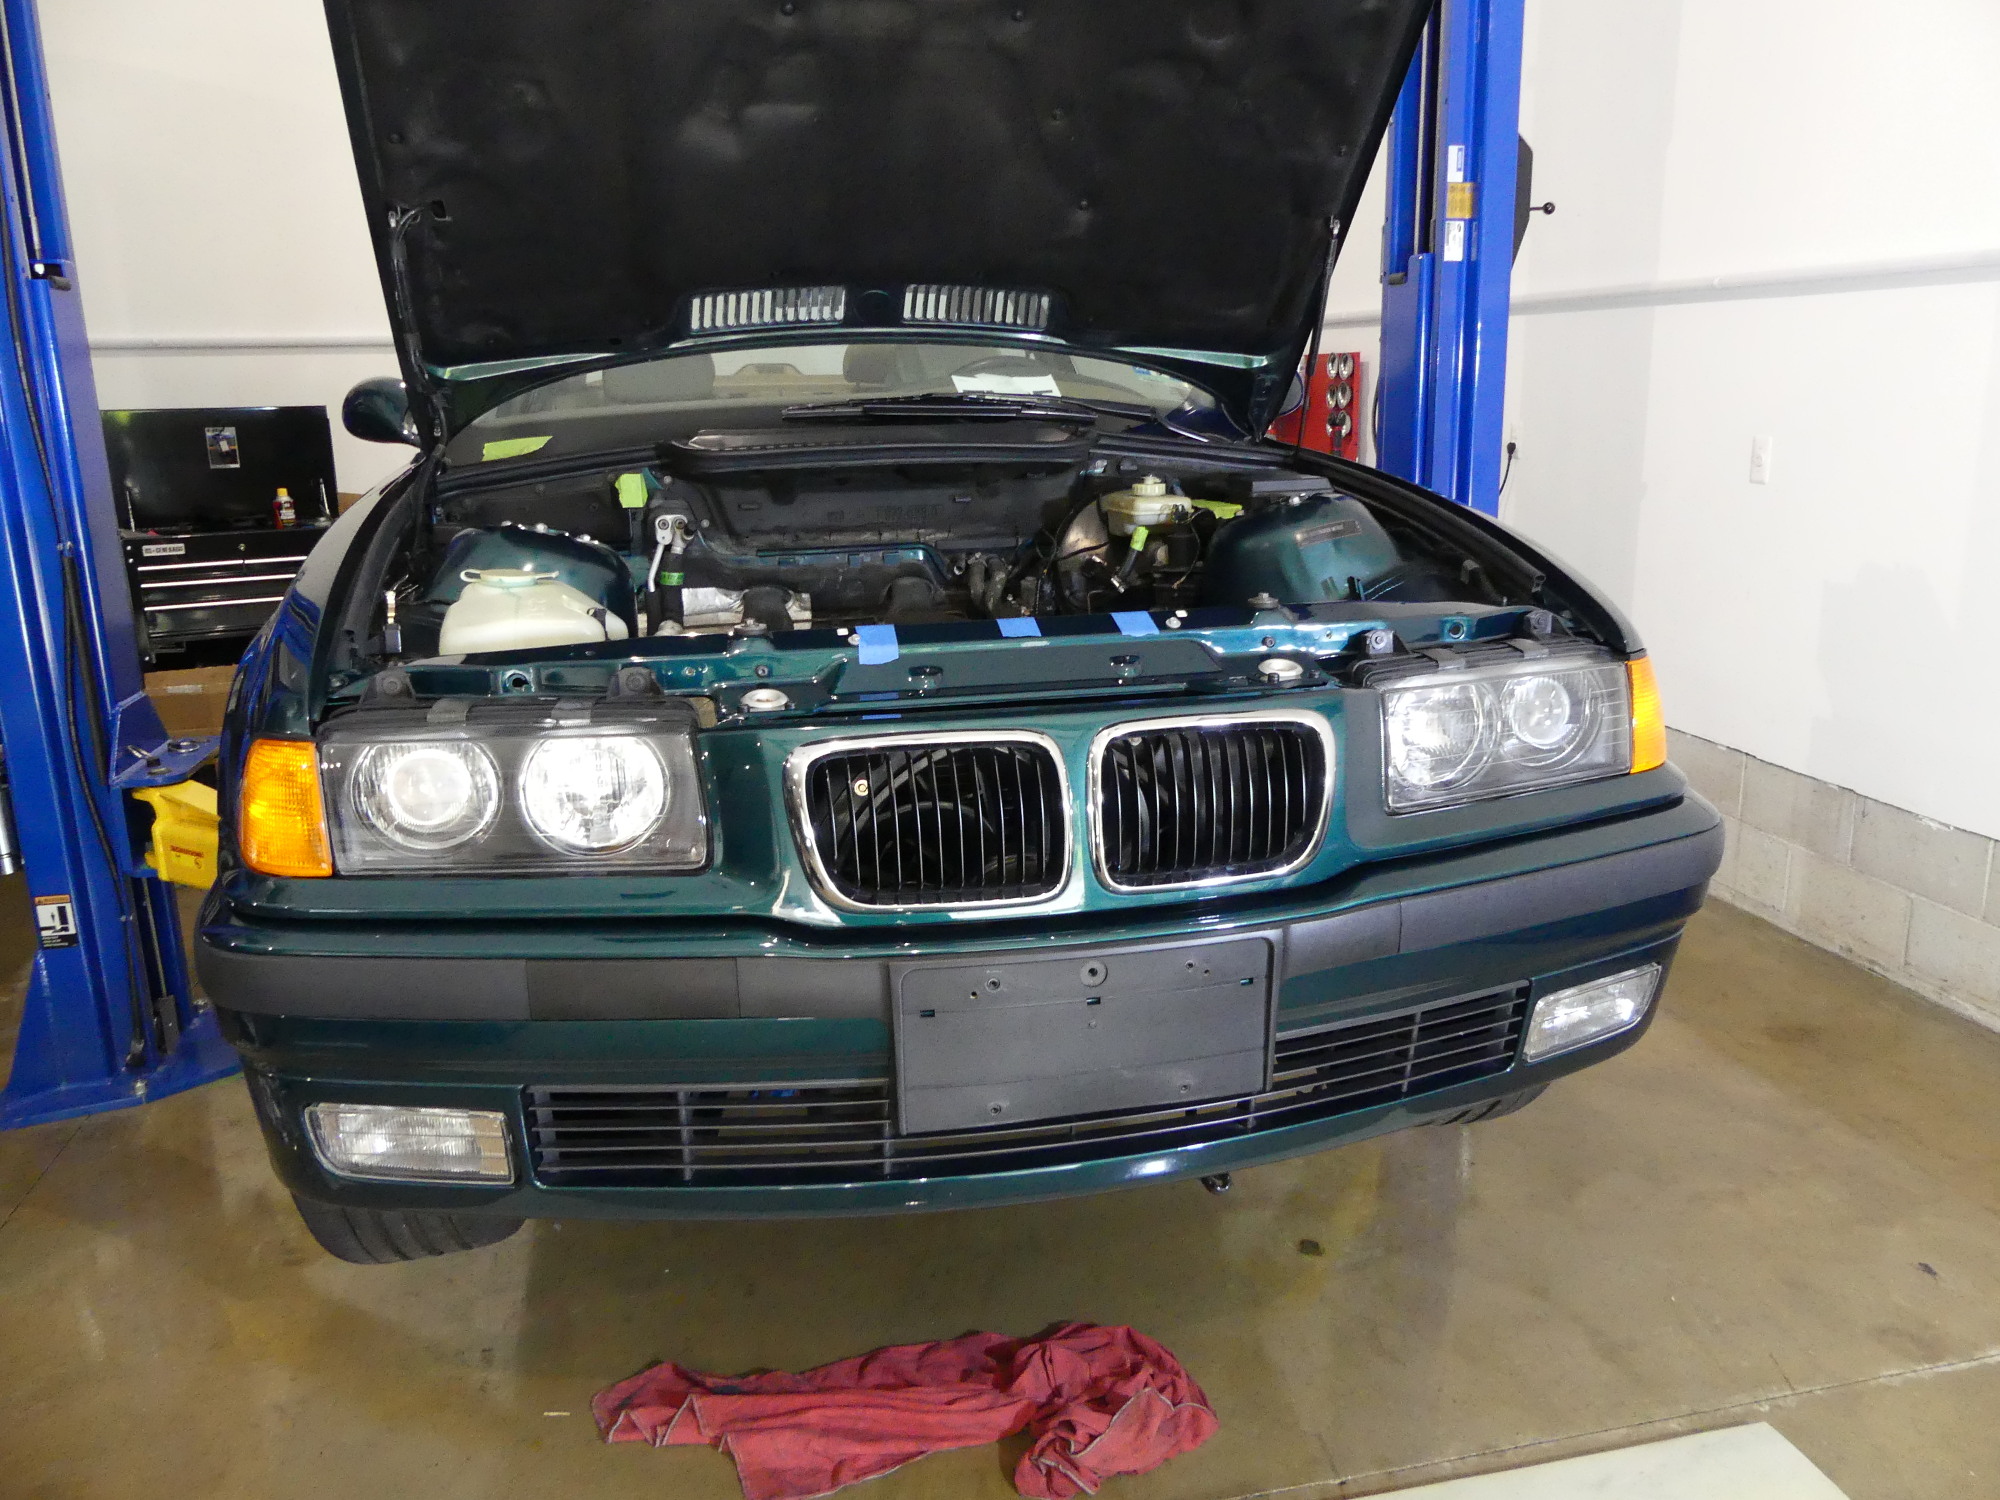 The glamour shot of the new front end reassembled using the correct hardware and with attention paid to rust remediation and prevention. This was a lot more work than it appears but I'm happy with the end result, and that's frankly all that matters. |
 This is the return fuel hardline that connects the fuel rail flexible return hose to the valve / regulator assembly. The hose shown is the original delivered with the vehicle in 1998. The crustiness is not corrosion as I originally believed -- it's dried cosmoline. |
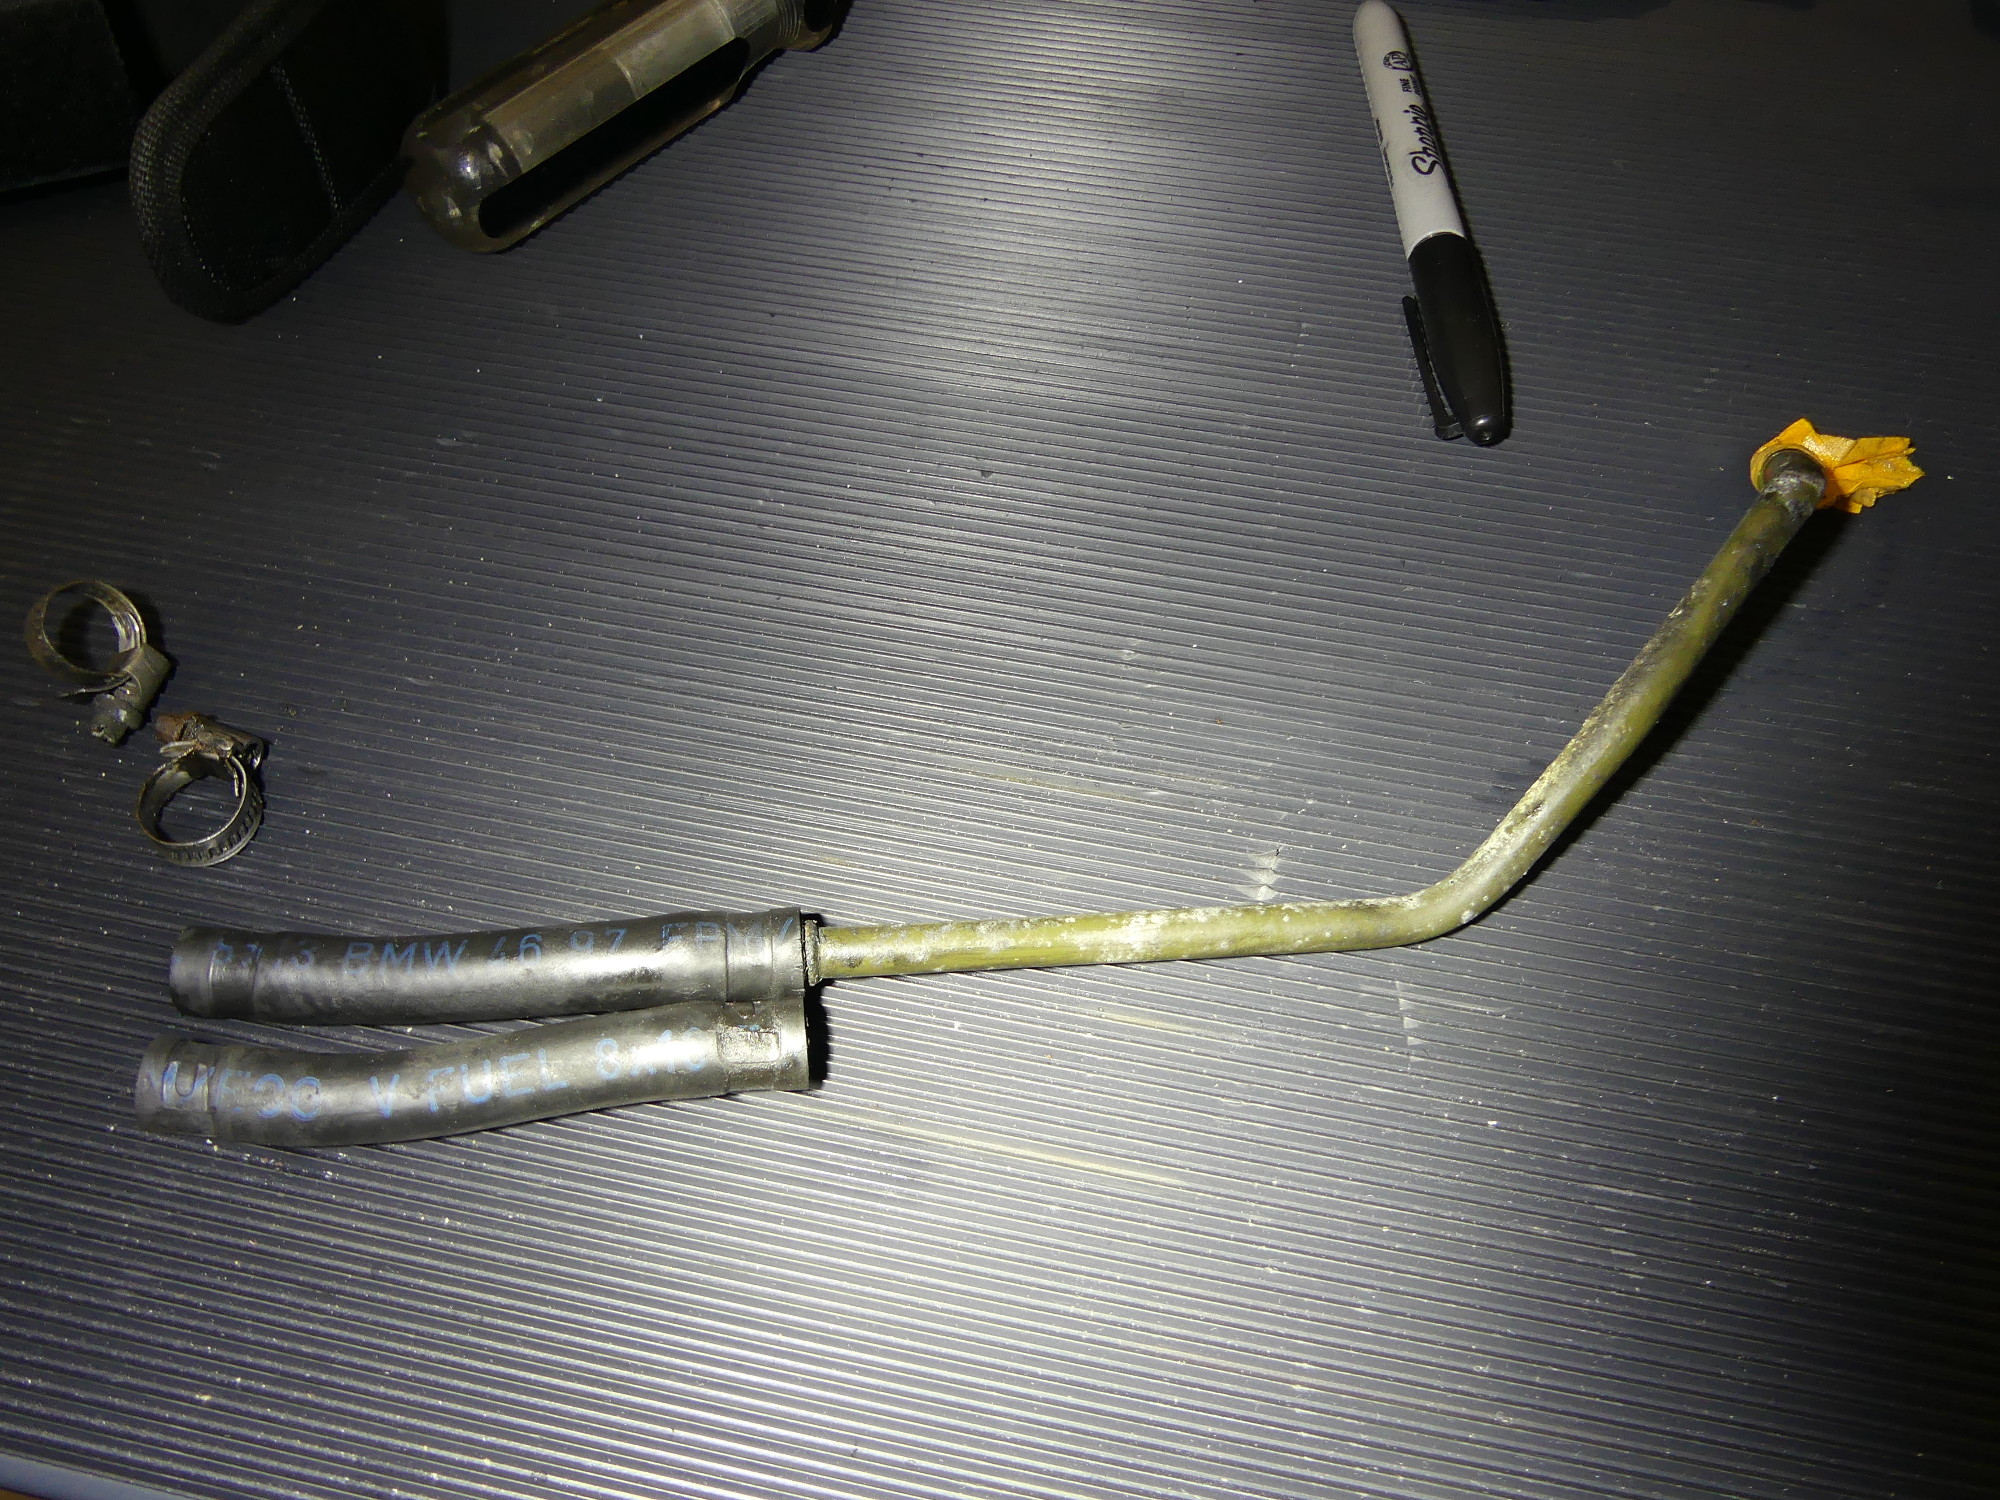 This slightly more contorted line delivers fuel from the regulator to the flexible hose that attaches to the fuel rail. The other hose segment, removed from the return line, is the same length as that on the feed line. |
I'm not exactly happy about this because I have a lot riding on this part. If the pieces start to delaminate after the project is wrapped up I'm screwed, as it's basically impossible to replace or repair the blanket with the engine in the car. For this reason, after the holiday I'm planning to ask my parts rep to order another part to replace this one, but in case that one comes in broken too I'll have a backup plan at the ready that will involve using epoxy along with mechanical reinforcement -- specifically, stitching the blanket sections together with a heavy gauge kevlar thread that will tolerate the high temperatures in the engine bay and prevent any dissimilar metal corrosion that would otherwise occur if I used something like safety wire over the aluminum foil covered regions. As far as reactivity is concerned, stainless steel and aluminum don't mix.
Front End Wrapped Up
When I arrived at the garage I wrapped up the front end. A last minute check of the bumper and support revealed two missing screws -- each designed to tie the fog light assemblies to the bumper support. The tinnerman clips were still in good shape so all I did was install new zinc-plated 8mm hex head screws.
I then set about to fix the gap between the bumper and grille support. I loosened the four nuts on the right side bumper shock and pushed it up as far as it would go before tightening the nuts again. Fitting the bumper, which included pushing it up as far as it would go on the mounting studs, eliminated much of the gap so I tightened the bumper retaining nuts, securing the bumper to the vehicle.
To wrap things up I made sure the brake ducts were properly mated between the bumper and wheel well liners, and wired up the temperature sensors and fog lights. Lastly, I installed the bumper trim and took a glamour shot for you.
Fuel Lines
I then started work on the fuel lines. The first two hardlines forward of the regulator were removed, cleaned up, scuffed and then sprayed with VHT Satin Black for good measure. I then removed and cleaned the regulator, and replaced the short (4") sections of fuel hose that remained behind. One of these sections went to the filter and had been replaced recently, while the other was original. As expected, the recently replaced hose looked and felt like new, but I replaced it anyway. I gladly discarded the other original hose section but I have to admit that while it wasn't as soft and flexible as the new hose it defied its age. I've said it before but I'll say it again -- BMW is in love with their fuel hose (it's about $12 a foot) but it's quality stuff and lasts a very long time.
The single biggest problem with doing this work was the sorry state of the fuel hose clamps -- most were rusty and initially difficult to turn. Rather than risk the heads stripping out from using a phillips or straight blade screwdriver I spritzed the clamps with PB blaster and used a nut driver to successfully loosen them. In addition to the clamps I purchased for this project (8) I found another bag of L12-L15 clamps I bought some time ago so I now have the means to replace every clamp on every fuel hose under the car.
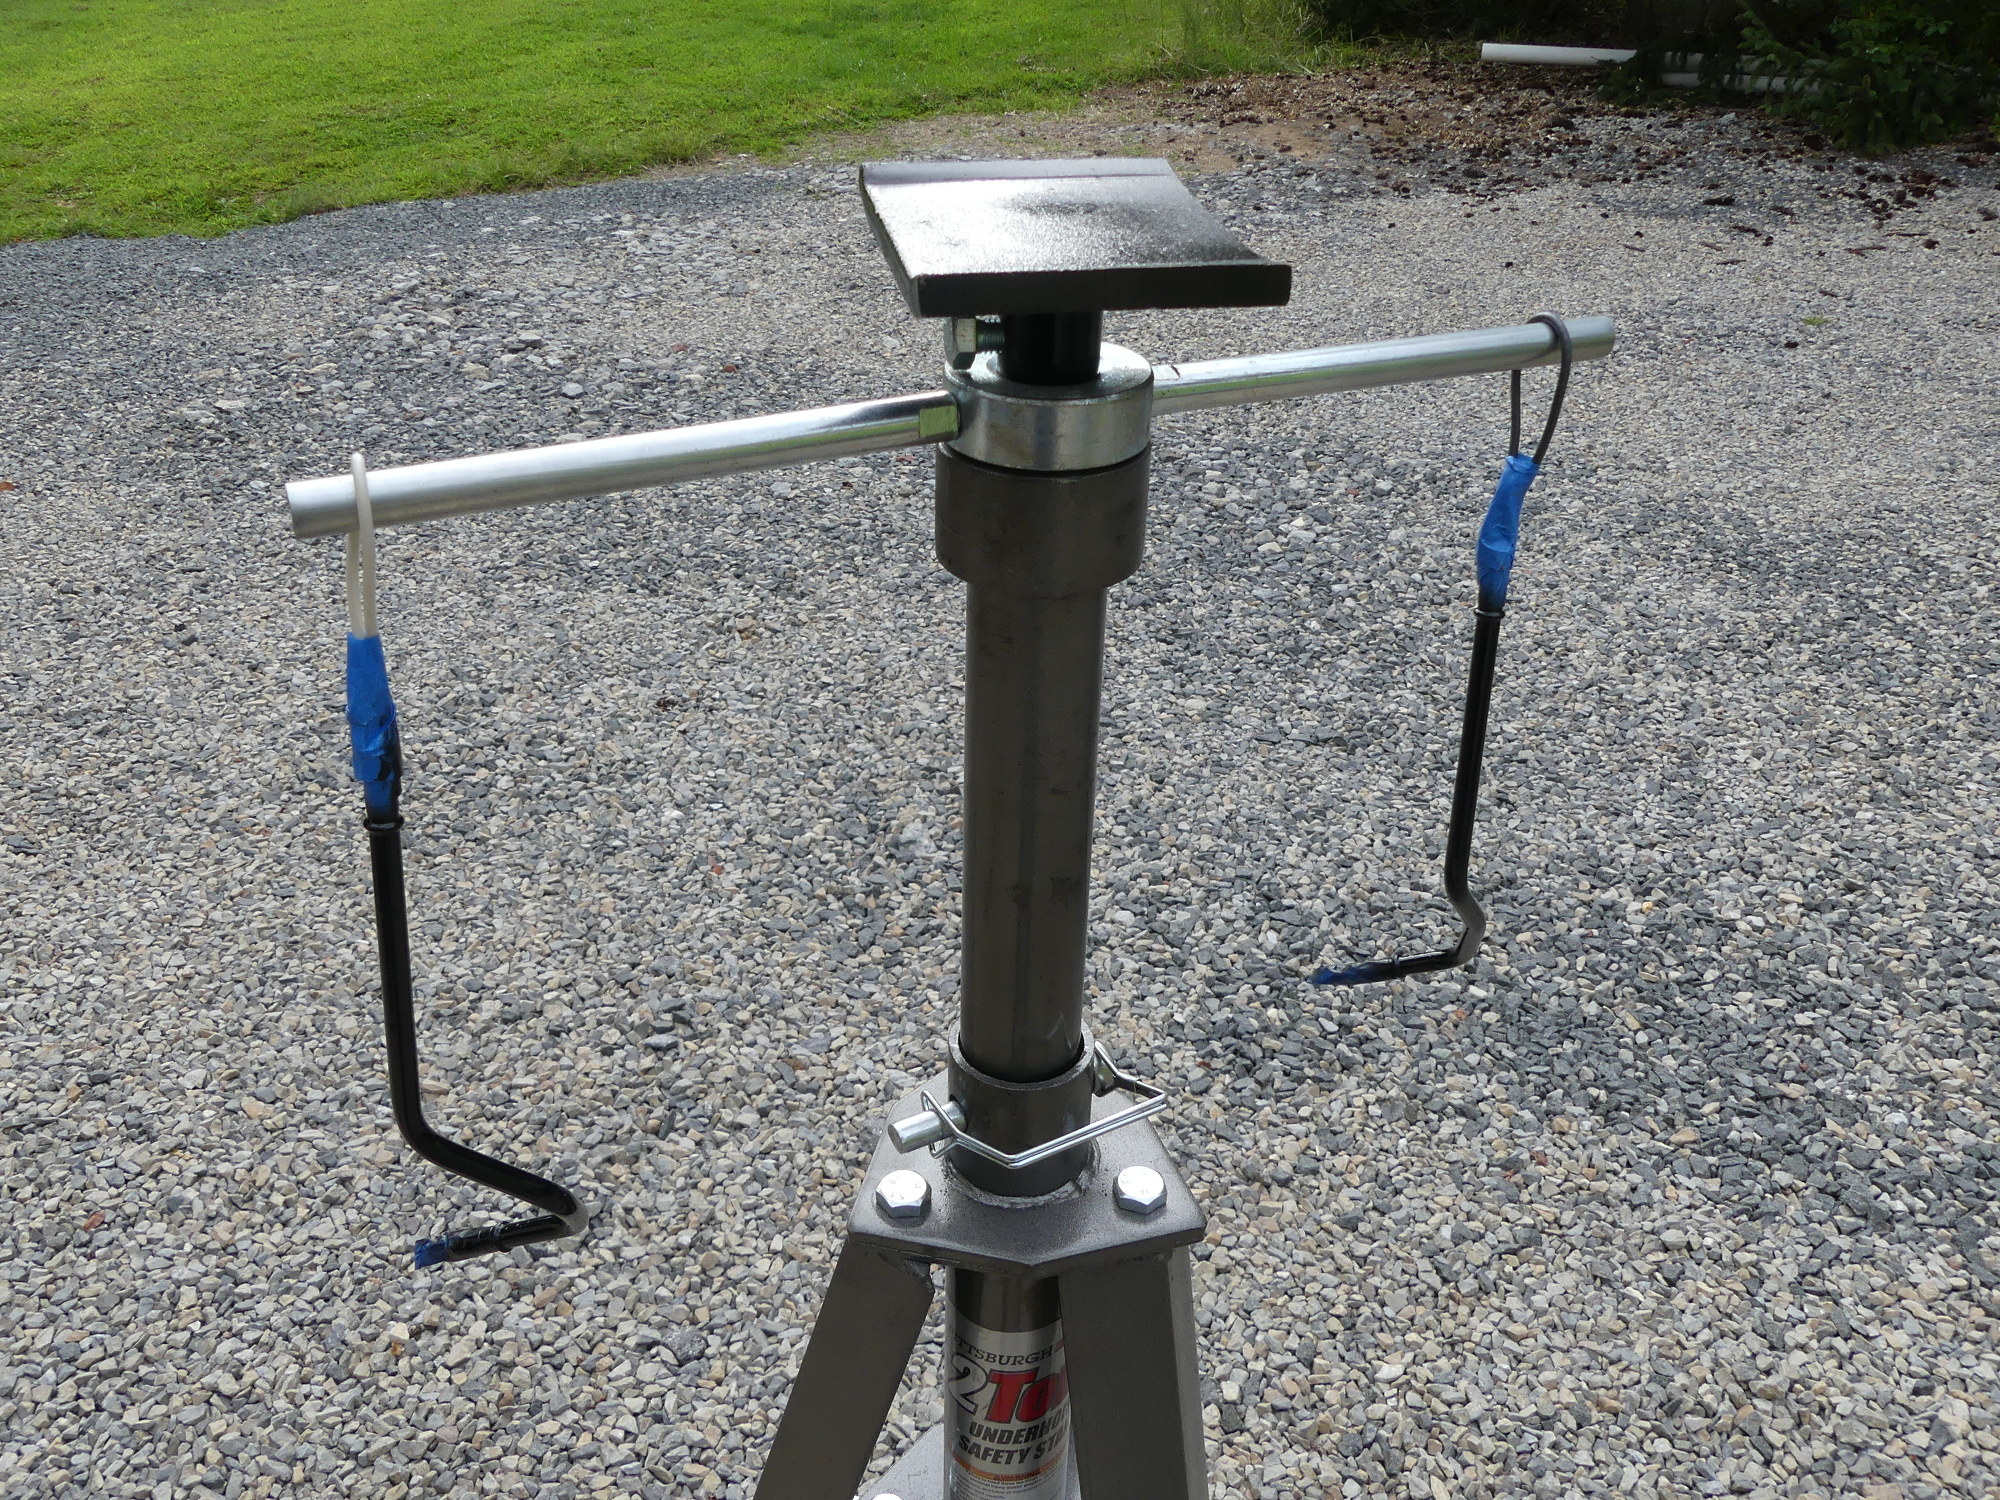 My brother's tall jack serves as a stand for my painting efforts, in this case of the forward feed and return fuel hardlines. Whatever protective coating BMW places on these lines from the factory does the job so painting was strictly optional. |
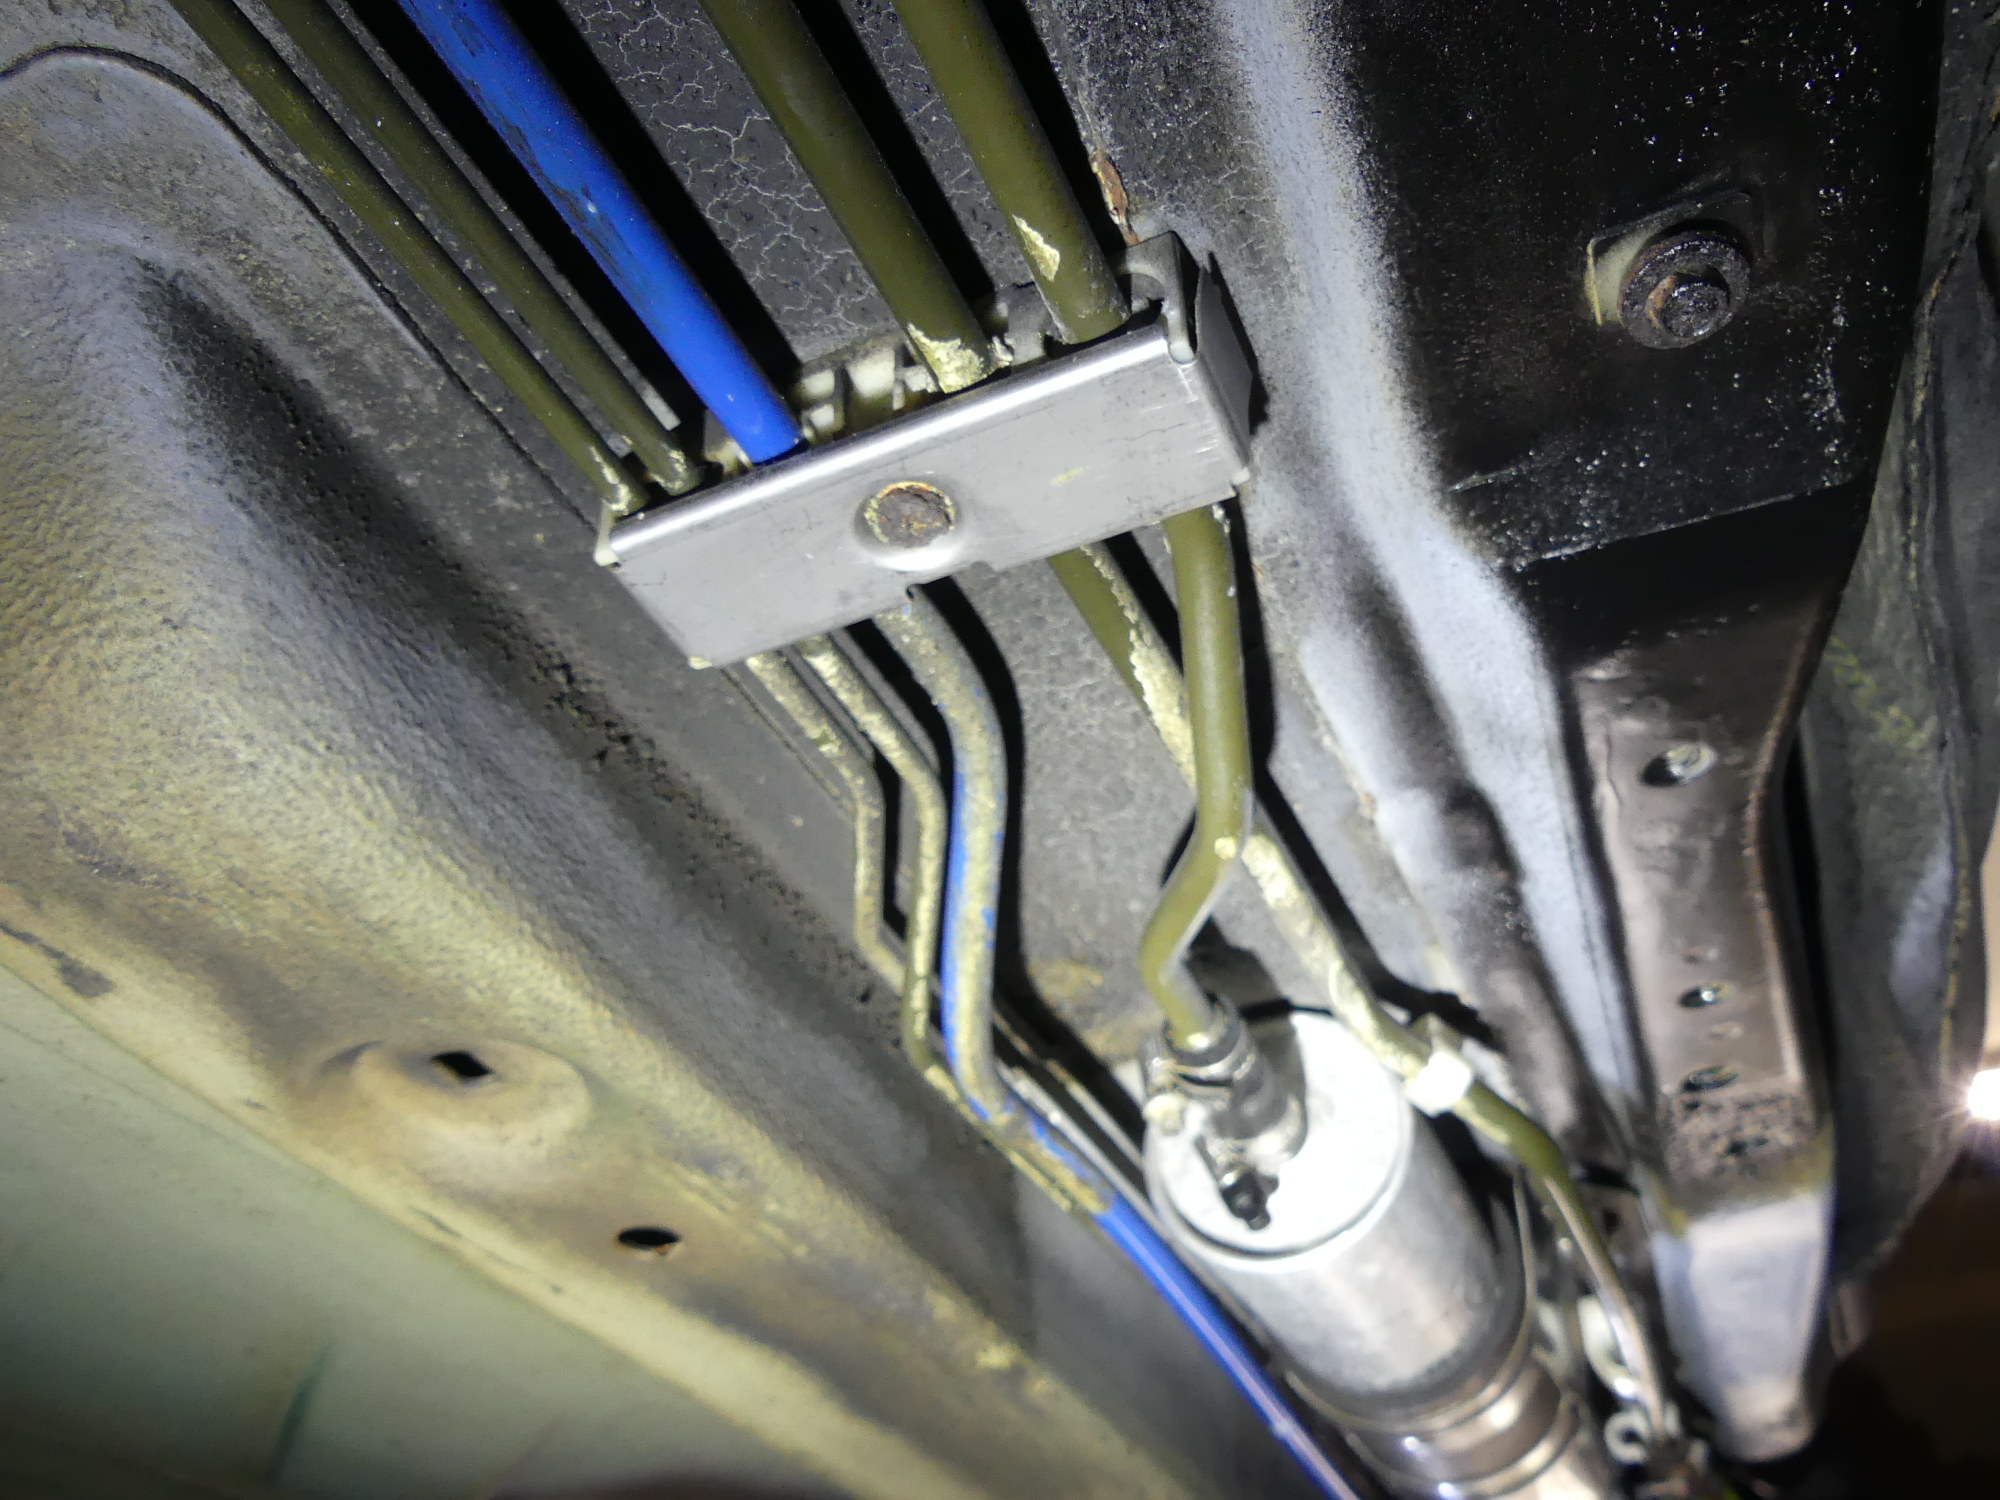 Just aft of the fuel filter is what BMW calls a "tubing support". This retains the fuel hard lines, blue plastic line that forms part of the emissions control system, and the two rear brake lines. The screw in the center of this one is seized. |
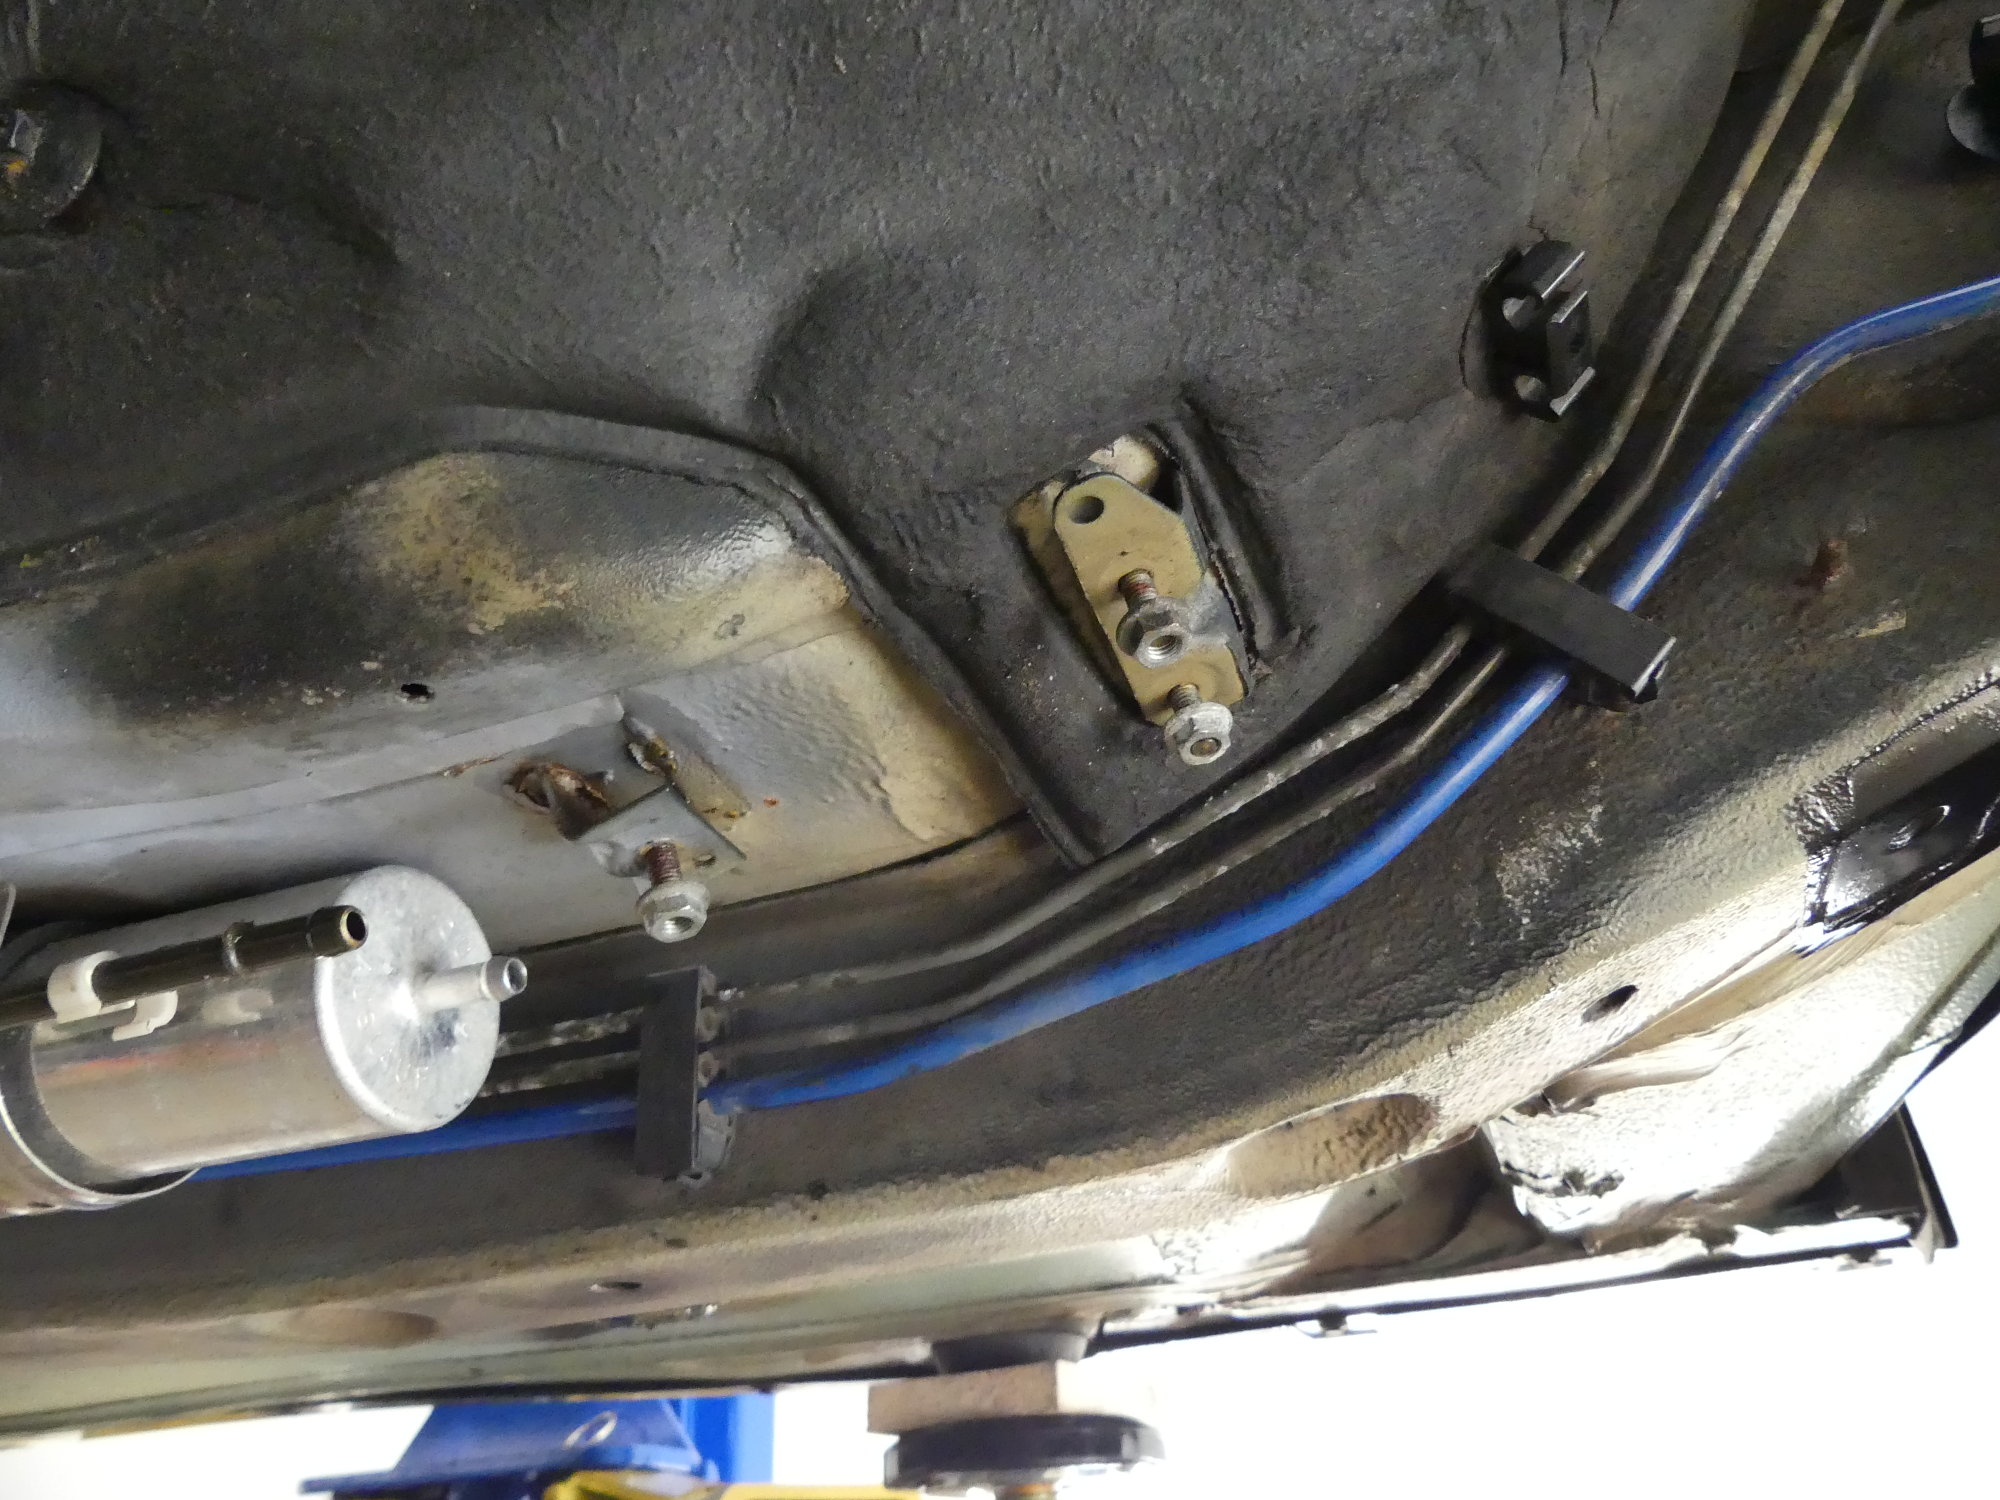 I removed the fuel regulator, which is normally mounted to the three studs shown, to clean it up and replace the associated fuel hoses, but also to facilitate replacement of the insulation blanket, which is held captive by the regulator. |
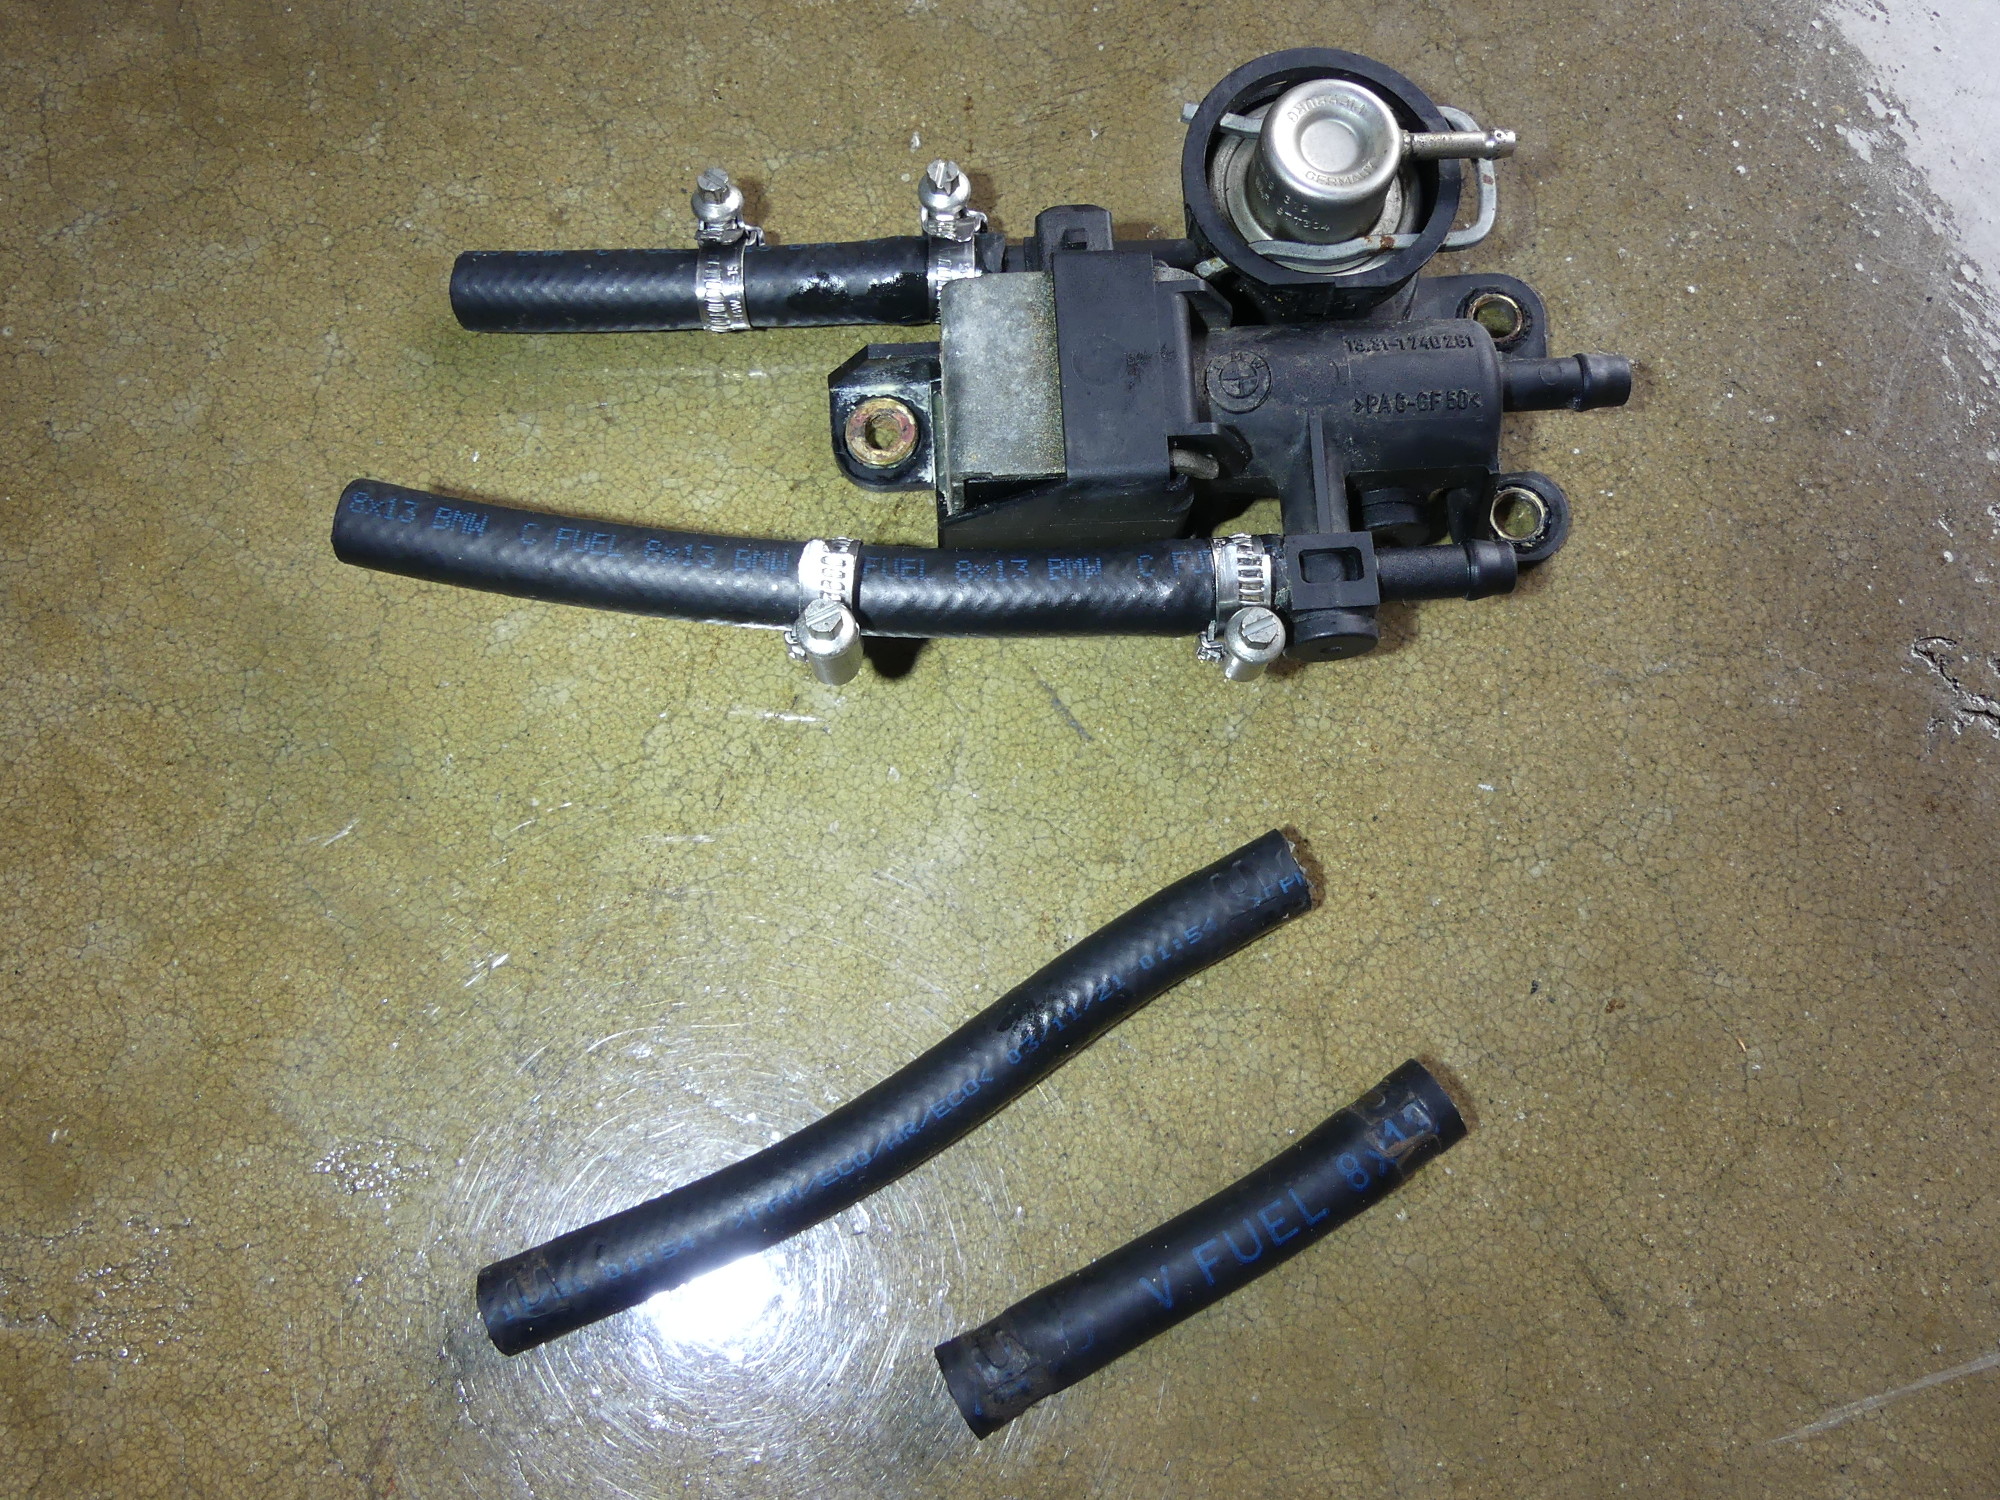 I would have normally chosen to replace the somewhat crusty fuel regulator assembly but it's not cheap and it can easily be replaced later if needed. Instead I cleaned it up and installed some new 8x13mm fuel hose segments with all new clamps. |
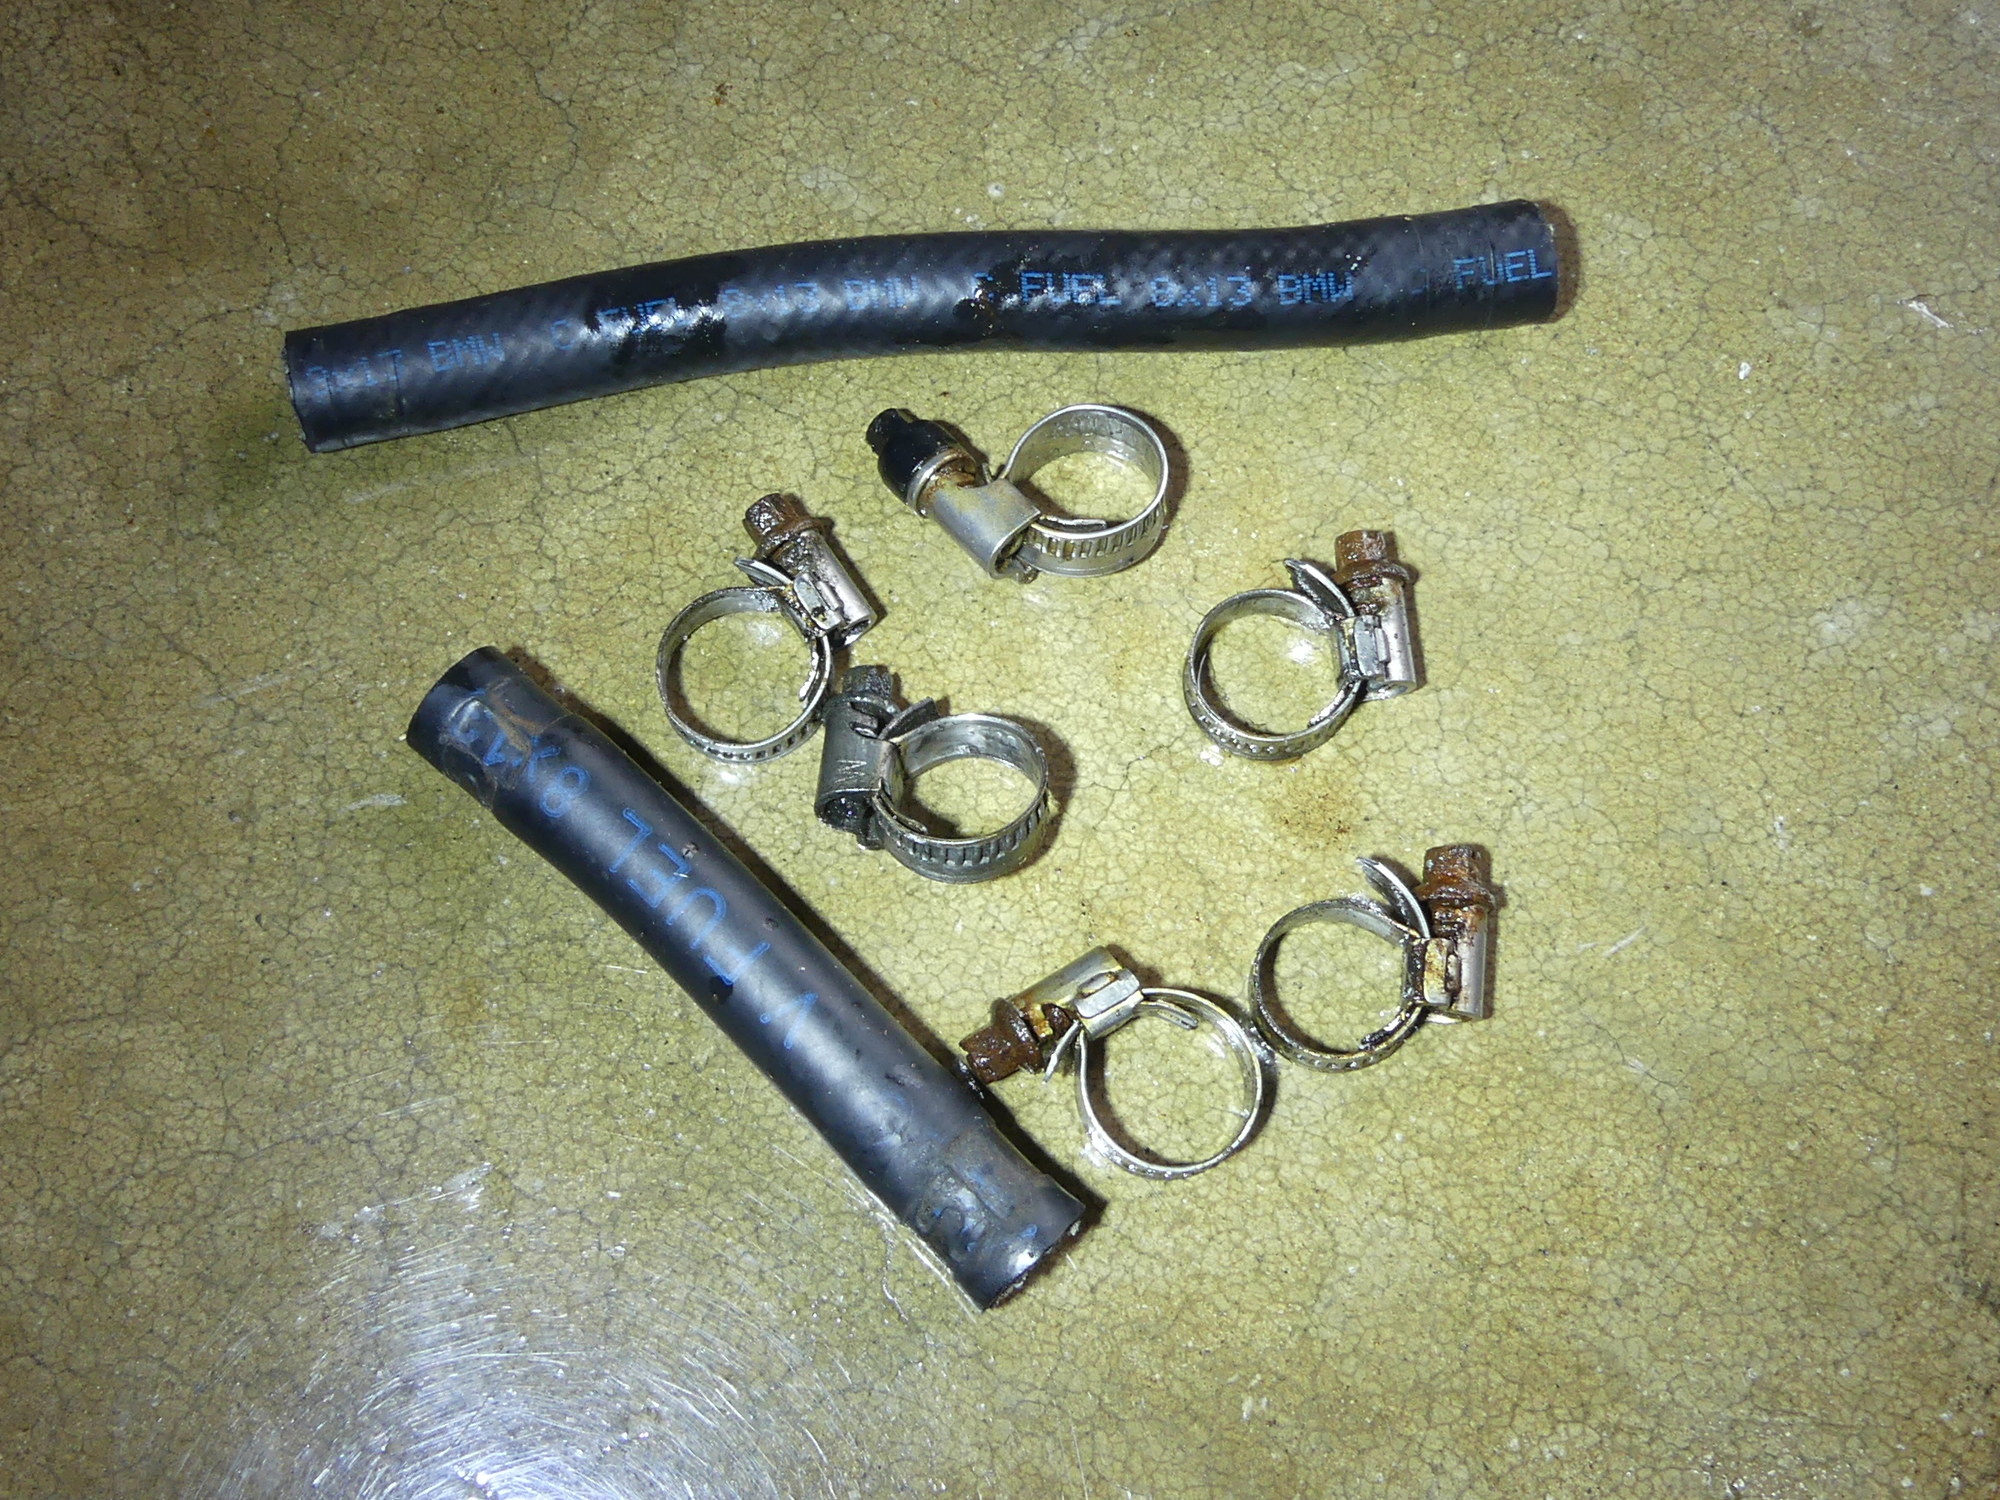 The clamps I've removed so far don't look bad, but the problem lies in the corrosion of the worm gear and the easily stripped tiny hex heads. The top hose is a few years old. The bottom hose was born in 1998. |
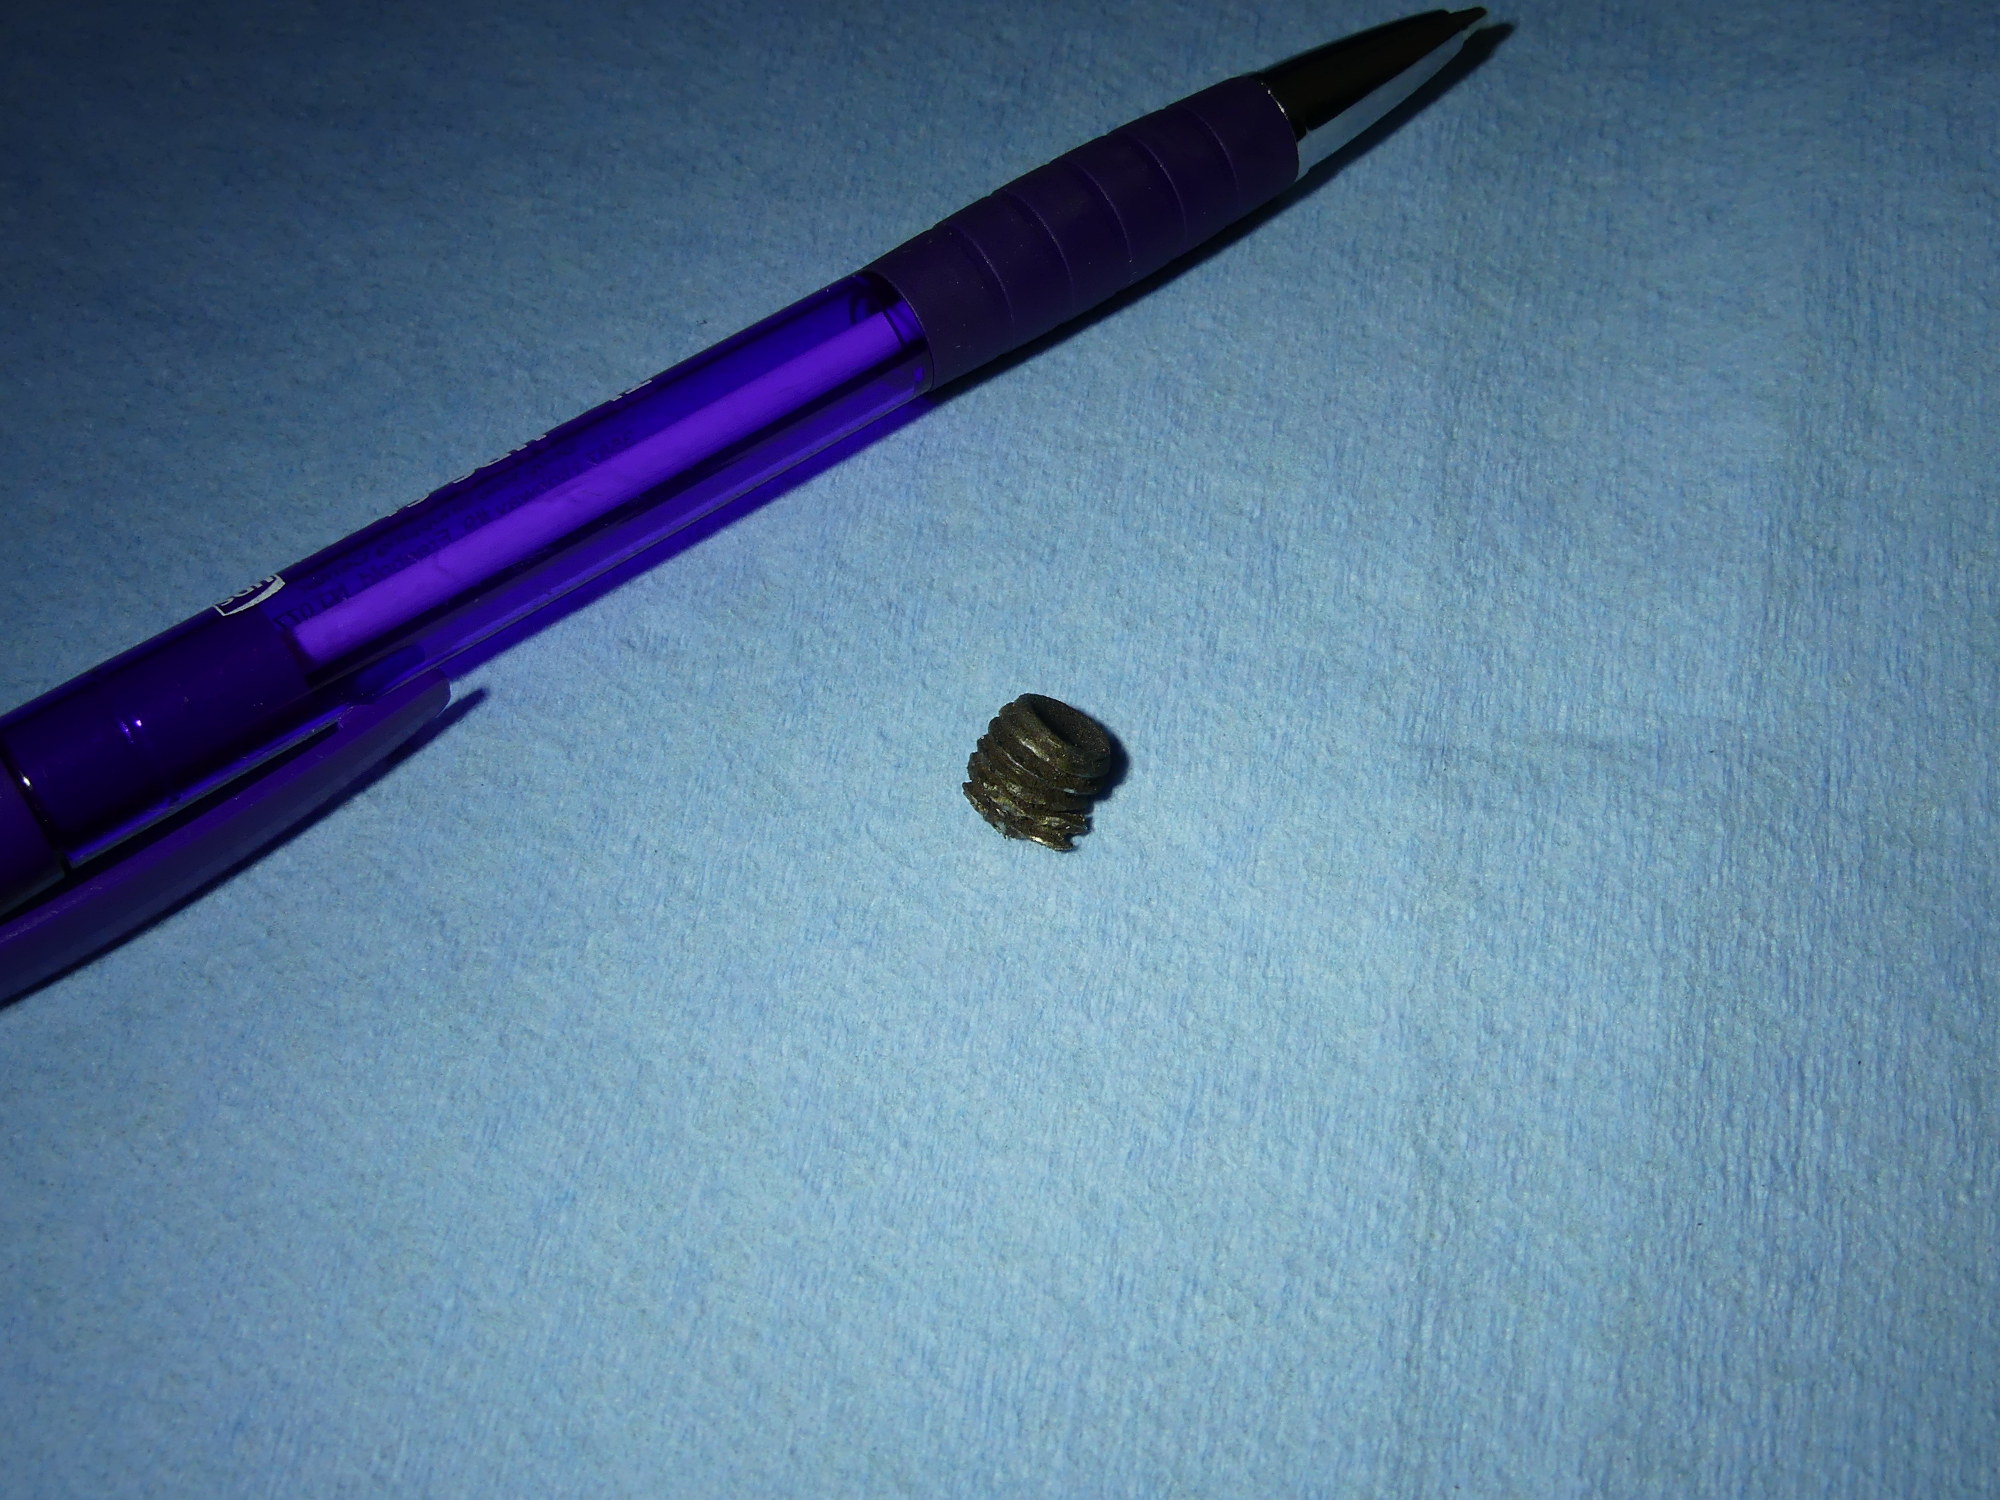 This stupid little remainder of a snapped bolt represents a solid 45 minutes of labor. Think about that the next time you give your old, rusted car to a technician for repair. Reminder: always soak rusted fasteners in PB blaster. |
I began the process to remove the hardlines and replace them with the parts I bought earlier and ran into a snag. I had applied PB blaster to the screws that retain the covers of the tubing support brackets several times over the last week in prep for this work. Of the three brackets, two of the screws came out as expected while the third (the one closest to the filter) failed to budge. I applied yet more PB blaster and moved to another project while I waited for the penetrating oil to do its thing.
Drilling Snapped M8 Bolt
I mentioned earlier that my tech snapped one of the four M8 bolts used to fasten the rear tunnel heat shield support. To fix this problem I knew I had to extract what remained of the bolt as the alternative solutions were far less palatable. So I stopped by Eppys and picked up a center punch along with a small set of easy-outs. The center punch worked well and I was able to start drilling at the approximate center of the bolt. After drilling the initial hole and tapping the easy-out into the hole I began to turn it counter clockwise. Unfortunately, not only did the easy-out not budge, after a couple more tries it snapped off in the hole. As anyone will tell you, this is the worst-case scenario, since it leaves behind a hardened steel (i.e. hard to drill) piece of metal exactly where you need to drill.
Never one to give up at the first sign of trouble I managed to drill around the piece of easy-out and then tapped it a few times in several directions with a screwdriver and a hammer. Once I saw it was loose I removed it with a pair of longnose pliers and breathed a sigh of relief. I then went back to drilling the bolt with ever-wider bits. By the time I got to 7mm I sensed that what remained of the bolt had started to rotate and using a variety of tools I managed to extract what was left of the bolt. That's the good news. The bad news is I trashed the threads on one side of the hole in the process. Despite this, I still managed to insert one of the original bolts into what was left of the threads and found that the bolt held tightly enough. When combined with its mate on that side I think it will do the job. The correct fix for this is, of course, welding in a stud, but I don't think it's strictly necessary.
By the time I wrapped this up I was ready to head for home, so that's what I did.
Next Up
I want to tear apart the seized tubing support as required to replace the hard lines, but I'm not inclined to do that until I have replacement supports in hand. I could, of course, begin the insulation blanket installation but that requires the master cylinder that has yet to arrive because I can't leave my brake system open for days on end. The only thing I have left to do that I can actually complete with parts on hand is installation of the M5 nutsert required to replace the failed fuel filter cover mounting stud. So after I wrap that up I'm done with the chassis until the required parts arrive.