


Tuesday, September 5, 2017
New Tunnel Insulation Ordered
After mulling things over this weekend I decided to reorder the insulation blanket in an attempt to get an undamaged part. The blanket has to come from Germany so that means a 7-10 day delay but it's really not a big deal. As it turns out my technician is on vacation until the middle of the month and I'm also expecting the engine parts back late this week, which should allow me to build the engine next week. If all goes as planned, my tech should be back from vacation and I'll have the engine wrapped up around the time the blanket arrives. This will allow me to put the car back onto the lift for the insulation and brake work and then a few days later roll everything out of the garage for the trip back to my technician for the drivetrain installation.
Fuel System Refit Decision
I looked more carefully at the design of the E36 fuel system over the last few days and confirmed that to replace the hoses I feel should be replaced, the tank will have to be dropped. I've concluded that is far too much work and risk for me at this point so I have decided to have my technician do the remaining fuel system rework.
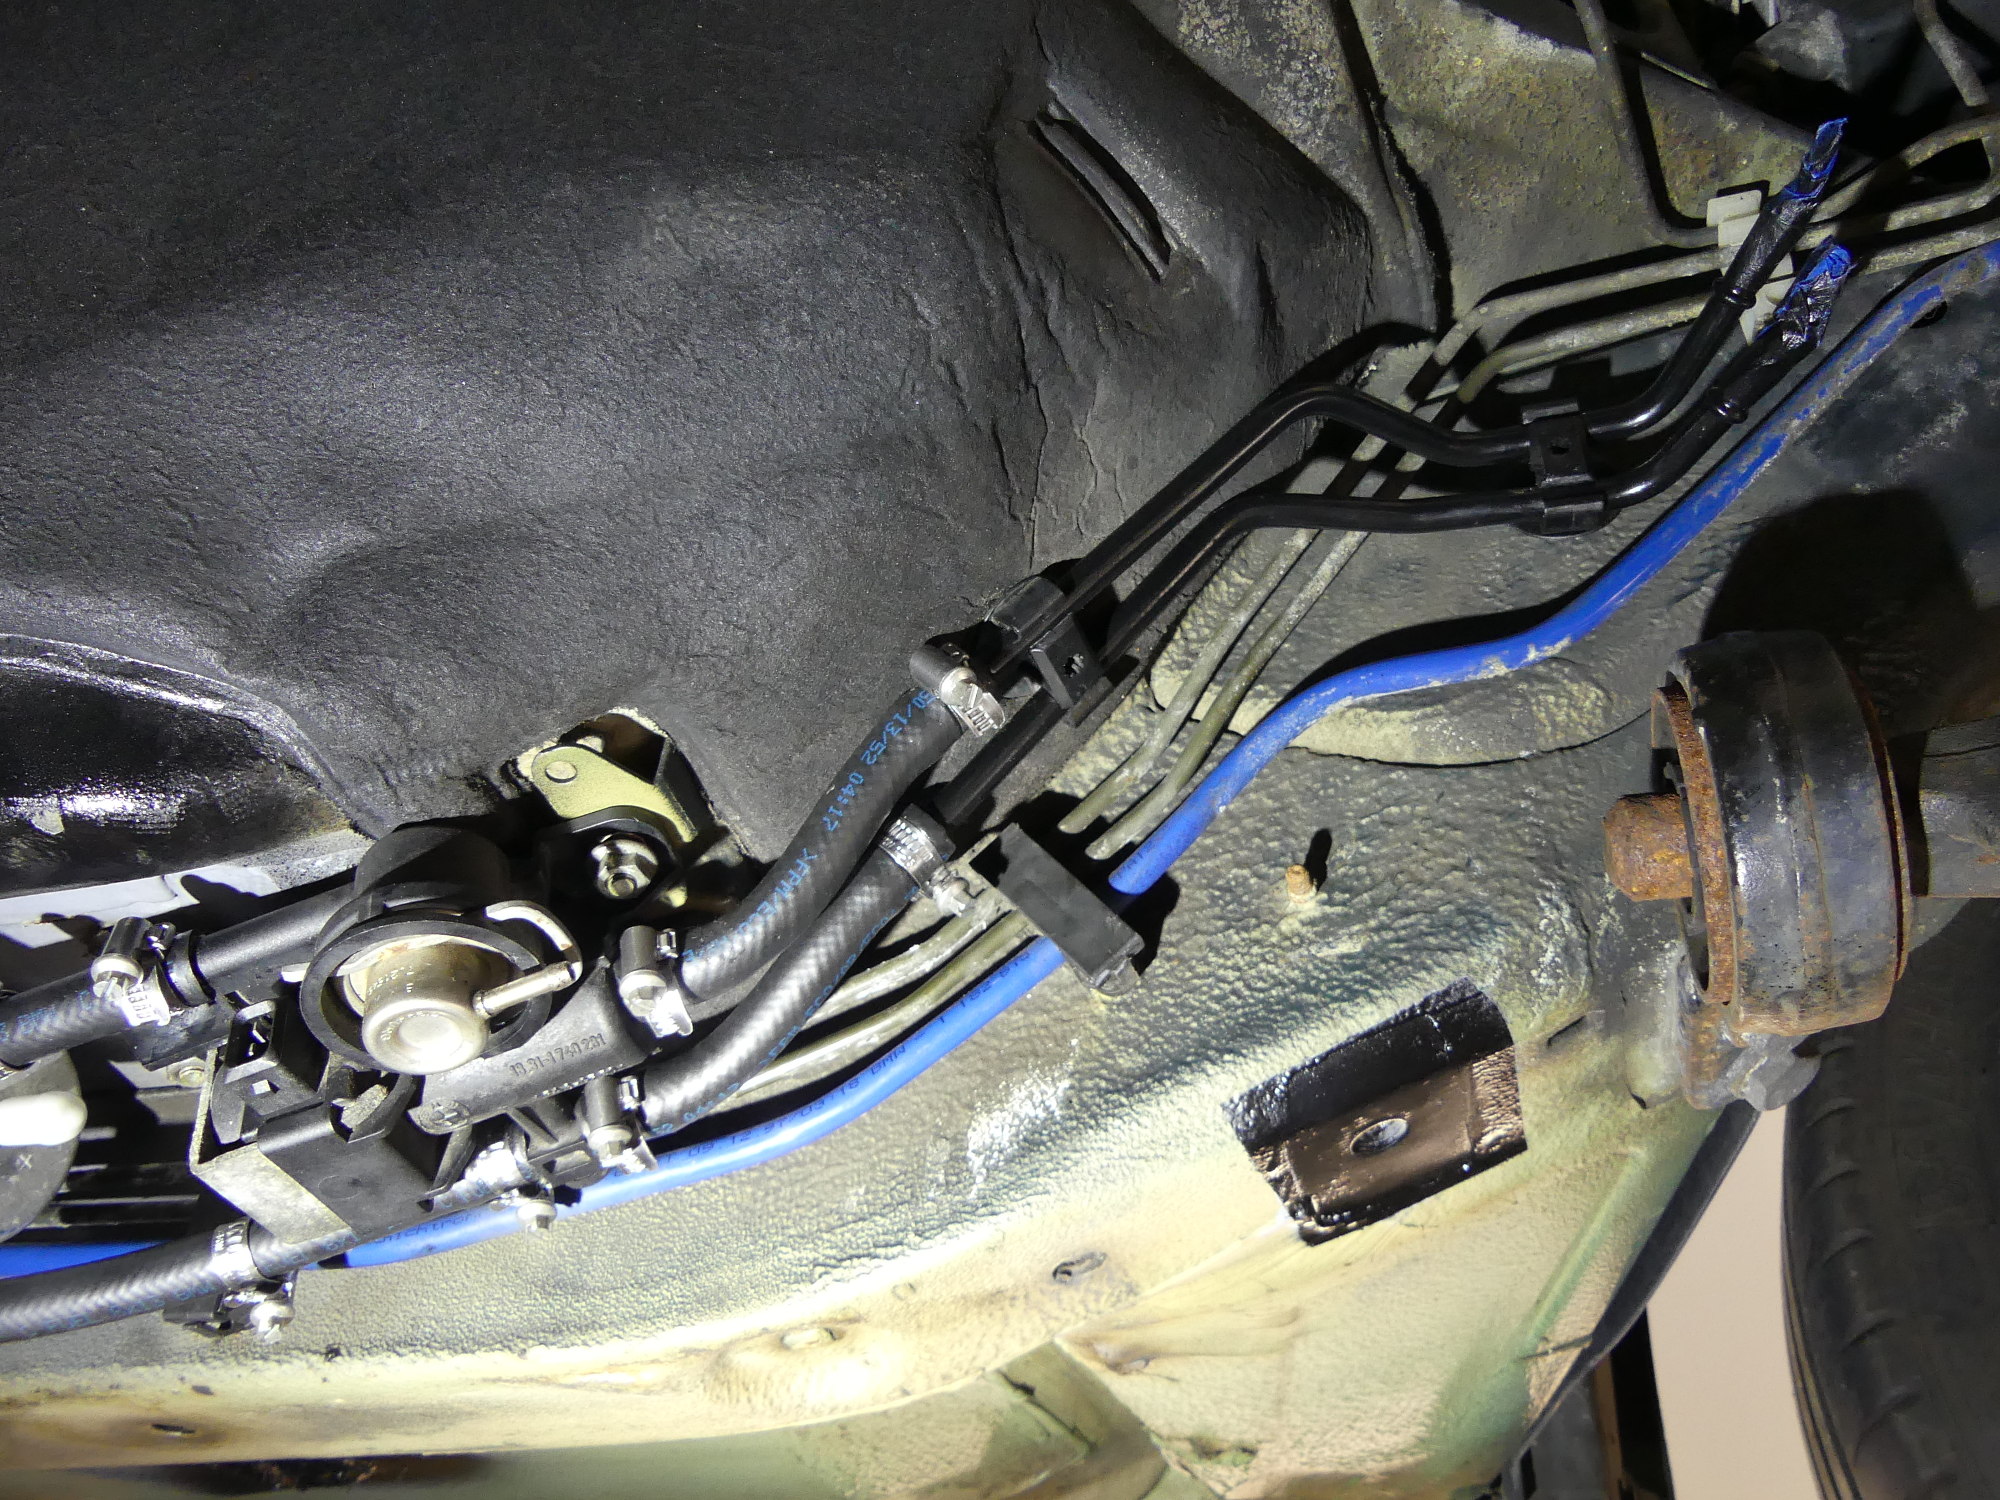
In prep for replacing the other fuel hard lines I have ordered new tubing supports. Oddly, the cover plates for these are made of a nice stainless steel, but the screws used to fasten them rusted solid. I hope BMW has learned a few things in the 20 years since the original parts were manufactured and the new ones come with stainless screws. If not I may replace them if possible.
Fuel Filter Cover M5 Nutsert Installation
To confirm the correct drilling location I grabbed the fuel filter cover and held it in place as I marked the center of the hole. I then used a center punch to locate the drill point. I began with a 3mm drill bit and then stepped up to 6mm and finally 7.6mm. I then grabbed one of the nutserts and pushed it up into the hole to see if it would clear the floorboard above it. It seemed close enough so I attempted to install it. As I pulled the handles of the tool I detected the usual level of resistance and thought the installation went as expected...right up until the tool dropped out of the car with the nutsert still installed on the tool.
 For a bit of added corrosion protection I decided to wash the nutsert in solvent and then spray it with a bit of VHT primer before installing it. |
 The first installation failed because I didn't have enough vertical clearance for the nutsert but I quickly remedied that and installed the nutsert. I later primed and finish coated this area as well. |
 A temporary fitting of the fuel regulator, new hoses and refinished forward hard lines. This will be reinstalled after the insulation blanket is replaced. |
This occurred because the nutserts are designed to "fold" over within a limited distance of the flange and the floorboard had obviously prevented the nutsert from being flush with the base metal. I grabbed another nutsert and pushed it into the hole. Sure enough the flange on the nutsert was not flush with the surface of the hole as required. The gap was only 1mm or so but that was apparently enough to cause an installation failure.
To fix this I grabbed a nail set with a wide head, inserted it into the hole and used a hammer to push the floorboard up just a bit. Rest assured, I didn't just hammer in one location -- I slid the nail set around the edge of the hole and tapped lightly in each location. This pushed the entire area up just enough to allow the nutsert flange to be flush with the bottom face of the body and this did the trick. The next nutsert installed successfully. I plan to use a short (< 10mm) stainless screw and washer here to help secure the cover.
Fuel Regulator Assembly and Related Hoses
I previously removed the fuel regulator, replaced the hoses and painted the short hardlines that connect to the flexible fuel rail hoses. To ensure that everything would fit correctly together I assembled the regulator, hoses and hard lines and temporarily mounted them to the car. I tweaked the locations of the various clamps, tightened them accordingly, and then removed the assembly from the car. It will be reinstalled once the new insulation blanket is installed in a couple weeks.
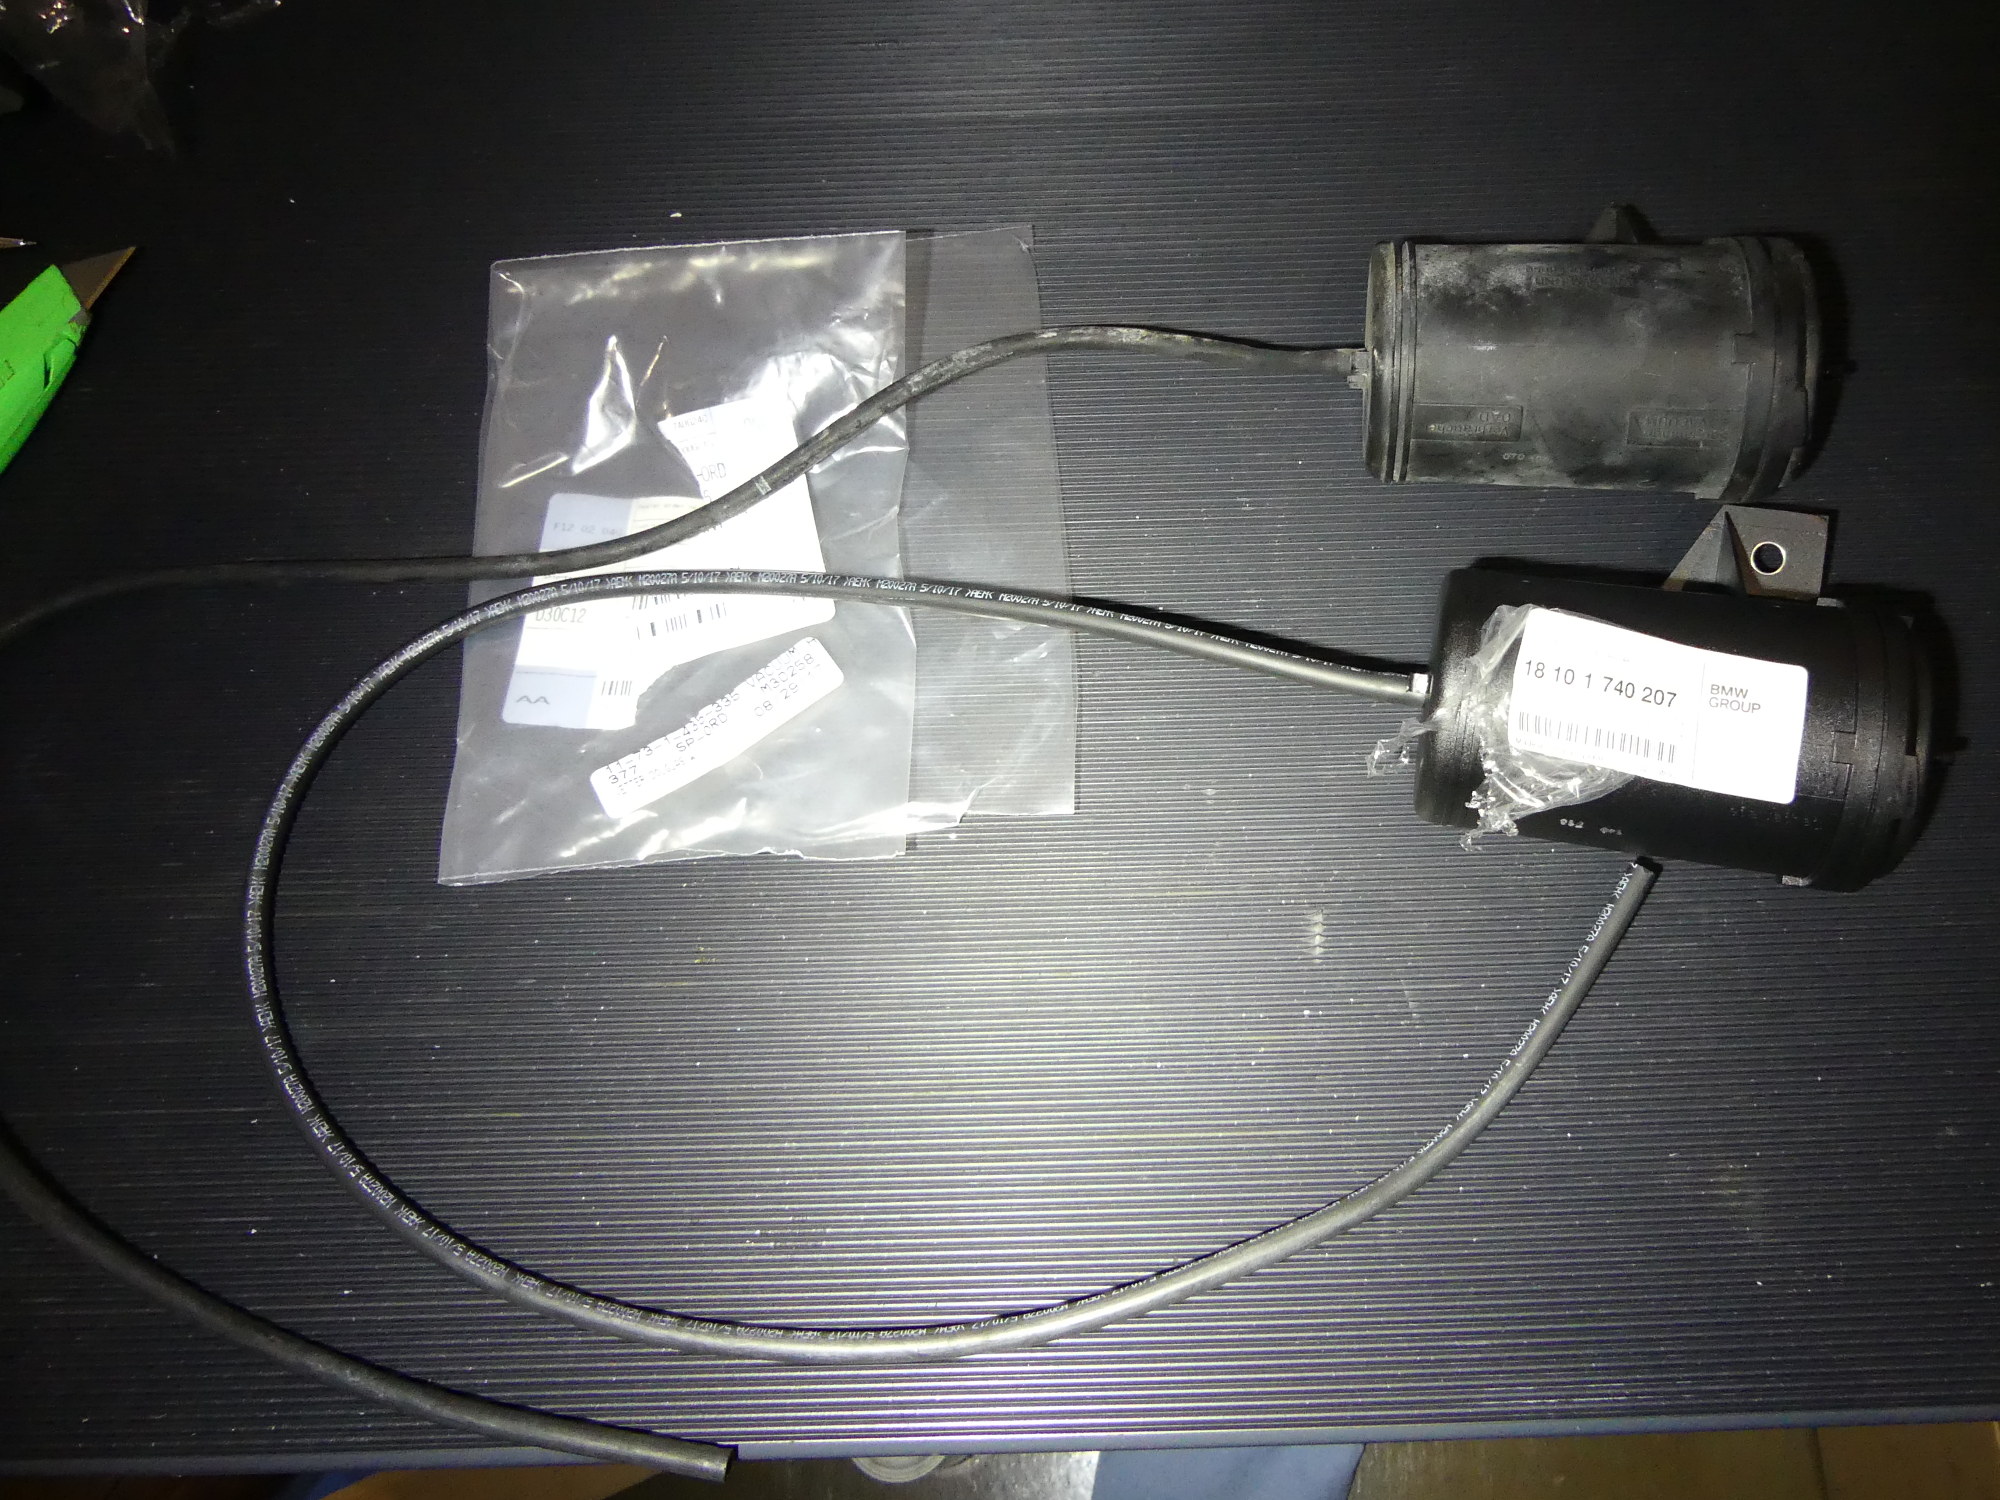 Another new vs old comparison. My technician removed the vacuum cannister and hose as shown so I duplicated it with new parts. My technician will install this assembly after the engine is back in the car. |
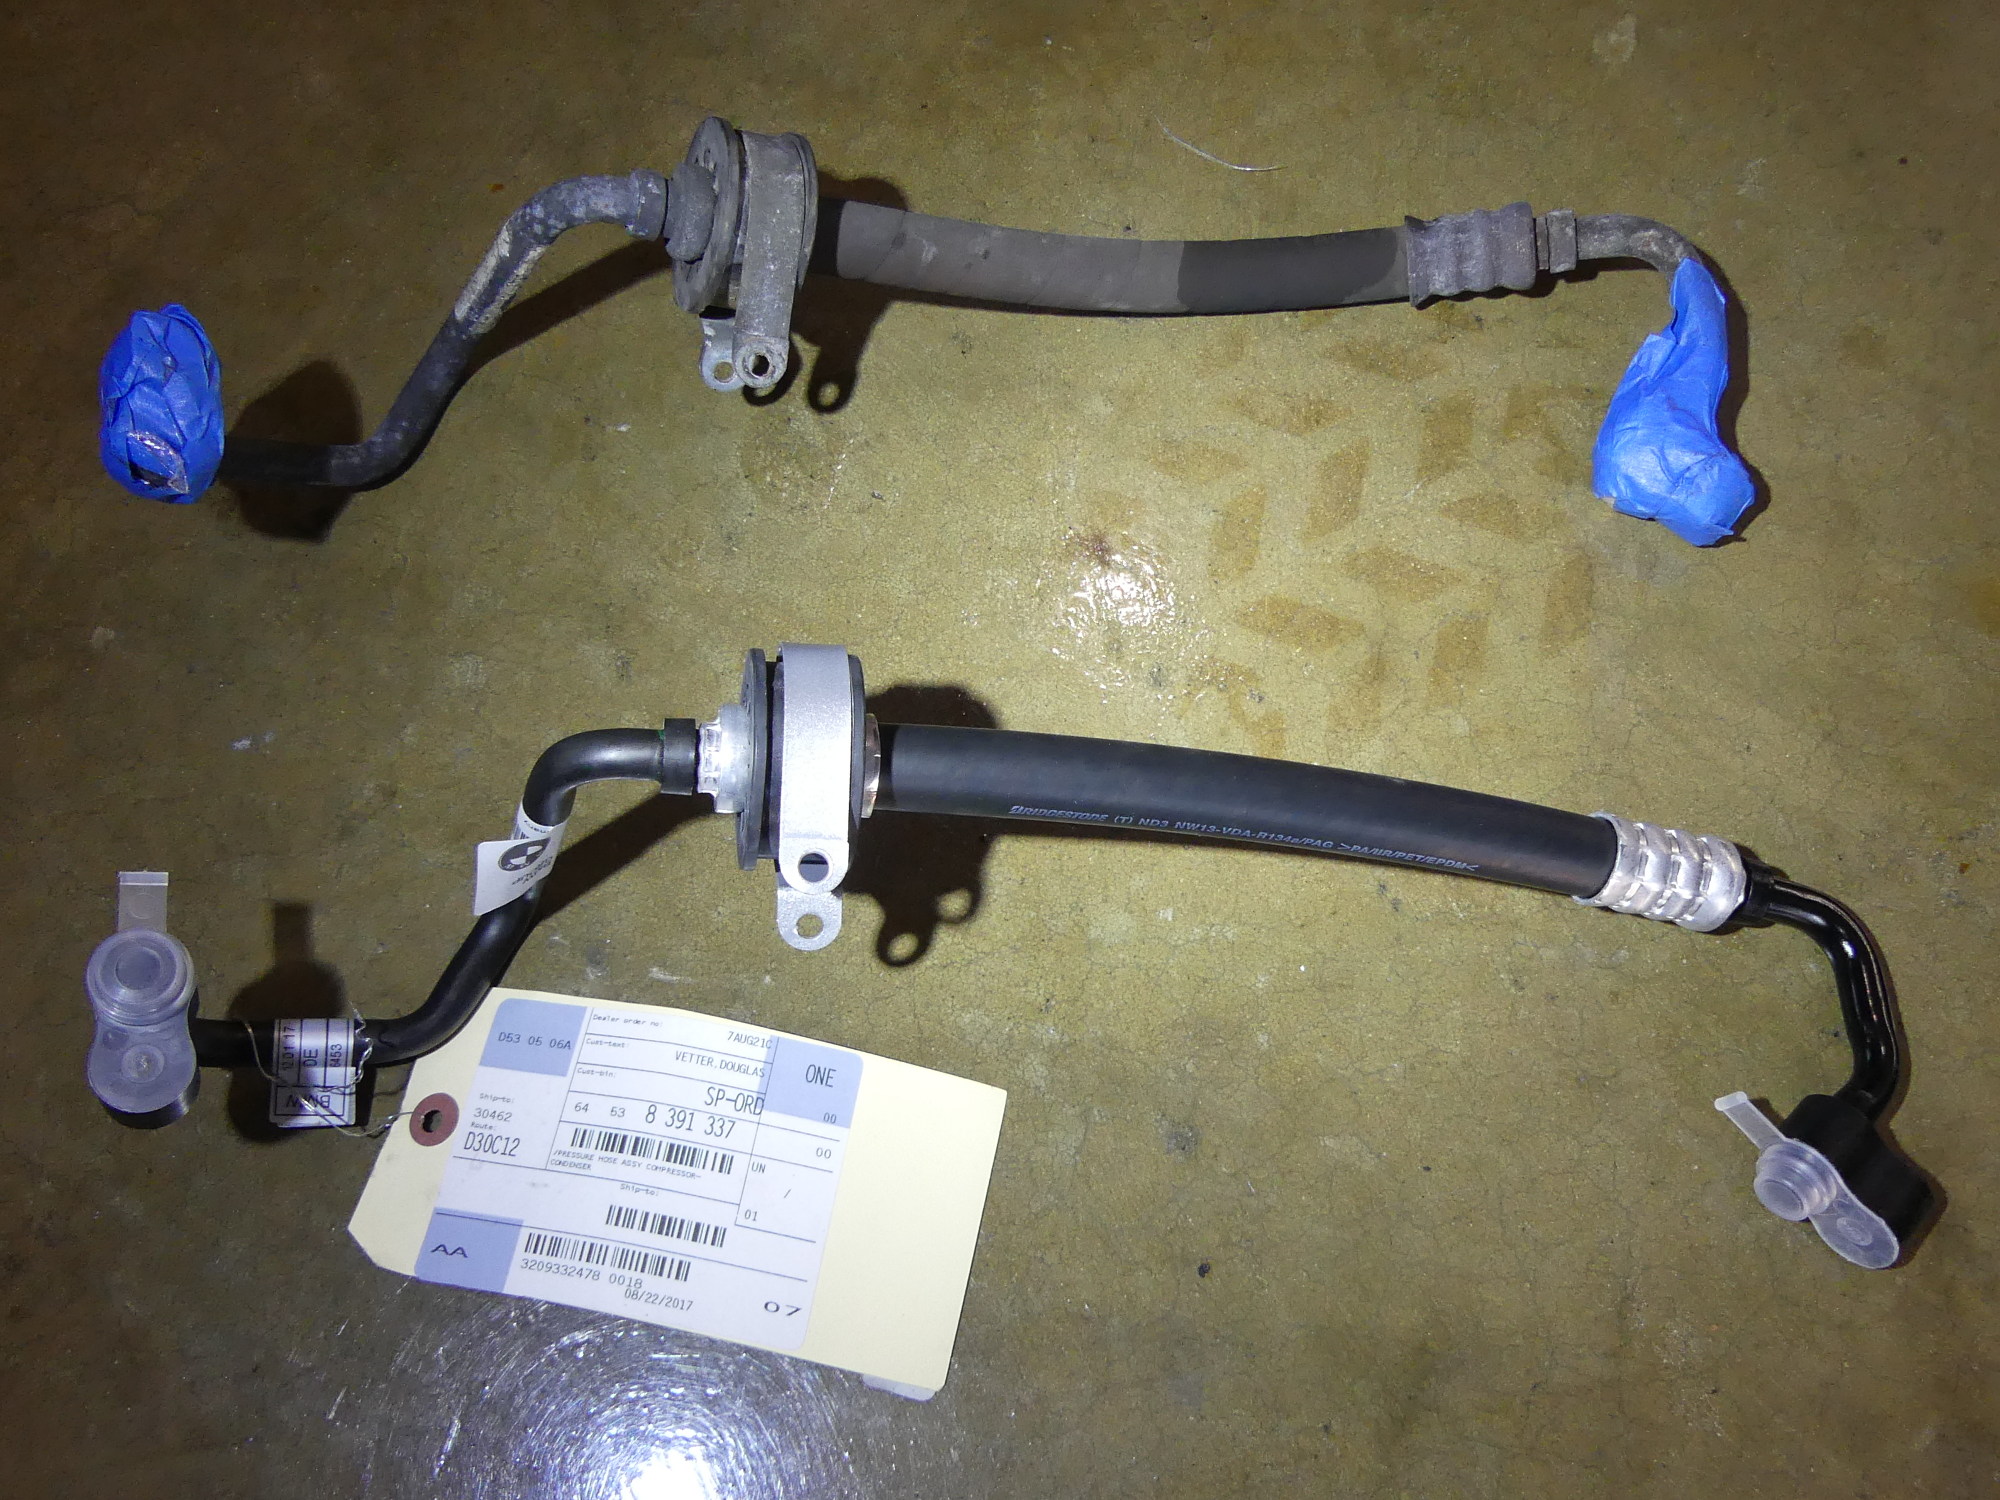 This refrigerant hose connects the compressor to the condenser. I found no aftermarket alternatives so I bought the BMW unit at a good discount. I also bought a new strap for a couple bucks and primed / painted it to prevent rust or other corrosion. |
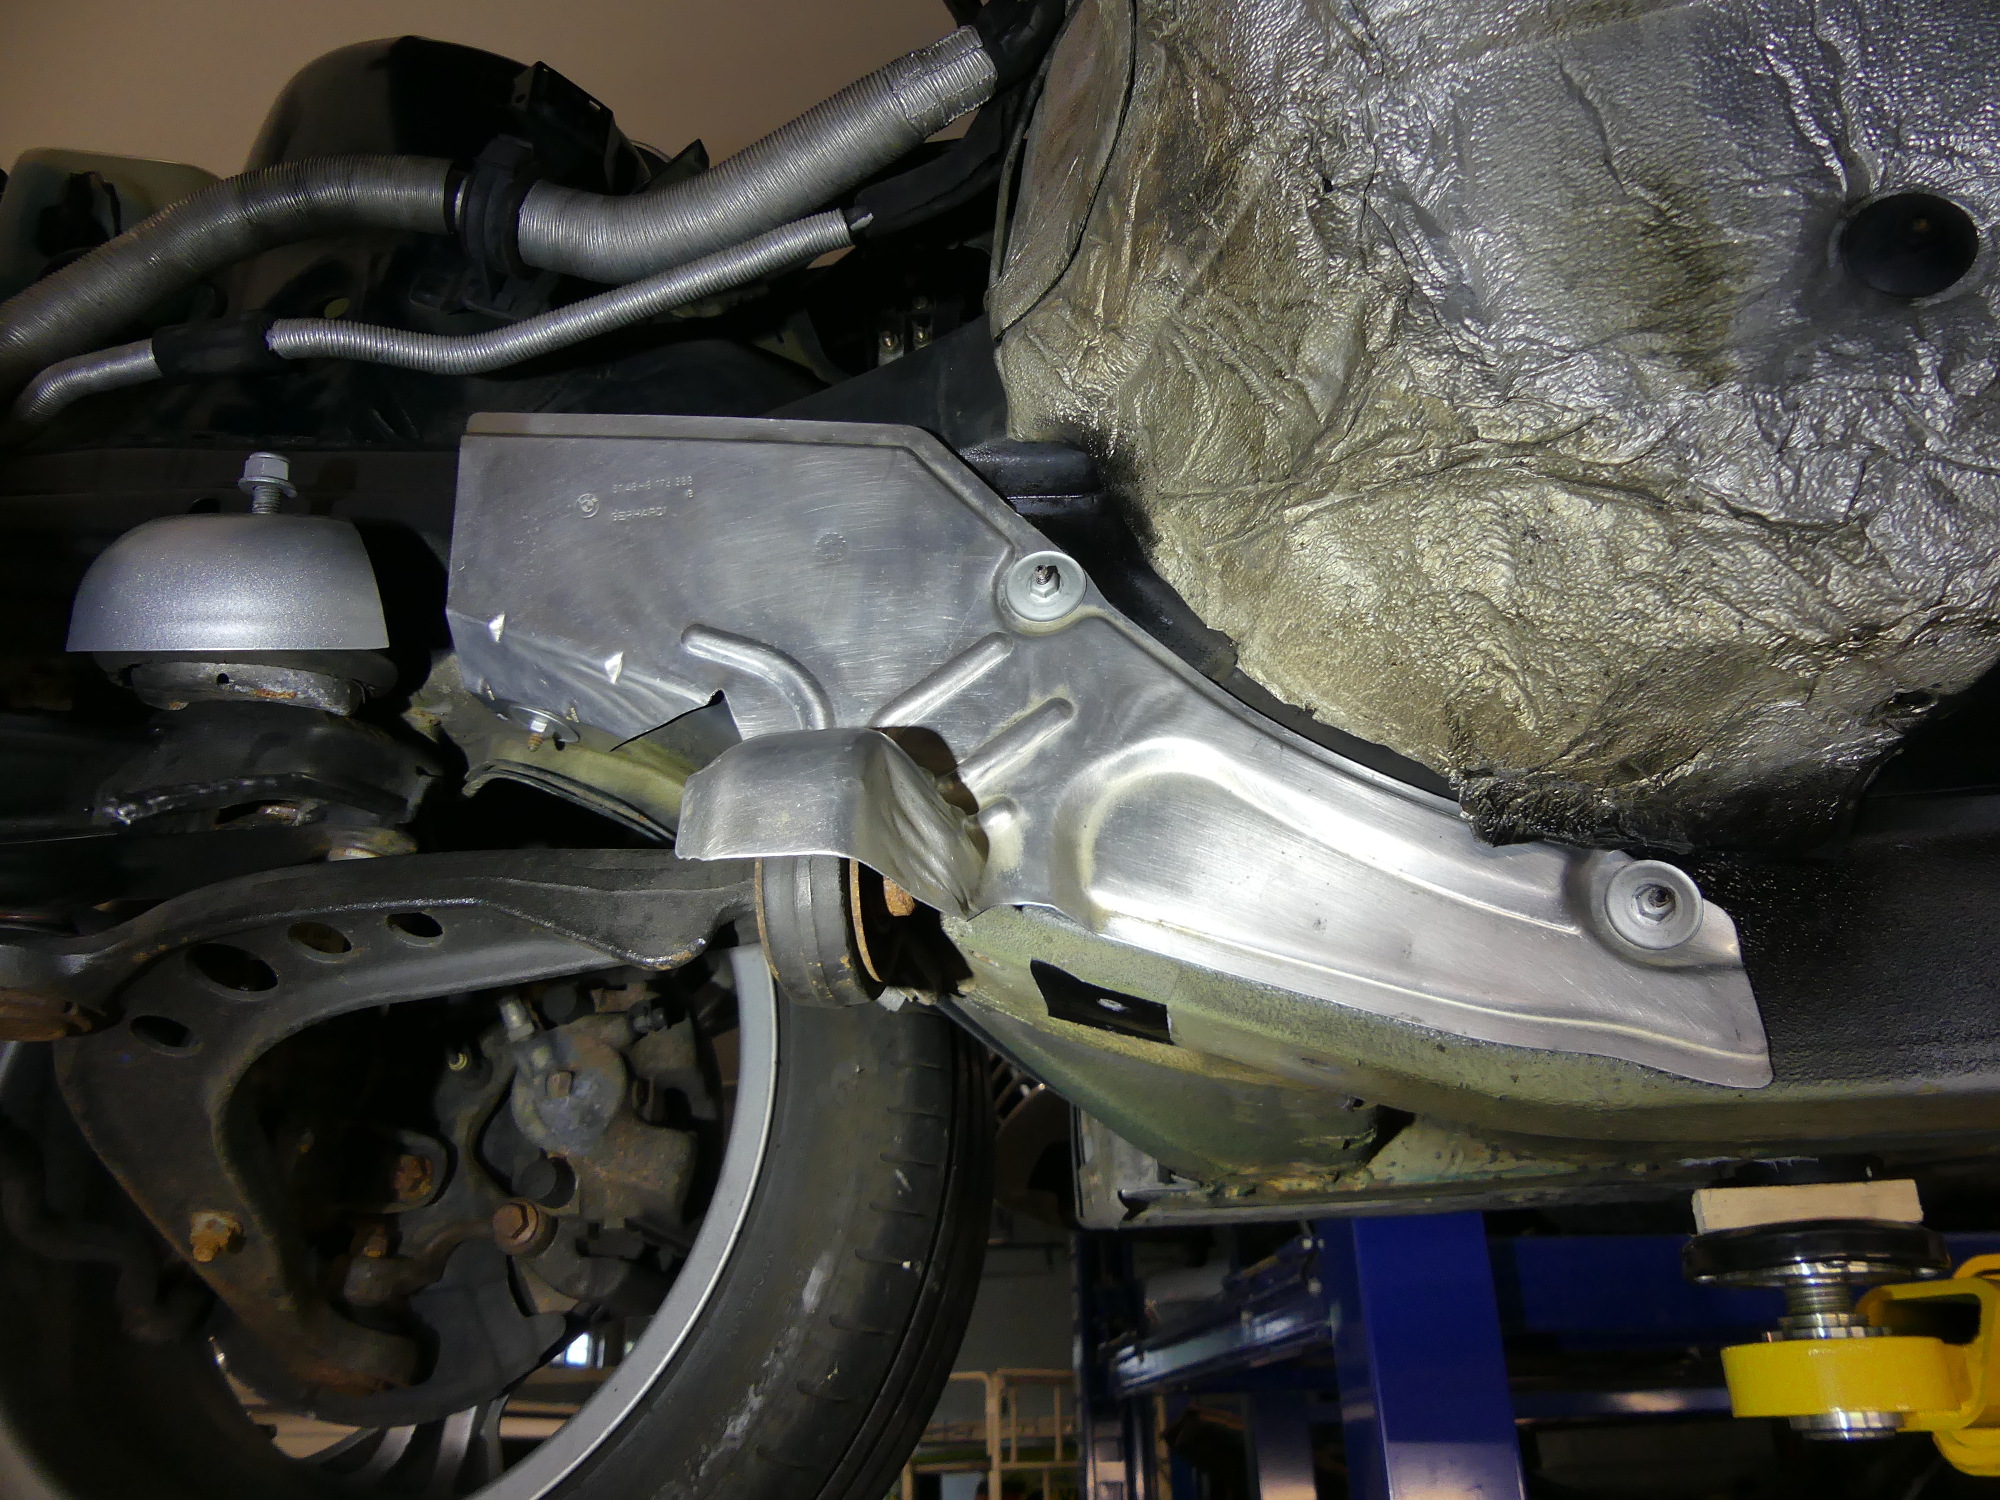 The right side frame rail heat shield has been reinstalled with fasteners slightly different than the original, simply because I could not locate the original type. These new fasteners are zinc plated and I know from experience won't hold up but they're better than the originals. |
While installing the nuts on the studs used to mount the fuel regulator I found that two of the nuts had damaged threads, most likely due to corrosion. How did I know the nuts were damaged vs. the studs? I found the one good nut threaded onto all of the studs smoothly. I decided at this point to order three new nuts, which are now Zinc-Nickel plated (shown in ETK / realoem.com as "ZNNI" in the part description).
Frame Rail Heat Shield Reinstalled
One of the first pieces I removed from the chassis several weeks ago was the heat shield that protects the right side frame rail and right side control arm bushing from the radiant heat emitted by the exhaust headers. I never could find the small nuts that are designed to mate with the studs and neither could my parts rep, but I did find a larger equivalent in the ETK and I had several extras in stock so I just used those to fasten it to the body...after using a wire brush to clean up the studs and some primer and paint to protect them, of course.
Cleaning and Inspection of Valve Cover
In prep for the engine build I decided to clean the valve cover. This proved more difficult than expected, as I found a stubborn dried oil film bonded with the cover. I used the spray wand once again to apply a stream of mineral spirits, let it soak for a while, and then repeated the process. I paid particular attention to the venting system that sends oil vapor to the CCV for air/oil separation purposes. Even after several cleanings I'm not 100% satisfied with the look, but based on what came out of the venting system I think it's safe to say it's cleaner than it was.
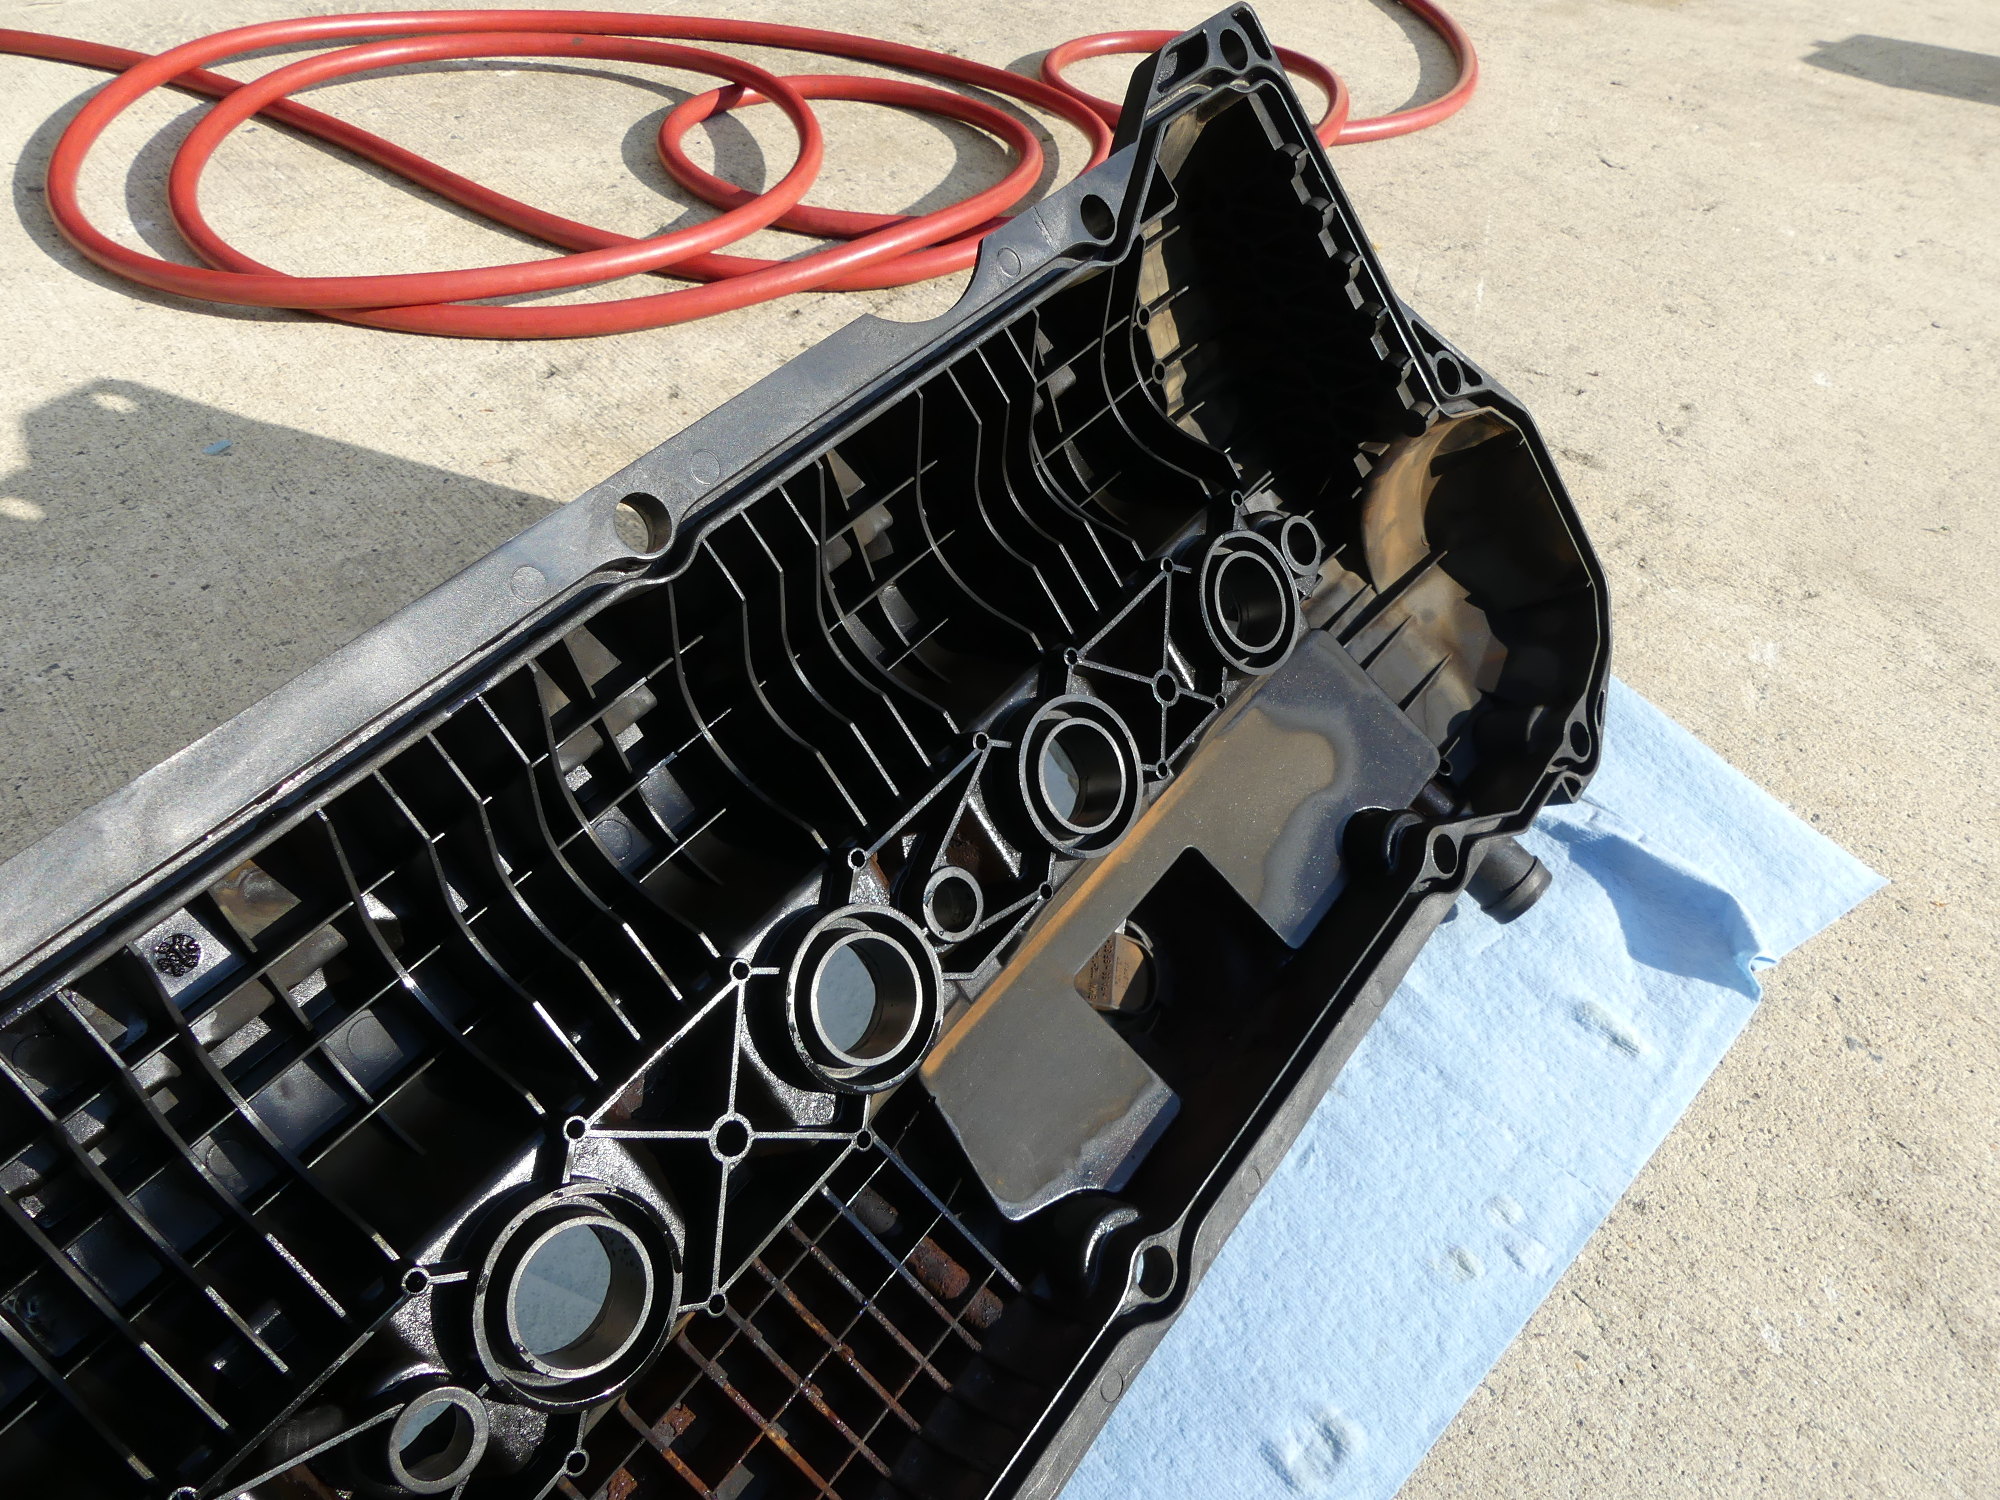 The valve cover cleaned up nicely after a few rinses with mineral spirits, but there is still a bit of stubborn residue on the interior of the cover as well as, I imagine, inside the venting system. It's far better than it was, however, so I'm happy. |
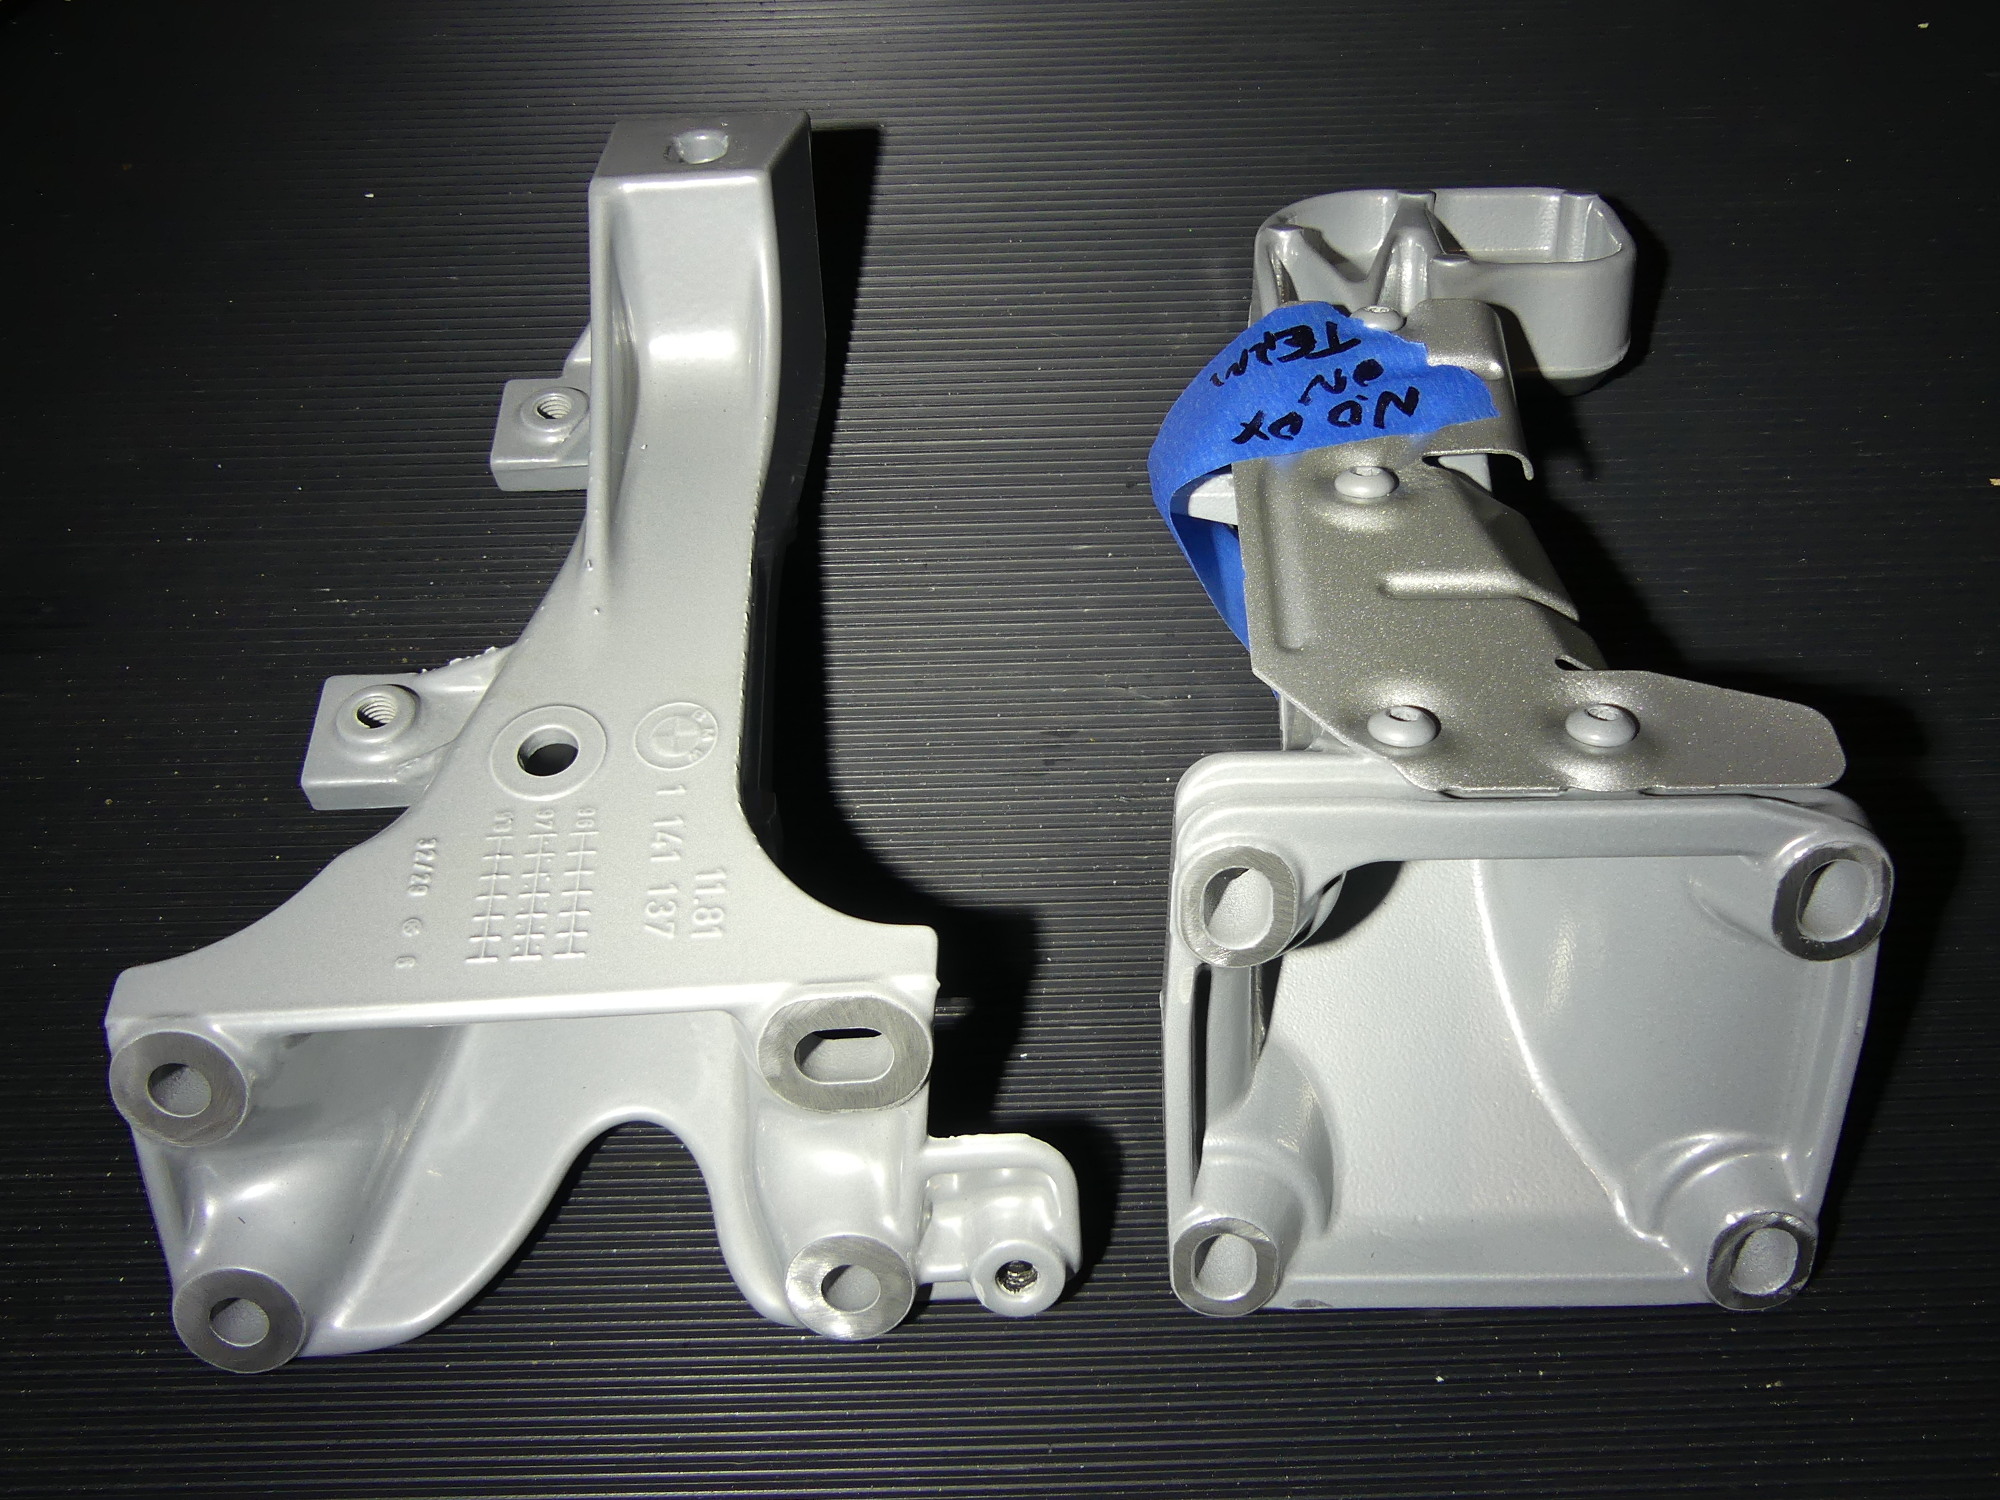 The right side engine support provides an essential ground connection to the engine block and starter so I used a roloc disk in my die grinder to remove the powdercoat at the contact points. |
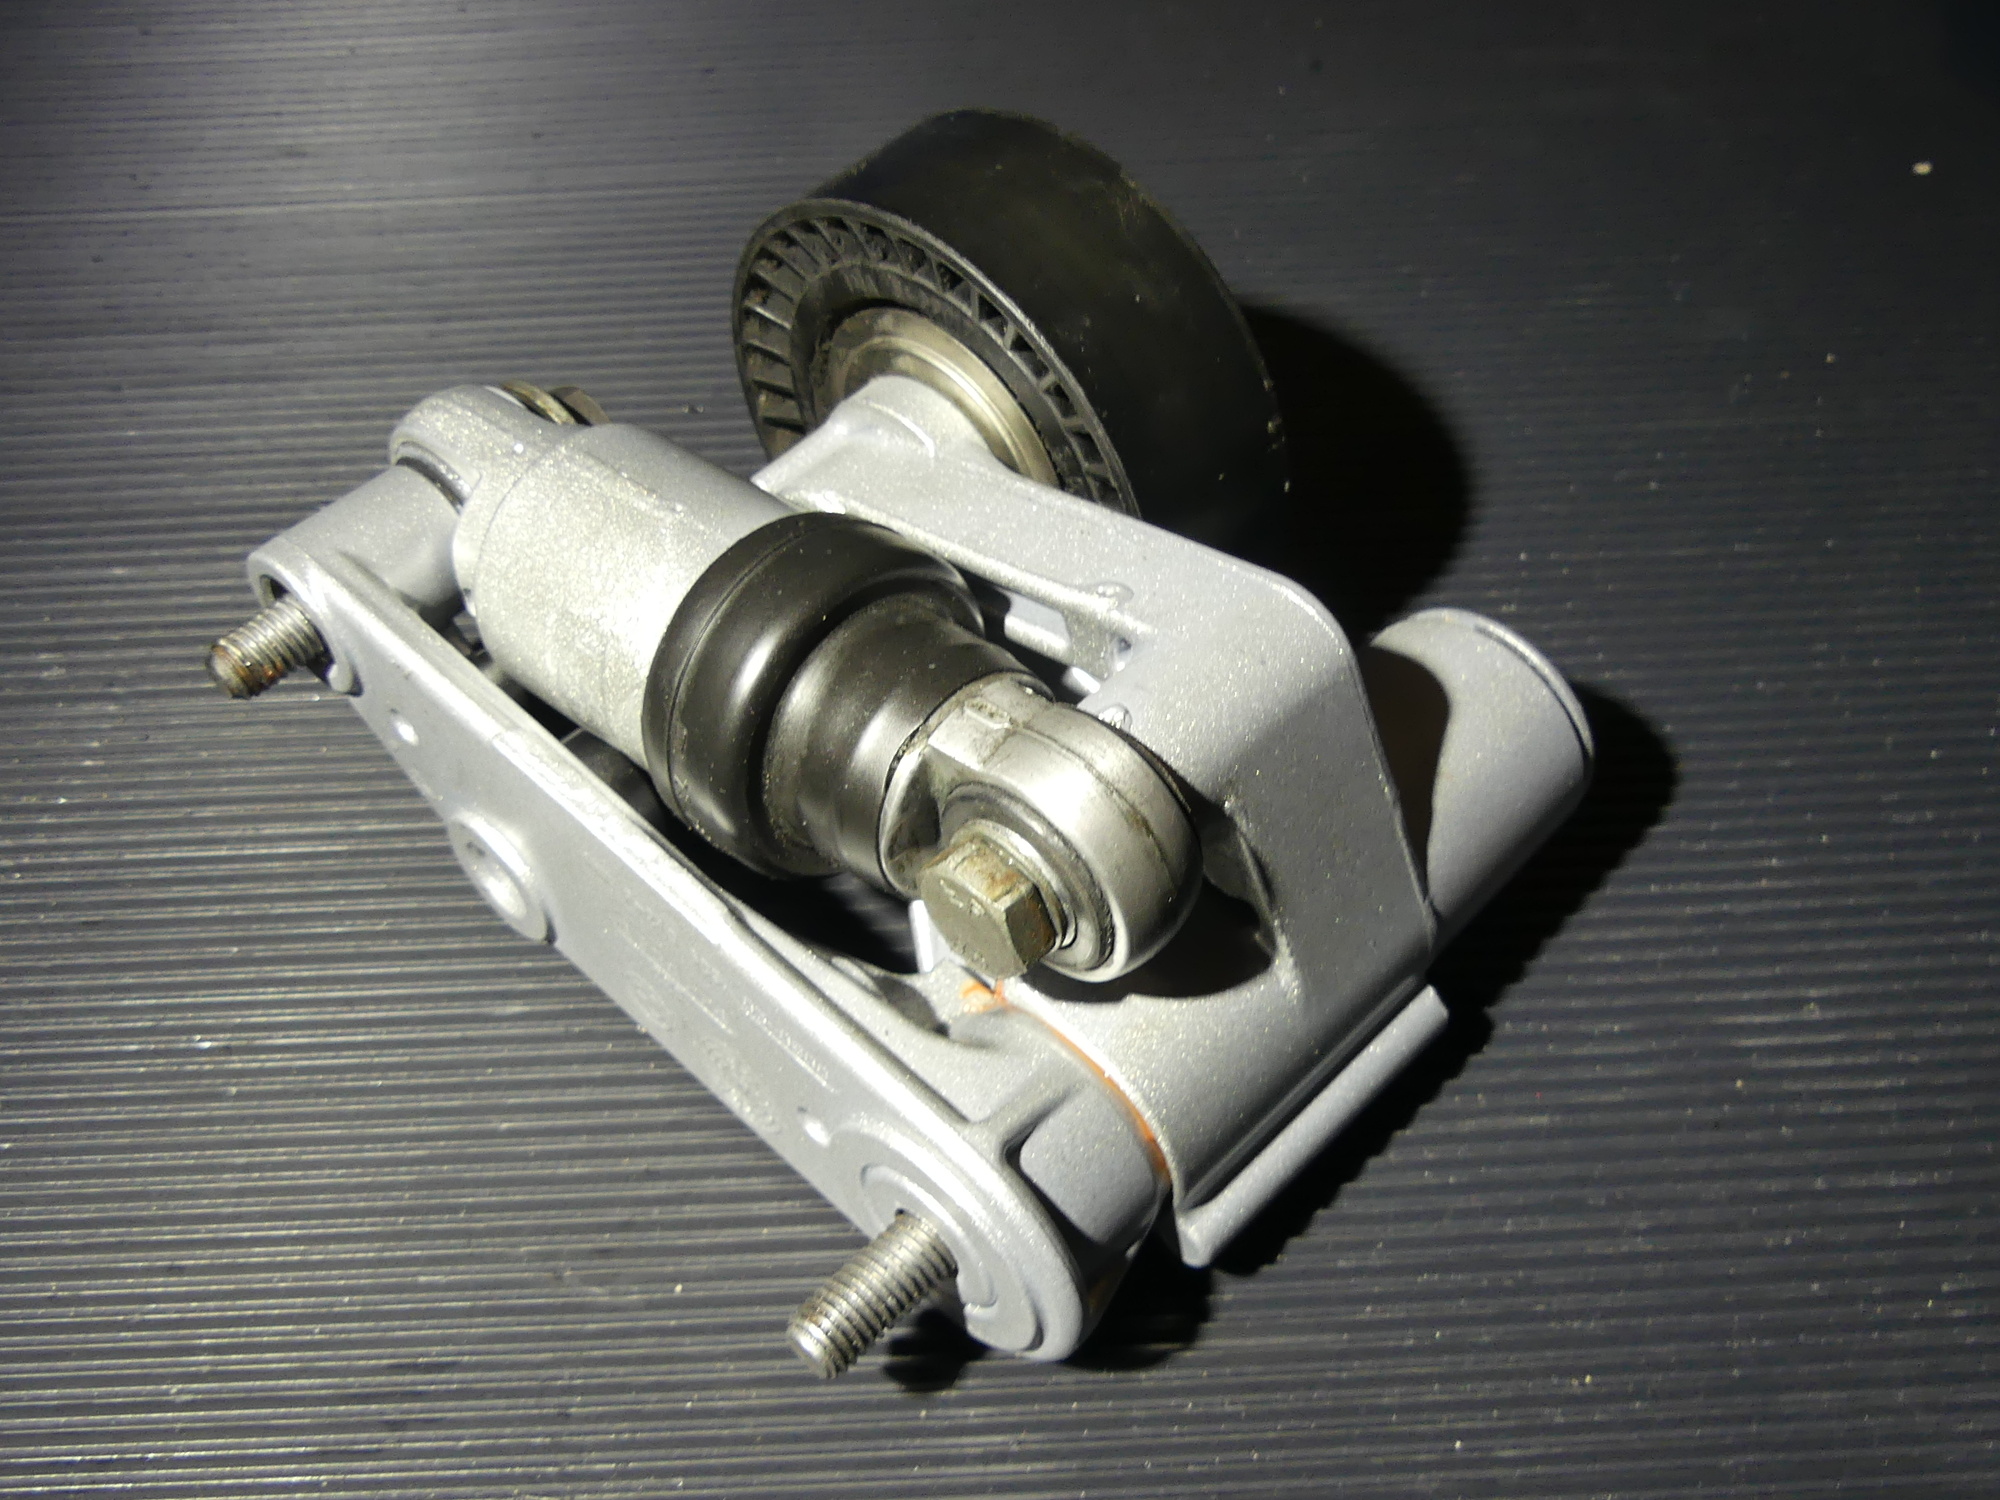 The accessory belt hydraulic tensioner reassembled. Note that I took this picture before I realized I swapped one of the bolts and washers. I plan to fix that before I install it on the newly assembled block. |
There are two rubber isolator mounts with integral studs screwed into the valve cover. These are used to mount the BMW branded cover that helps keep water out of the spark plug holes and coil packs. While inspecting the valve cover I realized that the studs on the isolators were heavily corroded. I recalled having difficulty removing the nuts the last time I had to replace the plugs so I decided to order new isolators and the associated nuts. Researching these items I found the isolators to be surprisingly pricey. I also discovered that the new Zinc-Nickel plated nuts I needed to buy to mount the fuel regulator are also used in this application so I added a couple more to my latest order.
Engine Support Prep
One of the lesser known functions of the right side engine support is that it provides a path to electrical ground for the engine and starter. As I experienced a year or so ago, corrosion or failure of the bonding cable can result in erratic or intermittent starter operation, so the last bit of prep I had to do to the engine support was to remove the powdercoat from the portions of the mount that contact both the block and the bonding cable. I also put a bit of NoOx (an anti-oxidation paste) on the terminal where the bonding cable is attached, with the hope of preventing corrosion in that area.
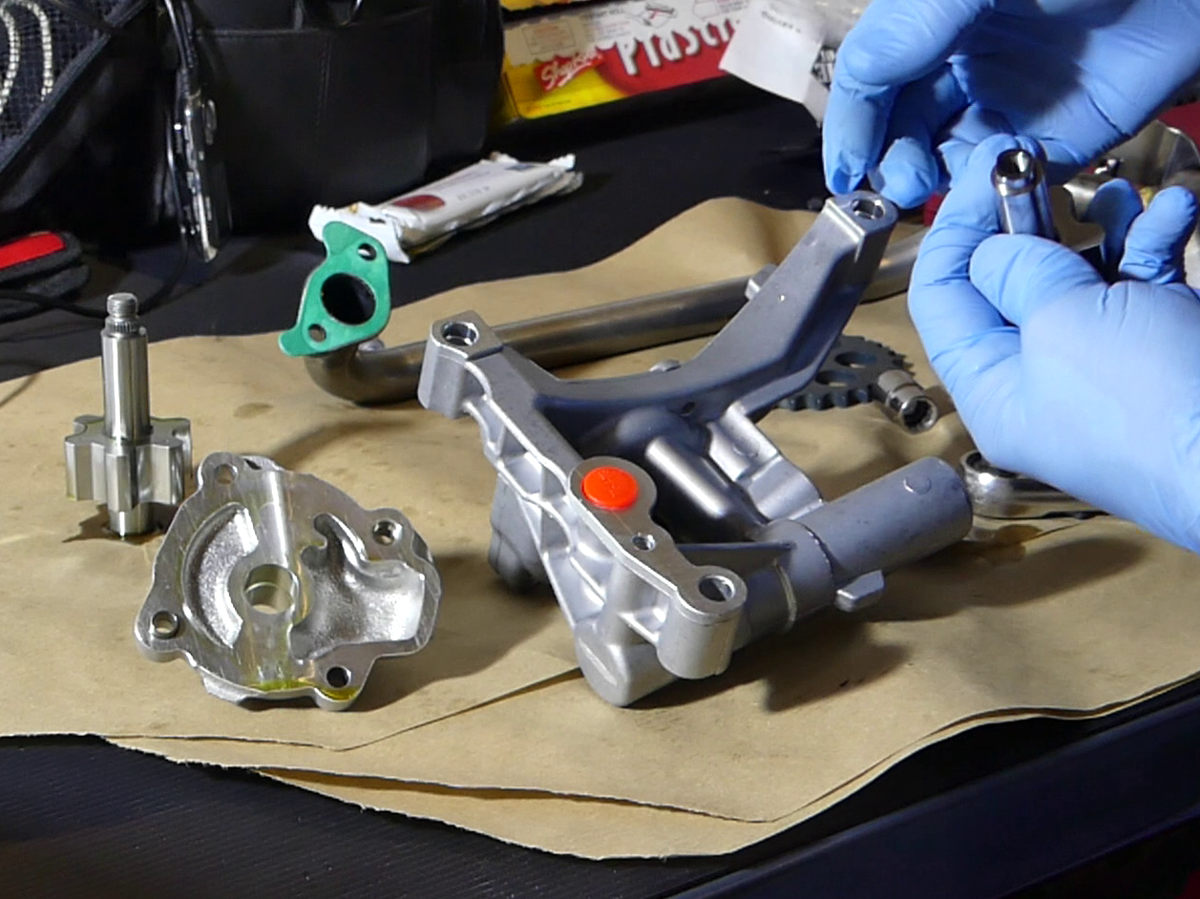
Oil Pump Upgrade with Achilles Motorsport Shaft Kit
With work on the chassis complete for now I turned to some engine build related items including installation of the Achilles Motorsport oil pump upgrade.
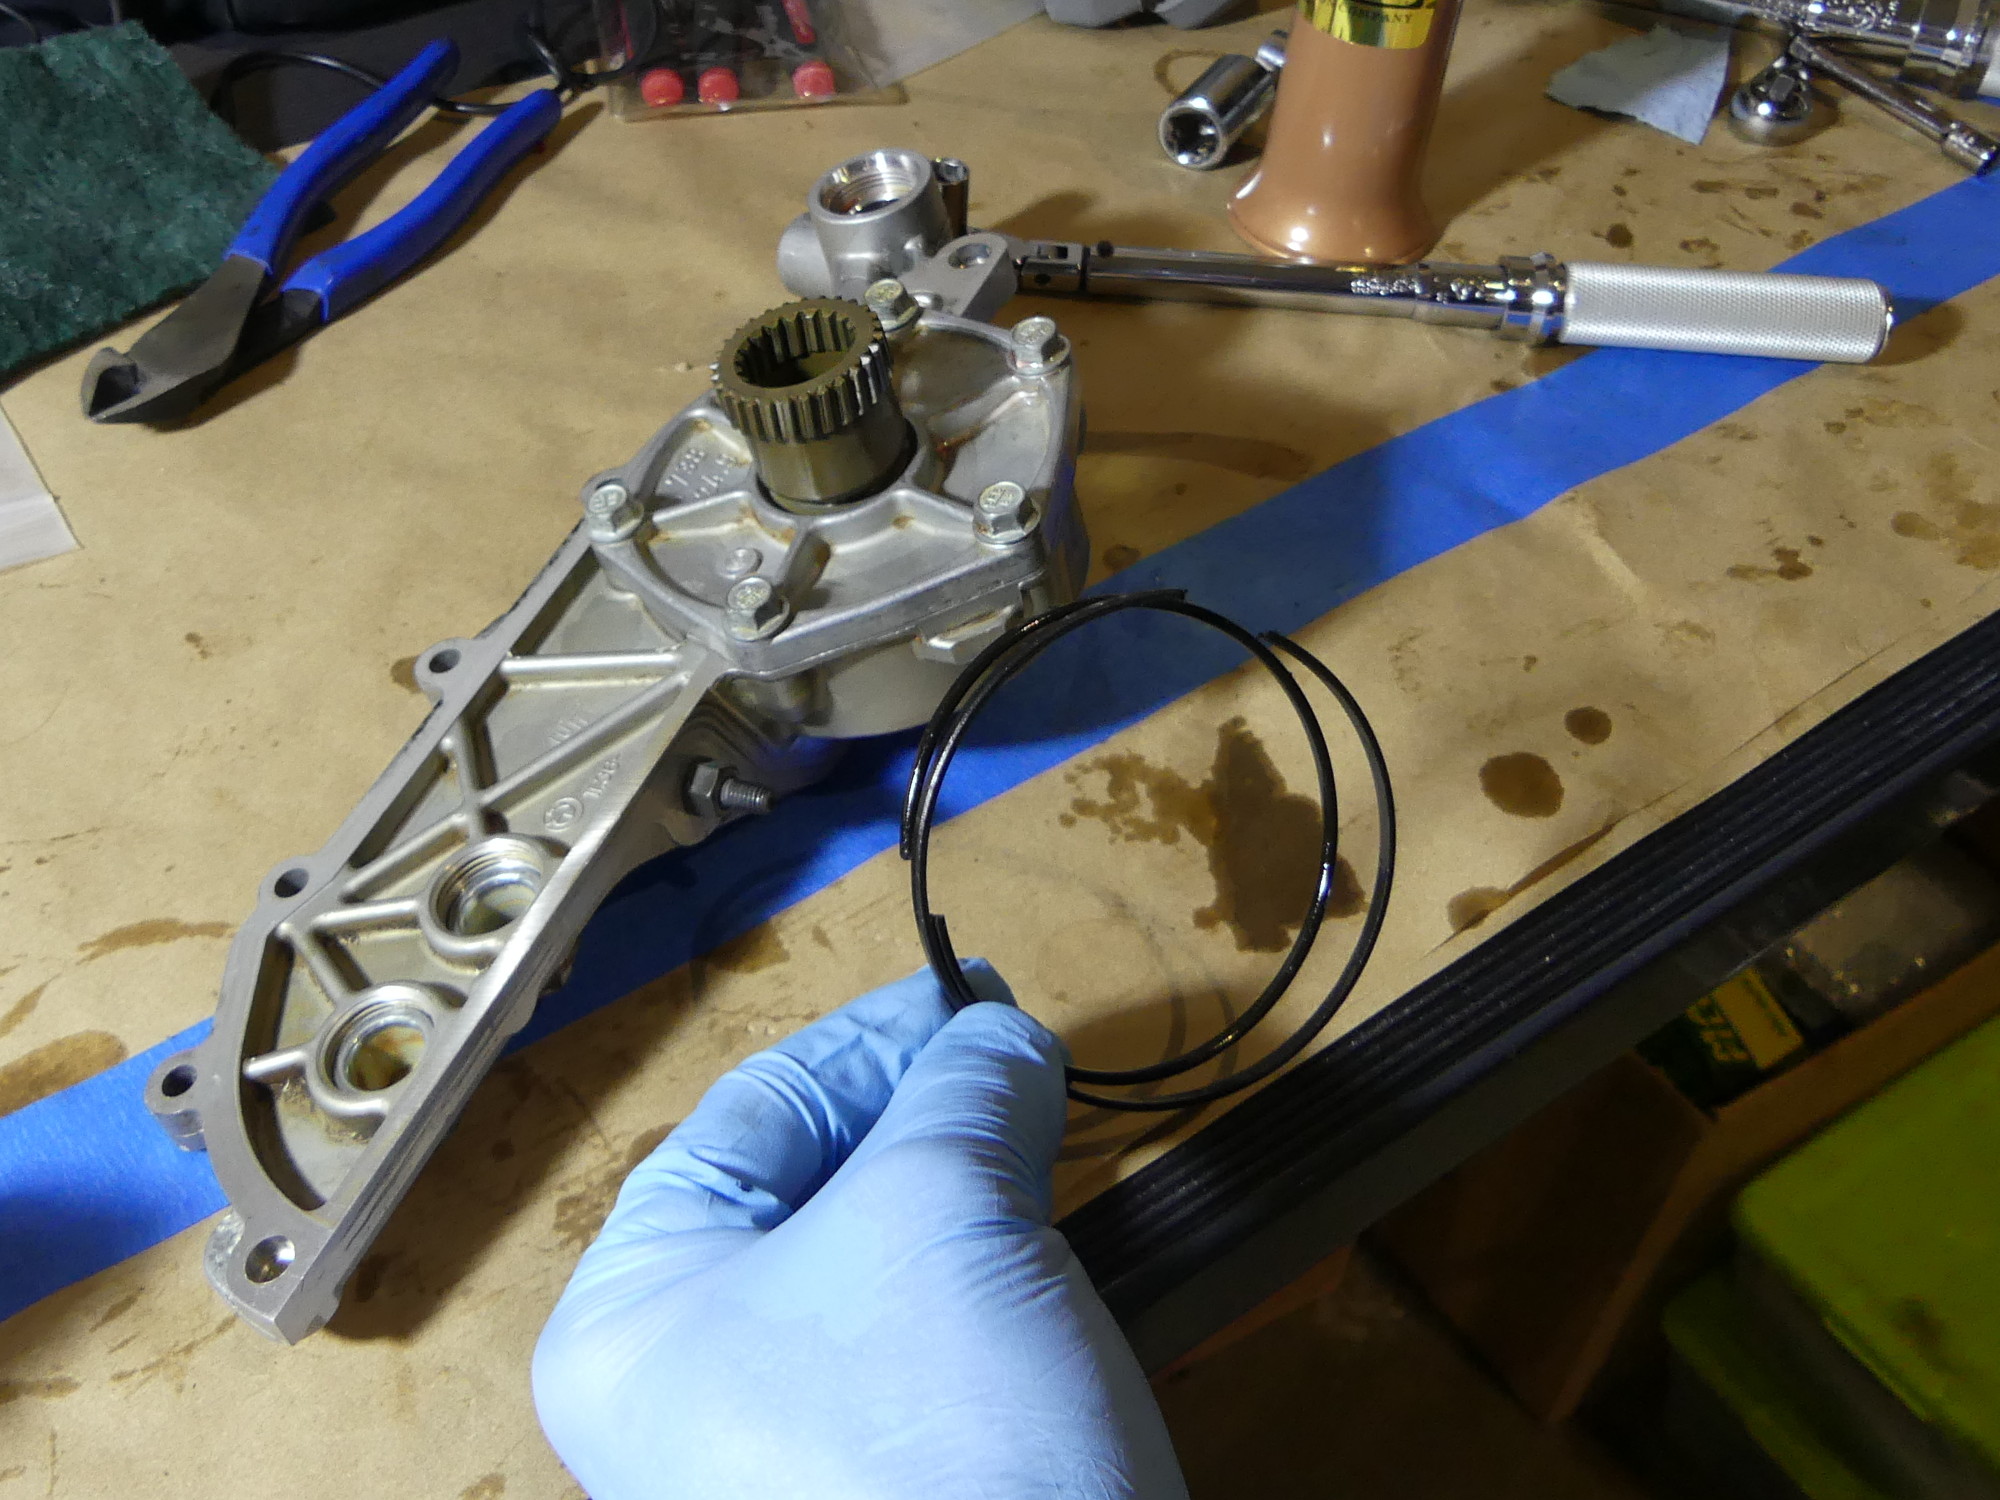
Since I chose to buy the upgrade with a new BMW rotor pre-pressed on the upgraded shaft the job was a simple matter of opening up my new pump and swapping rotor / shaft assemblies. This went as expected though I did find it annoying that the instructions lacked the torque specs for the four housing bolts so I had to look that up in TIS and convert to inch-pounds for use with my smallest torque wrench.
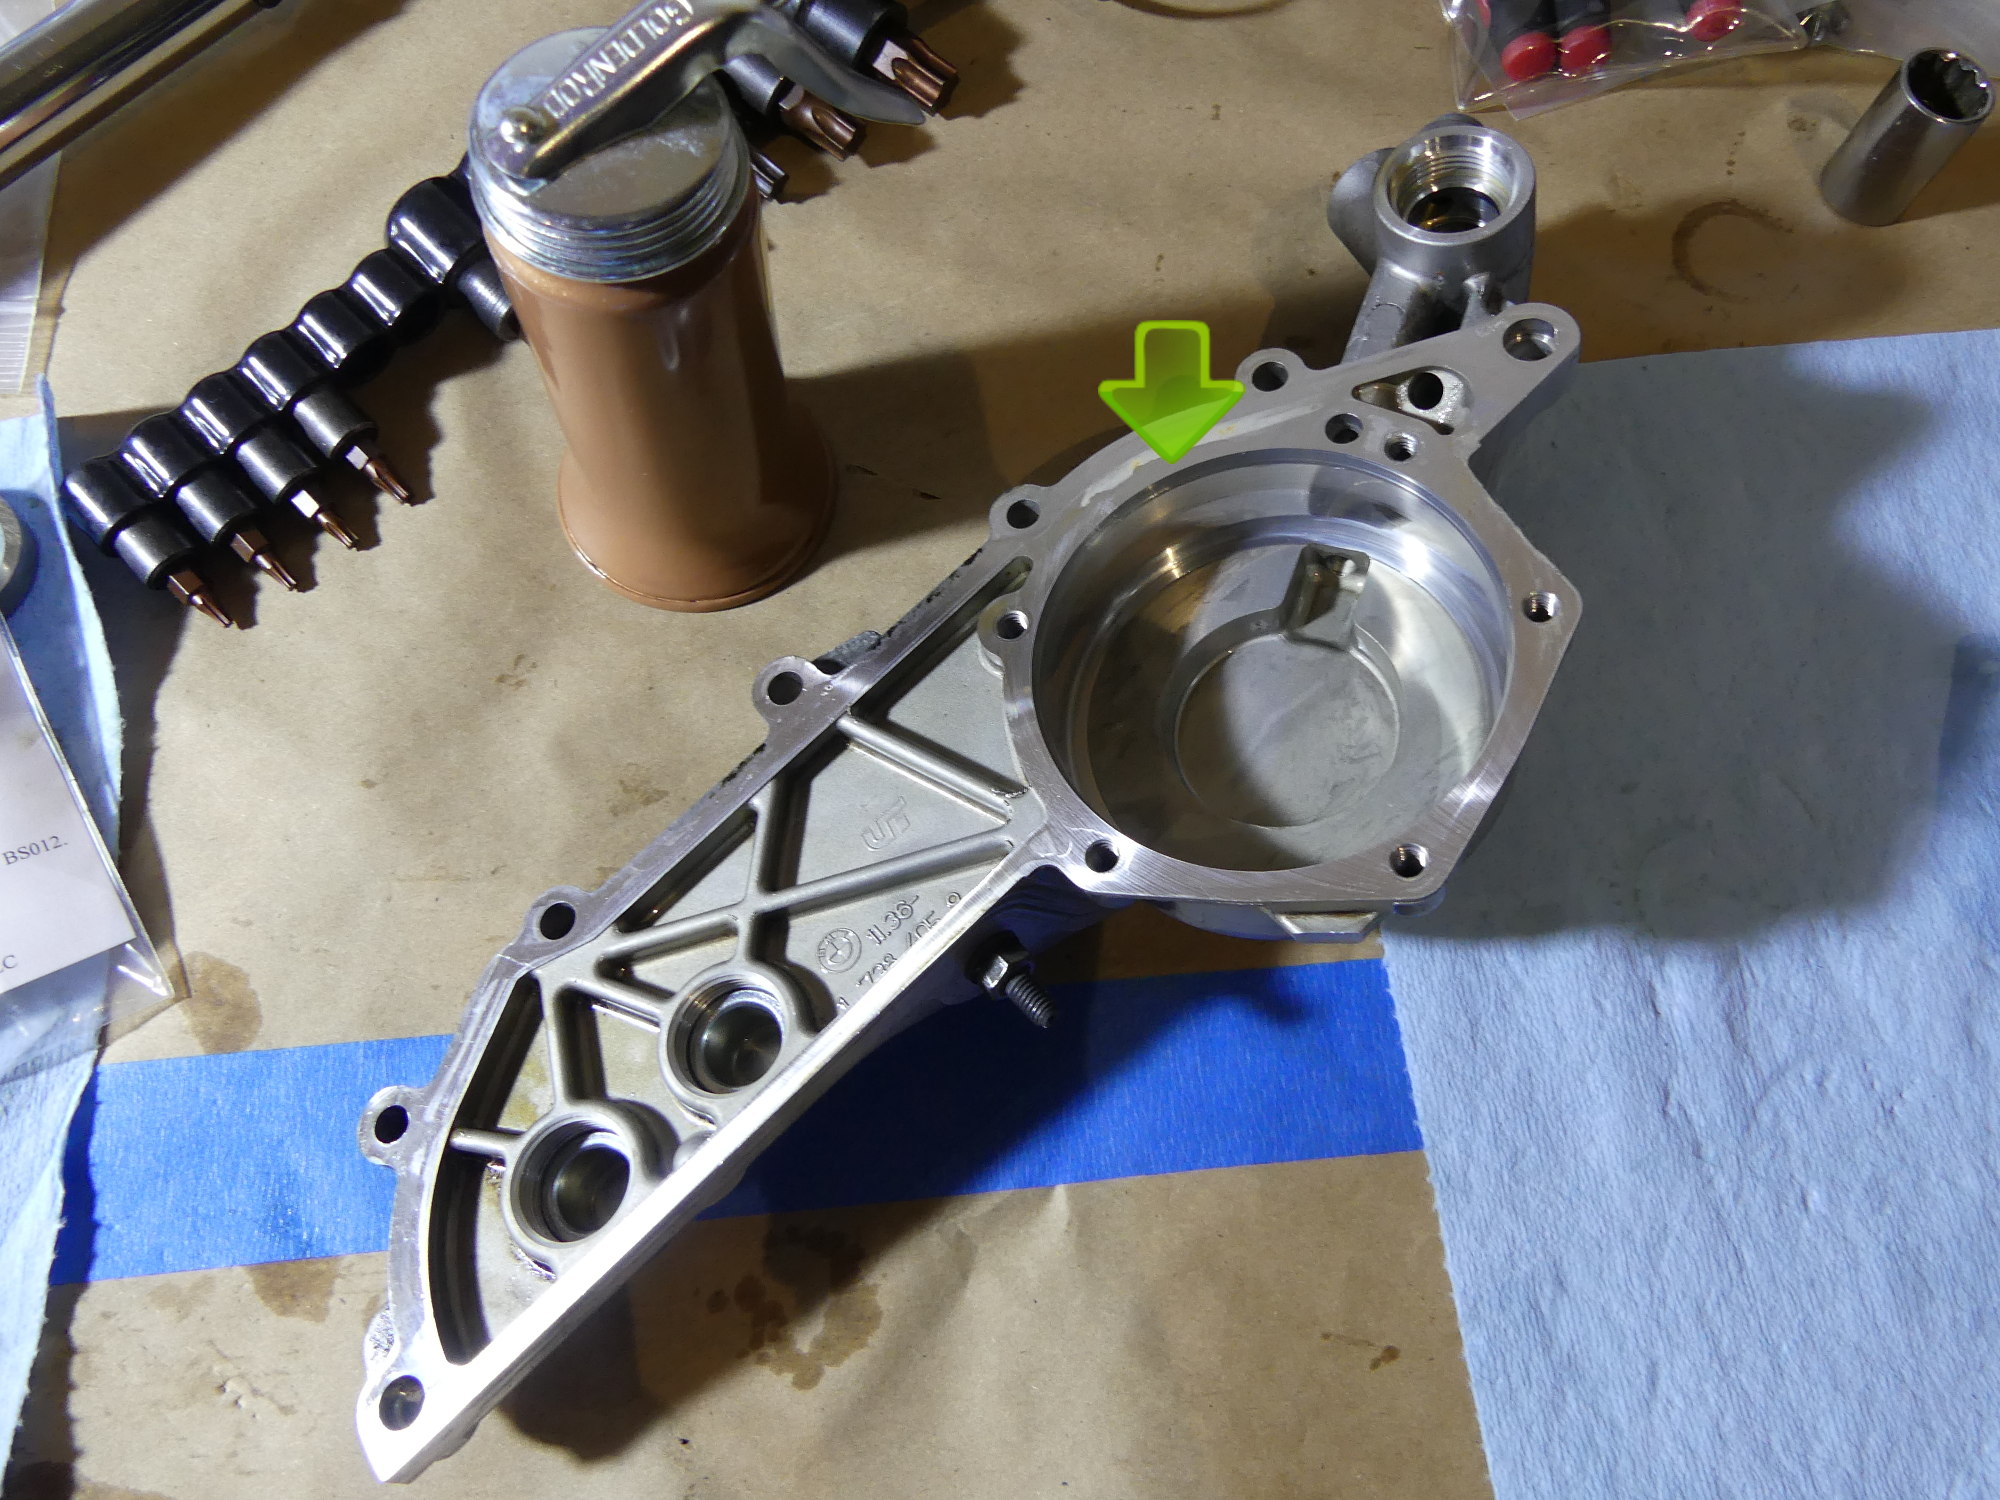
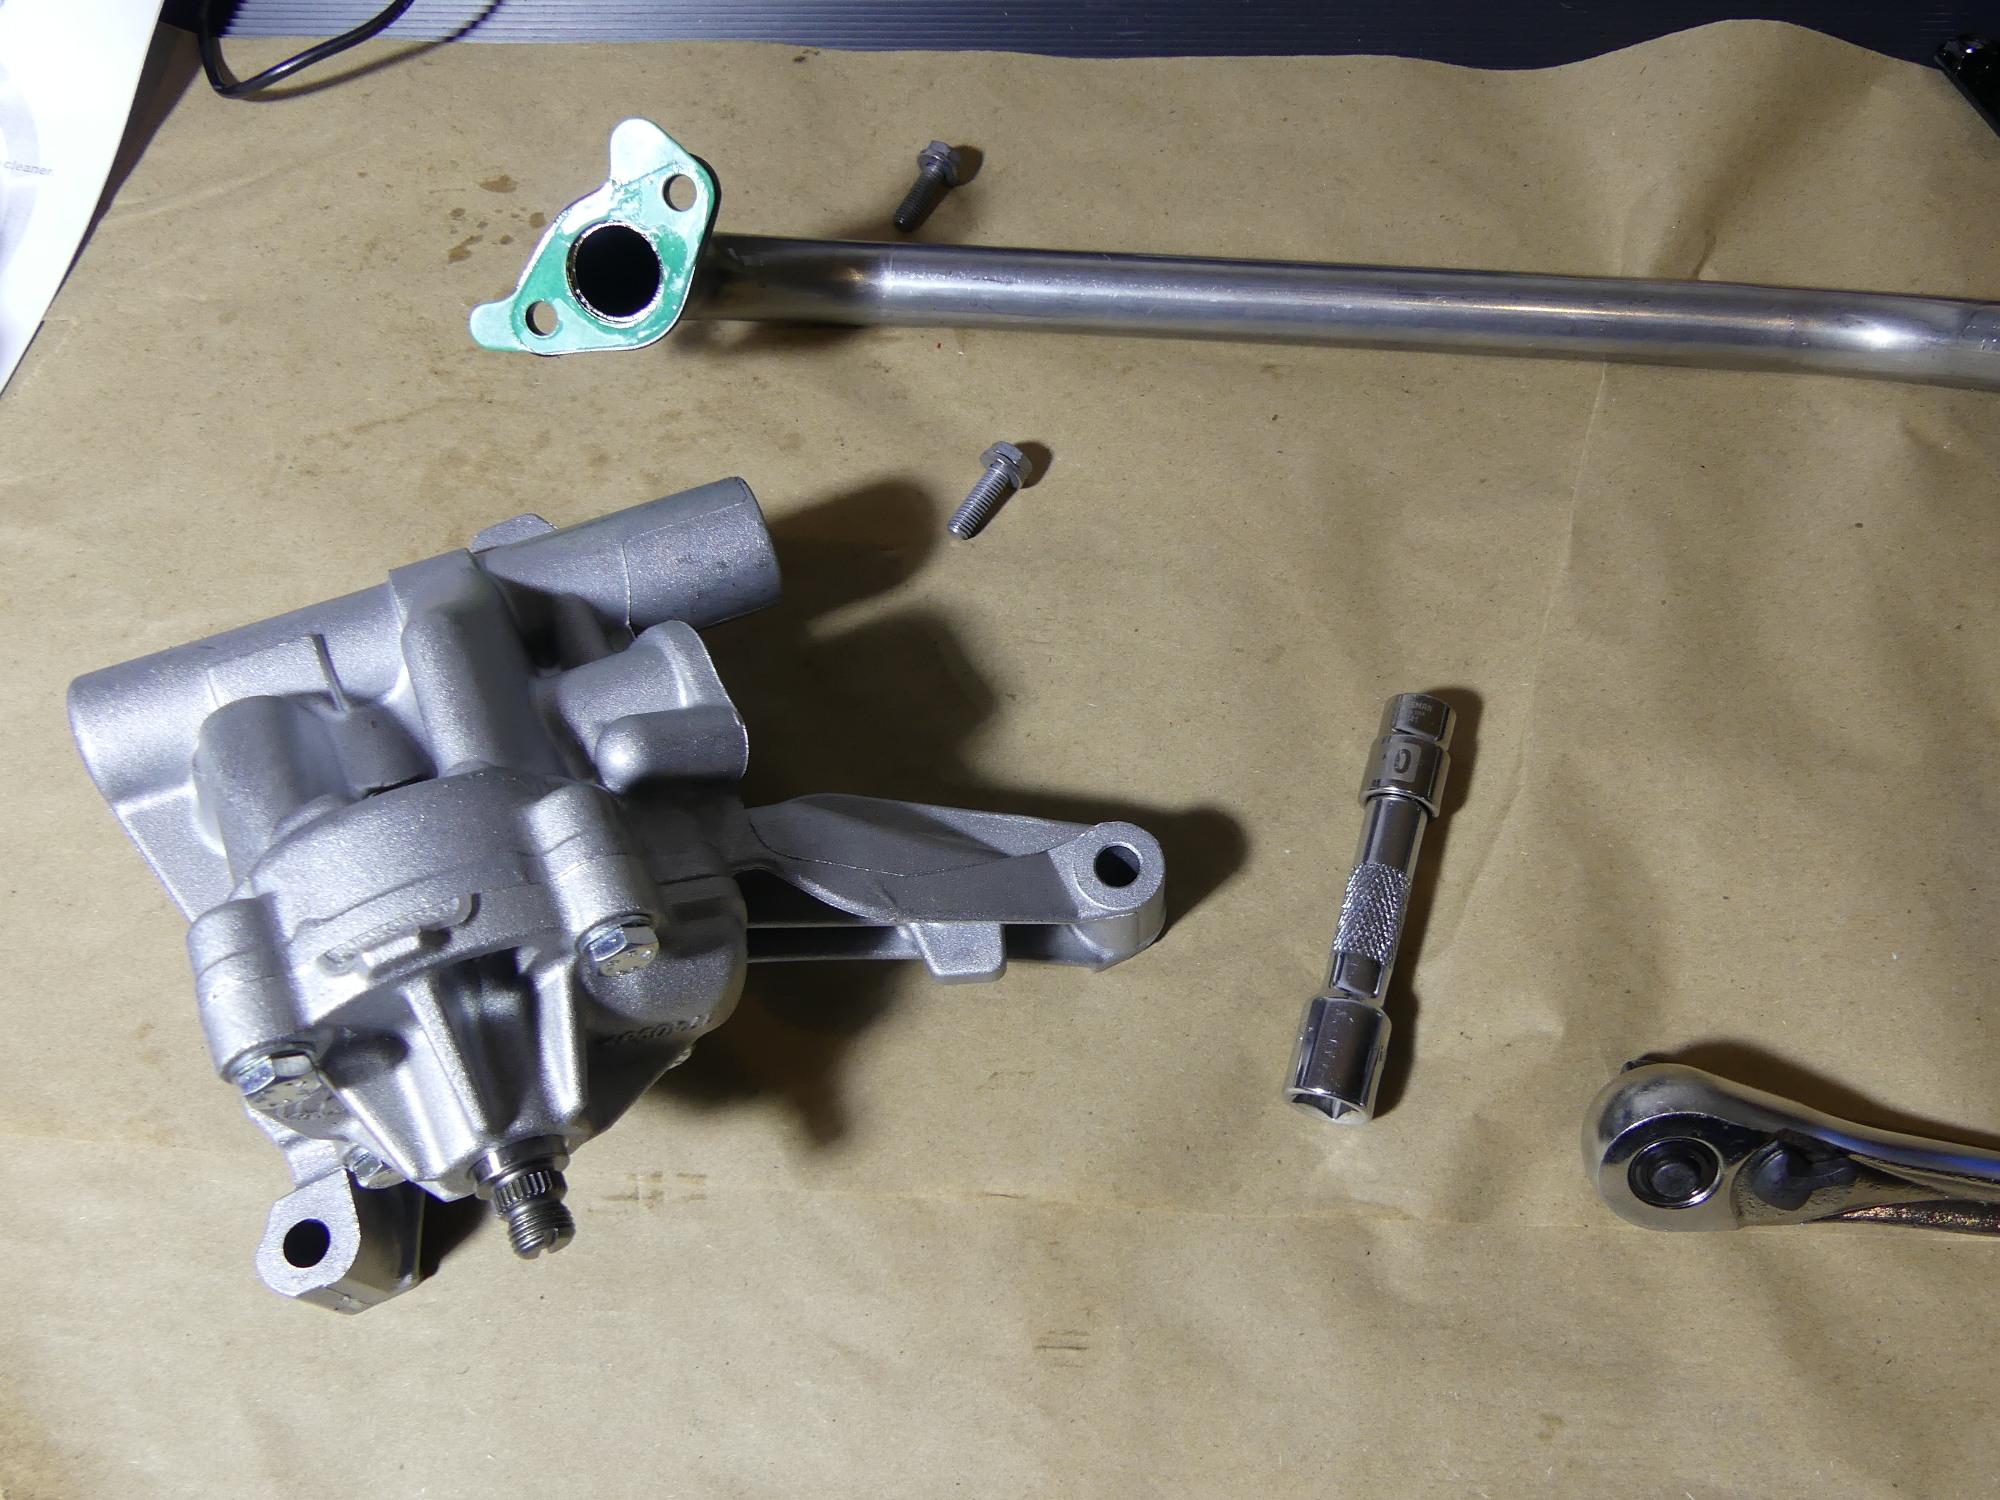 Beginning disassembly of the oil pump. Here I've removed the pickup provided with the new pump. This will be replaced with the reinforced pickup from the 2.8L Z3. |
 This shows the oil pump cover removed. I have the new Achilles shaft with new BMW rotor pre-pressed in my hand. The original rotor and splined shaft is seen on the left. |
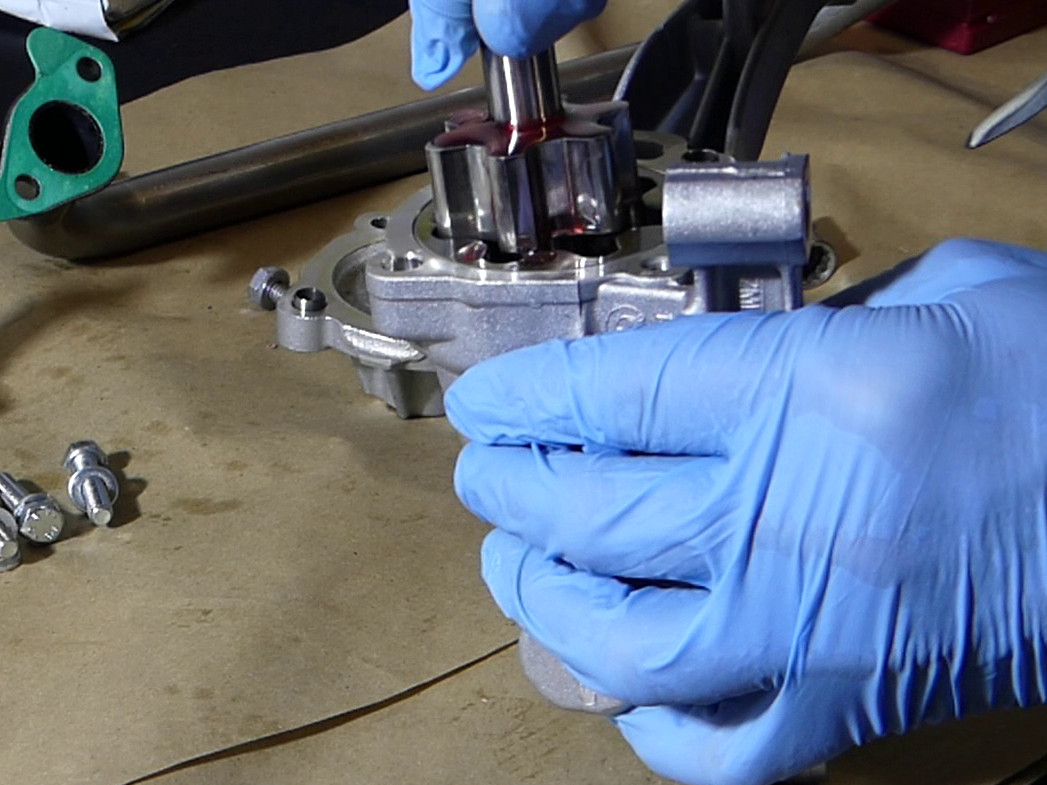 After spraying the new rotor and shaft down with brake cleaner to remove any and all remaining dirt I applied some AMSOIL break-in engine oil (hence the red color) to the oil pump housing and the rotor before installing it. |
One odd thing I found in the instructions was a note that the pump should be filled with oil during installation to prime it. I have never heard of such a requirement so I plan to ask my tech if it really matters. I've seen more than one person install the pump with the block upside down on an engine stand and they didn't seem to have problems on initial startup. I suppose this may be more of an issue on an existing engine as opposed to a rebuild like mine that will be protected with assembly lube for the first few critical seconds where oil pressure is below nominal.
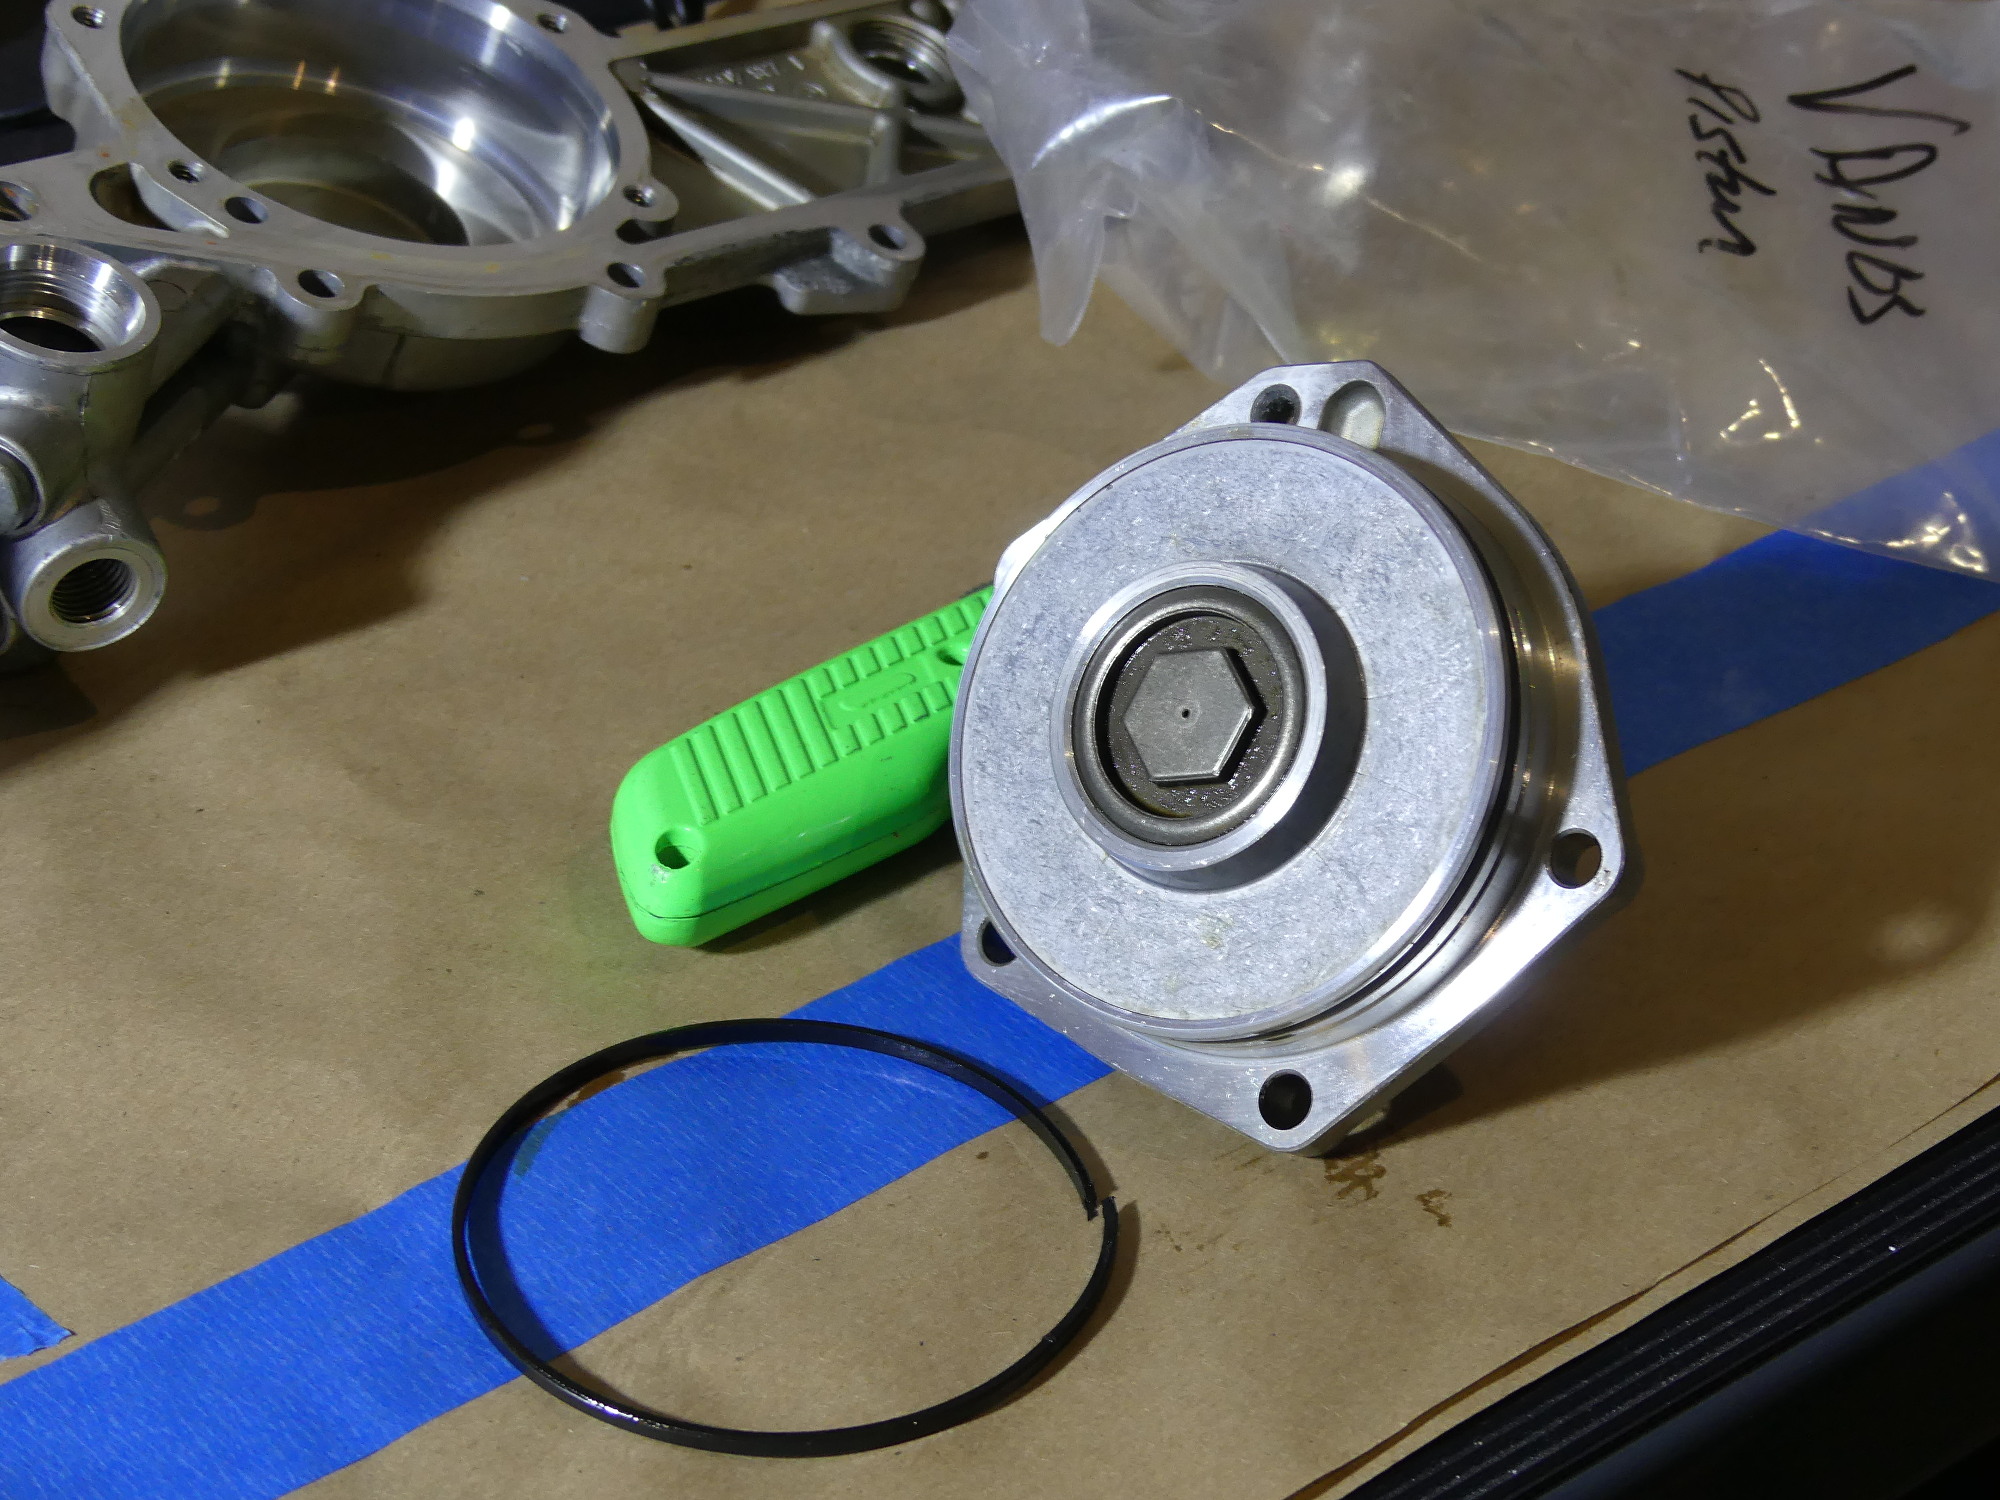
Vanos Rebuild with Beisan Systems Kits
The final project of the day involved installing the Beisan o-ring and anti-rattle kits on my VANOS unit.
 Removing the old VANOS piston seal turned out to be a bit annoying because it kept wanting to rotate in the groove but once slightly cut a pick was able to grab it and pull it out. The old seal was quite rigid and felt more like plastic than rubber. |
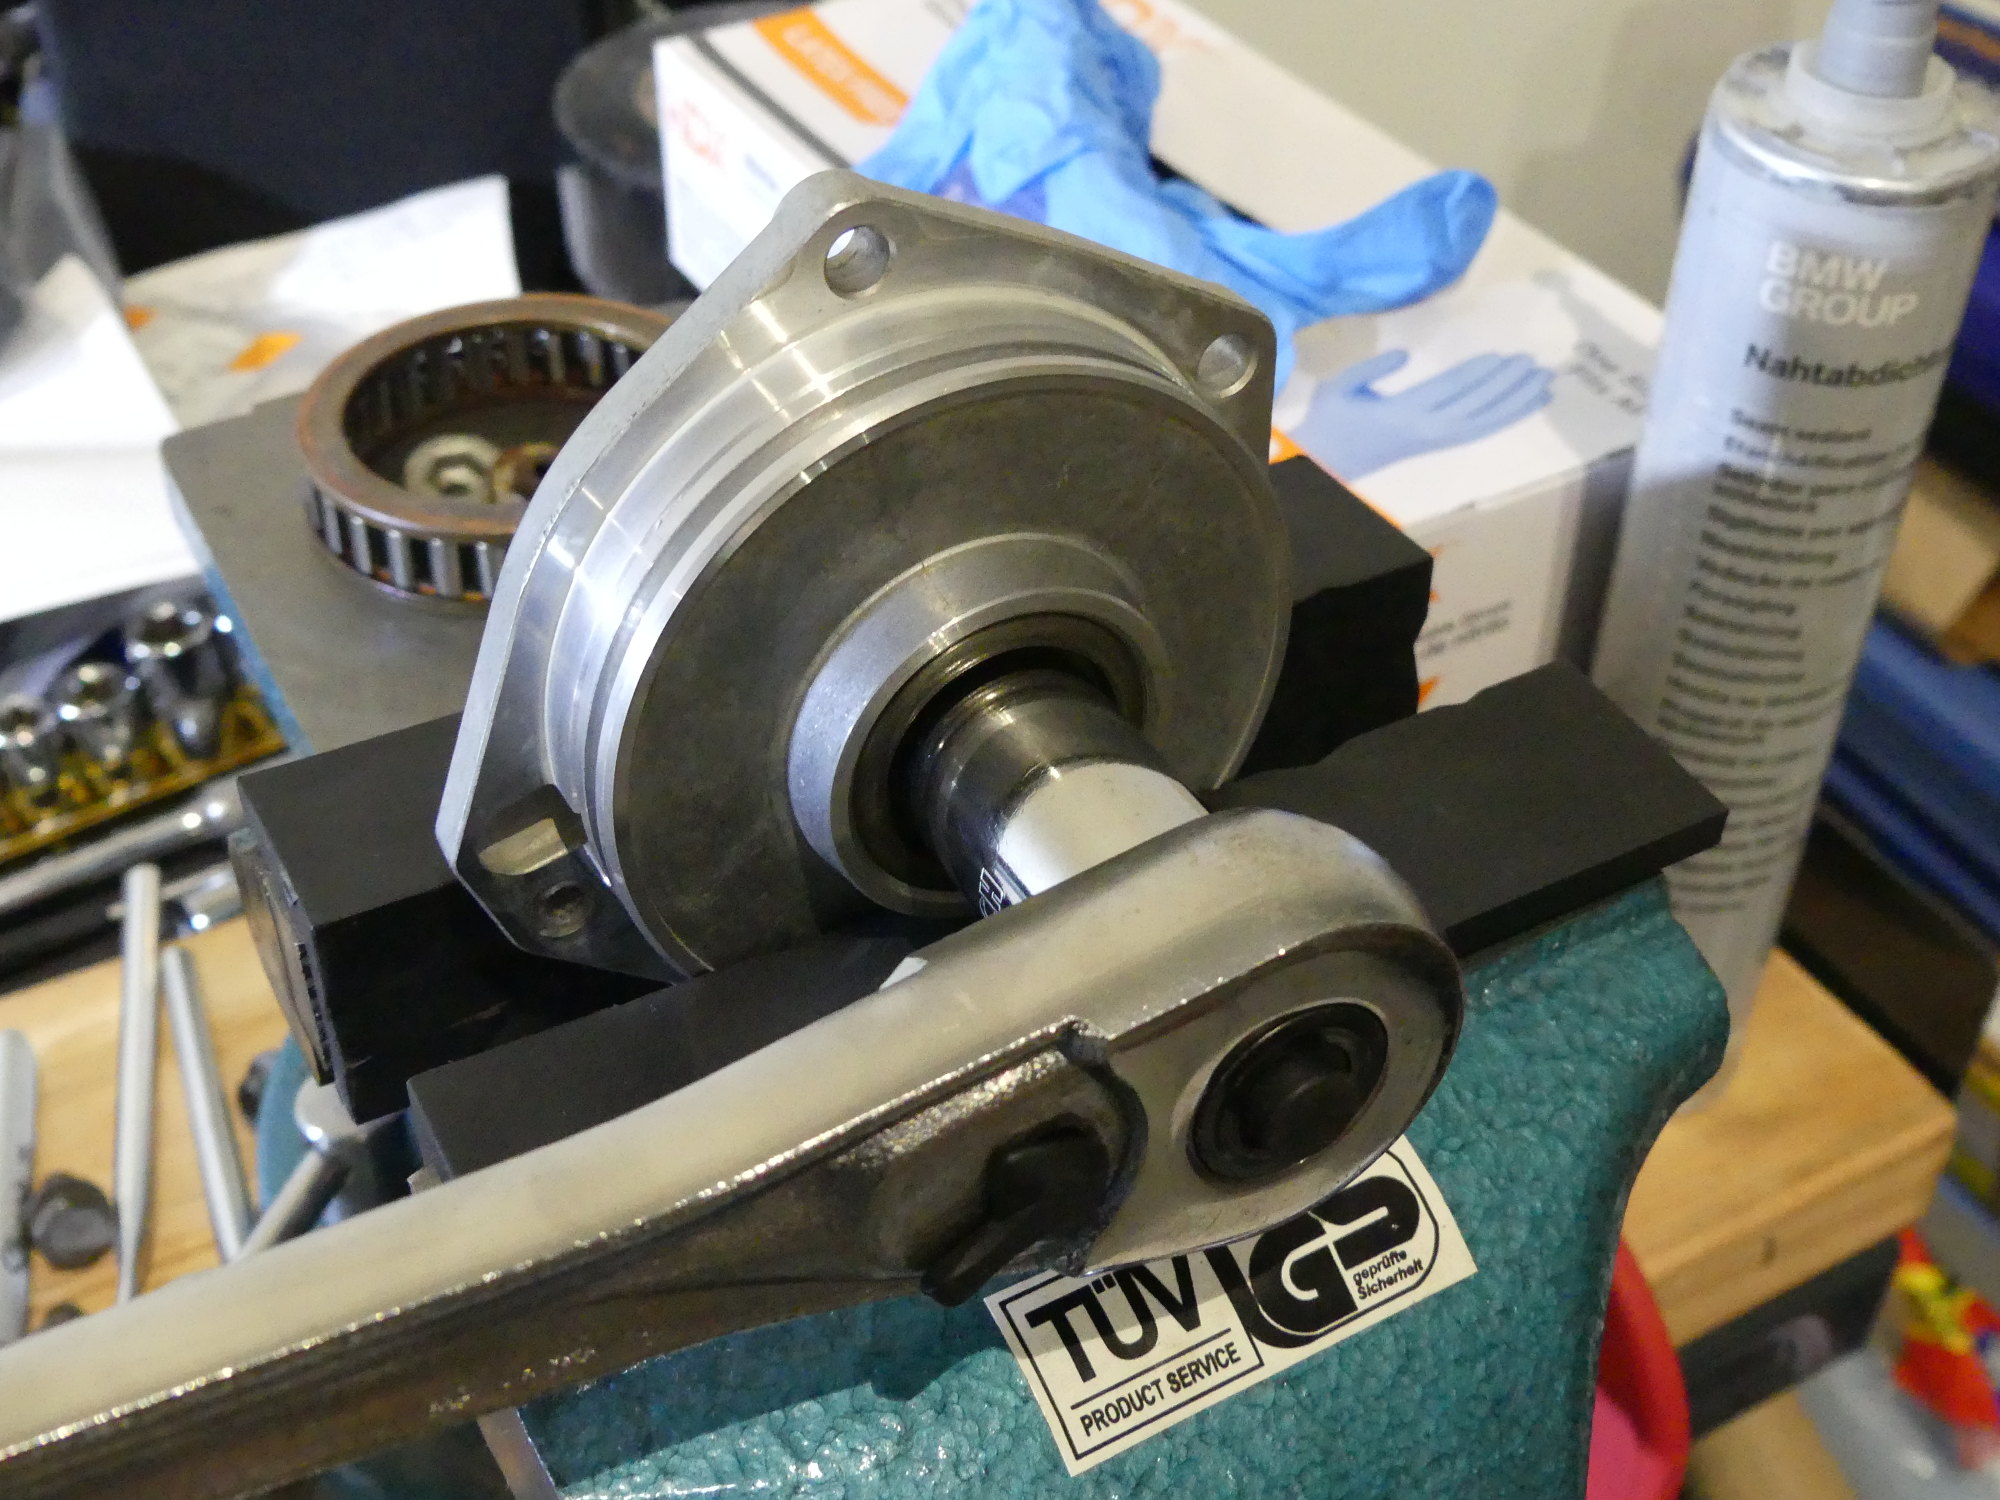 The instructions tell you to put the piston in a vise like this and then remove the cover with a ratchet and the special socket. The cover was too tight so I wound up loosening it with my impact wrench running at a lower than normal pressure. |
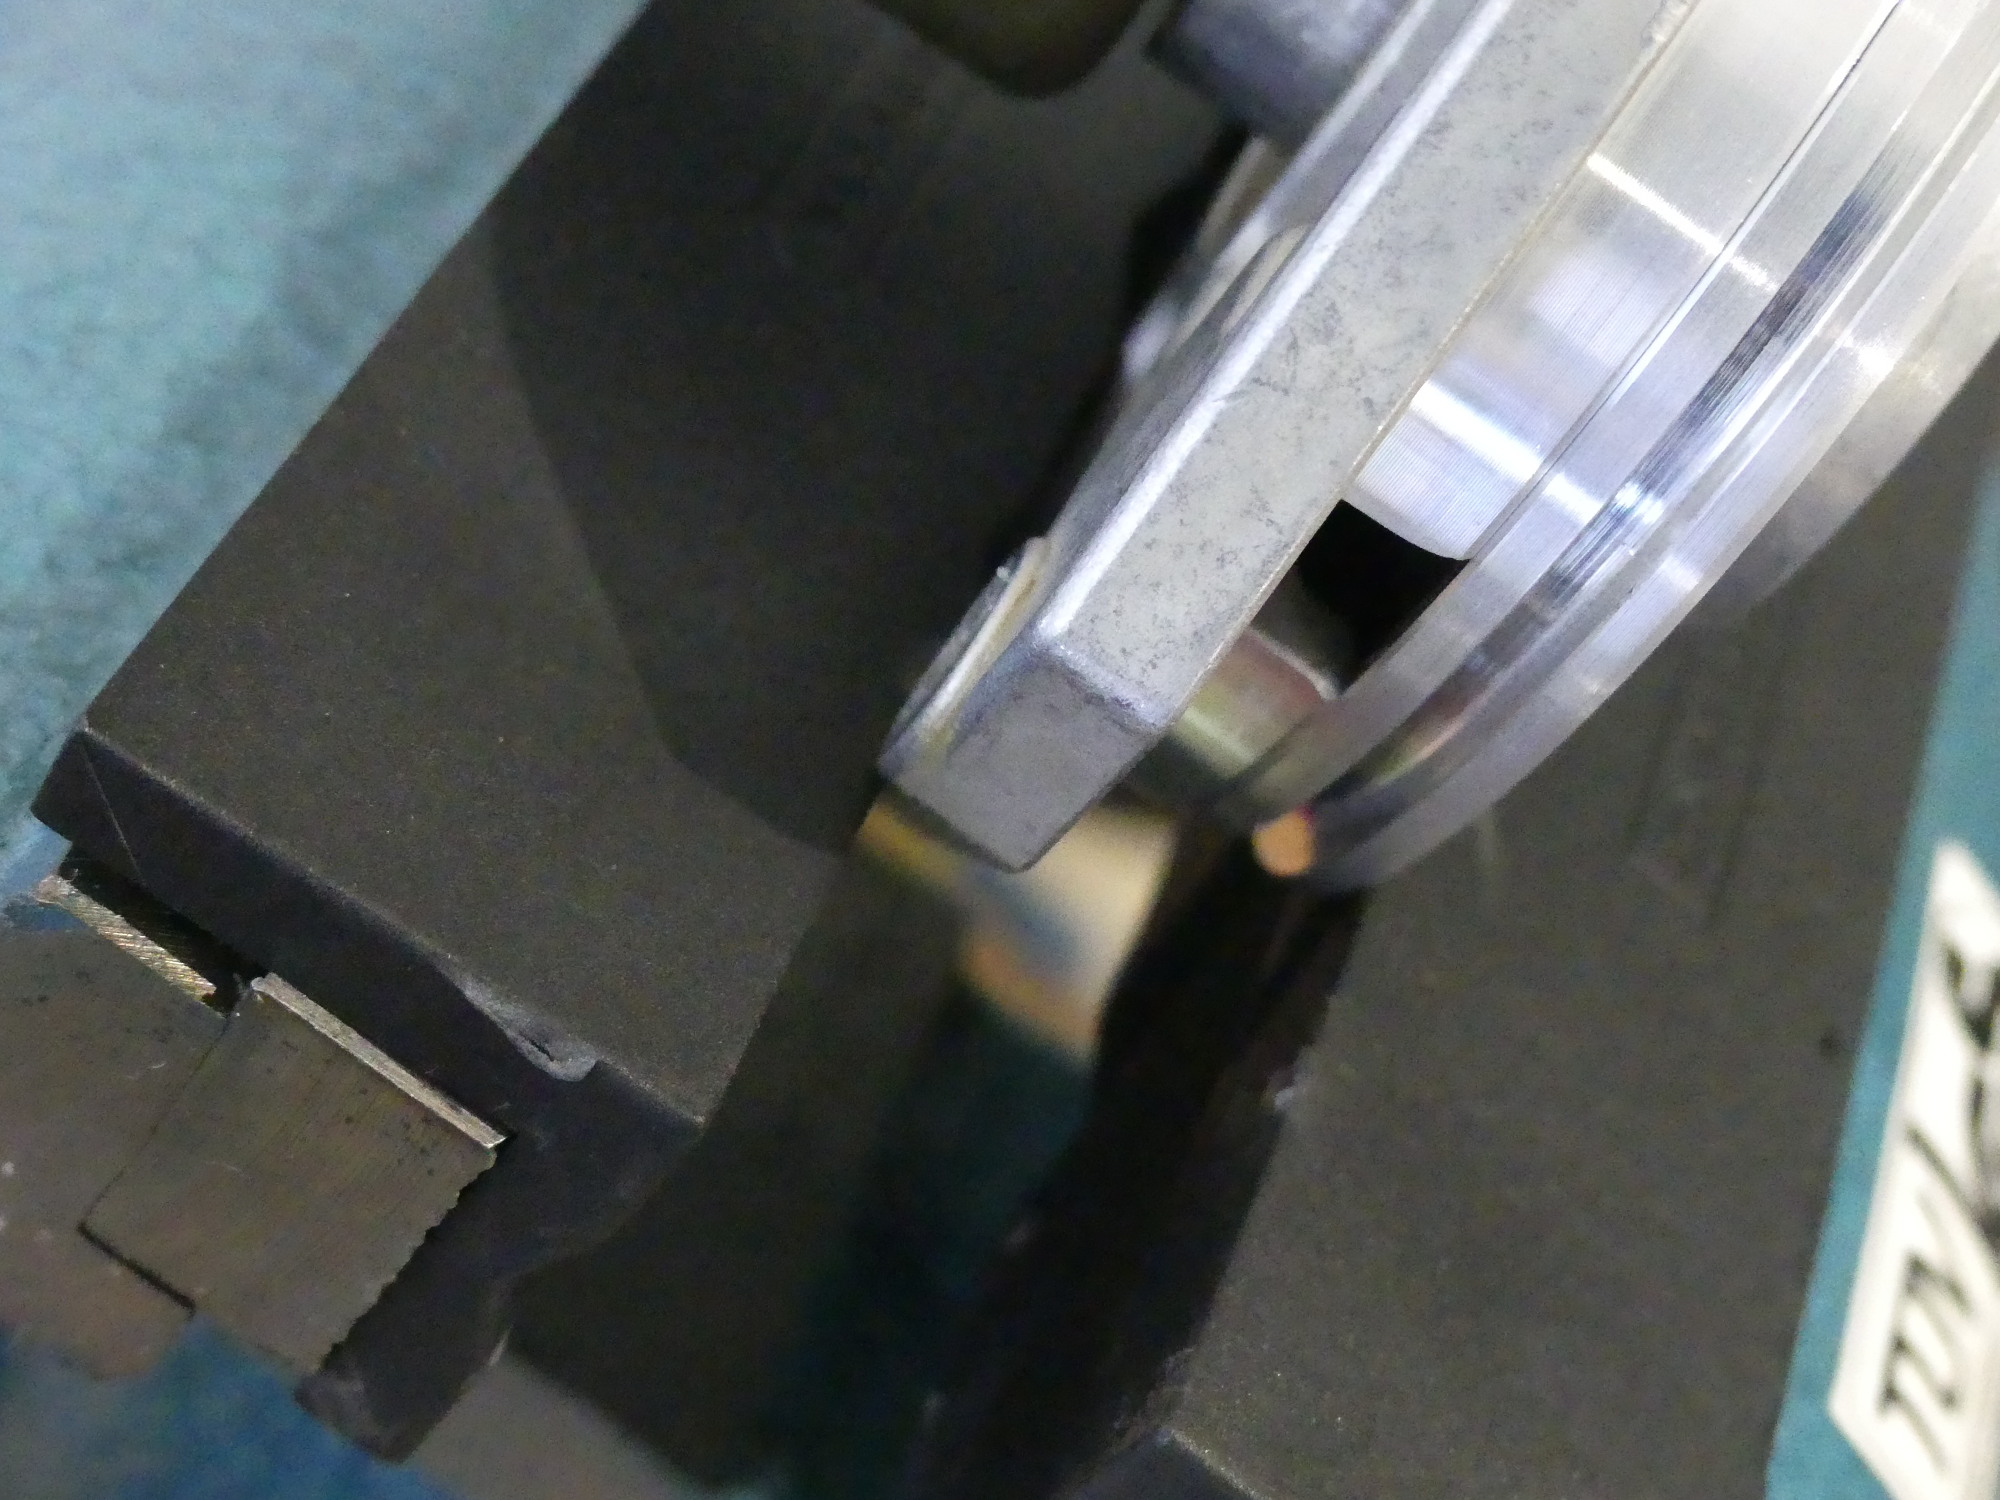 The instructions make reference to the mounting hole boss that can allegedly prevent the piston from rotating in the vise. Despite tightening the vise this was not enough to overcome the torque to which the cover had been tightened at the factory. |
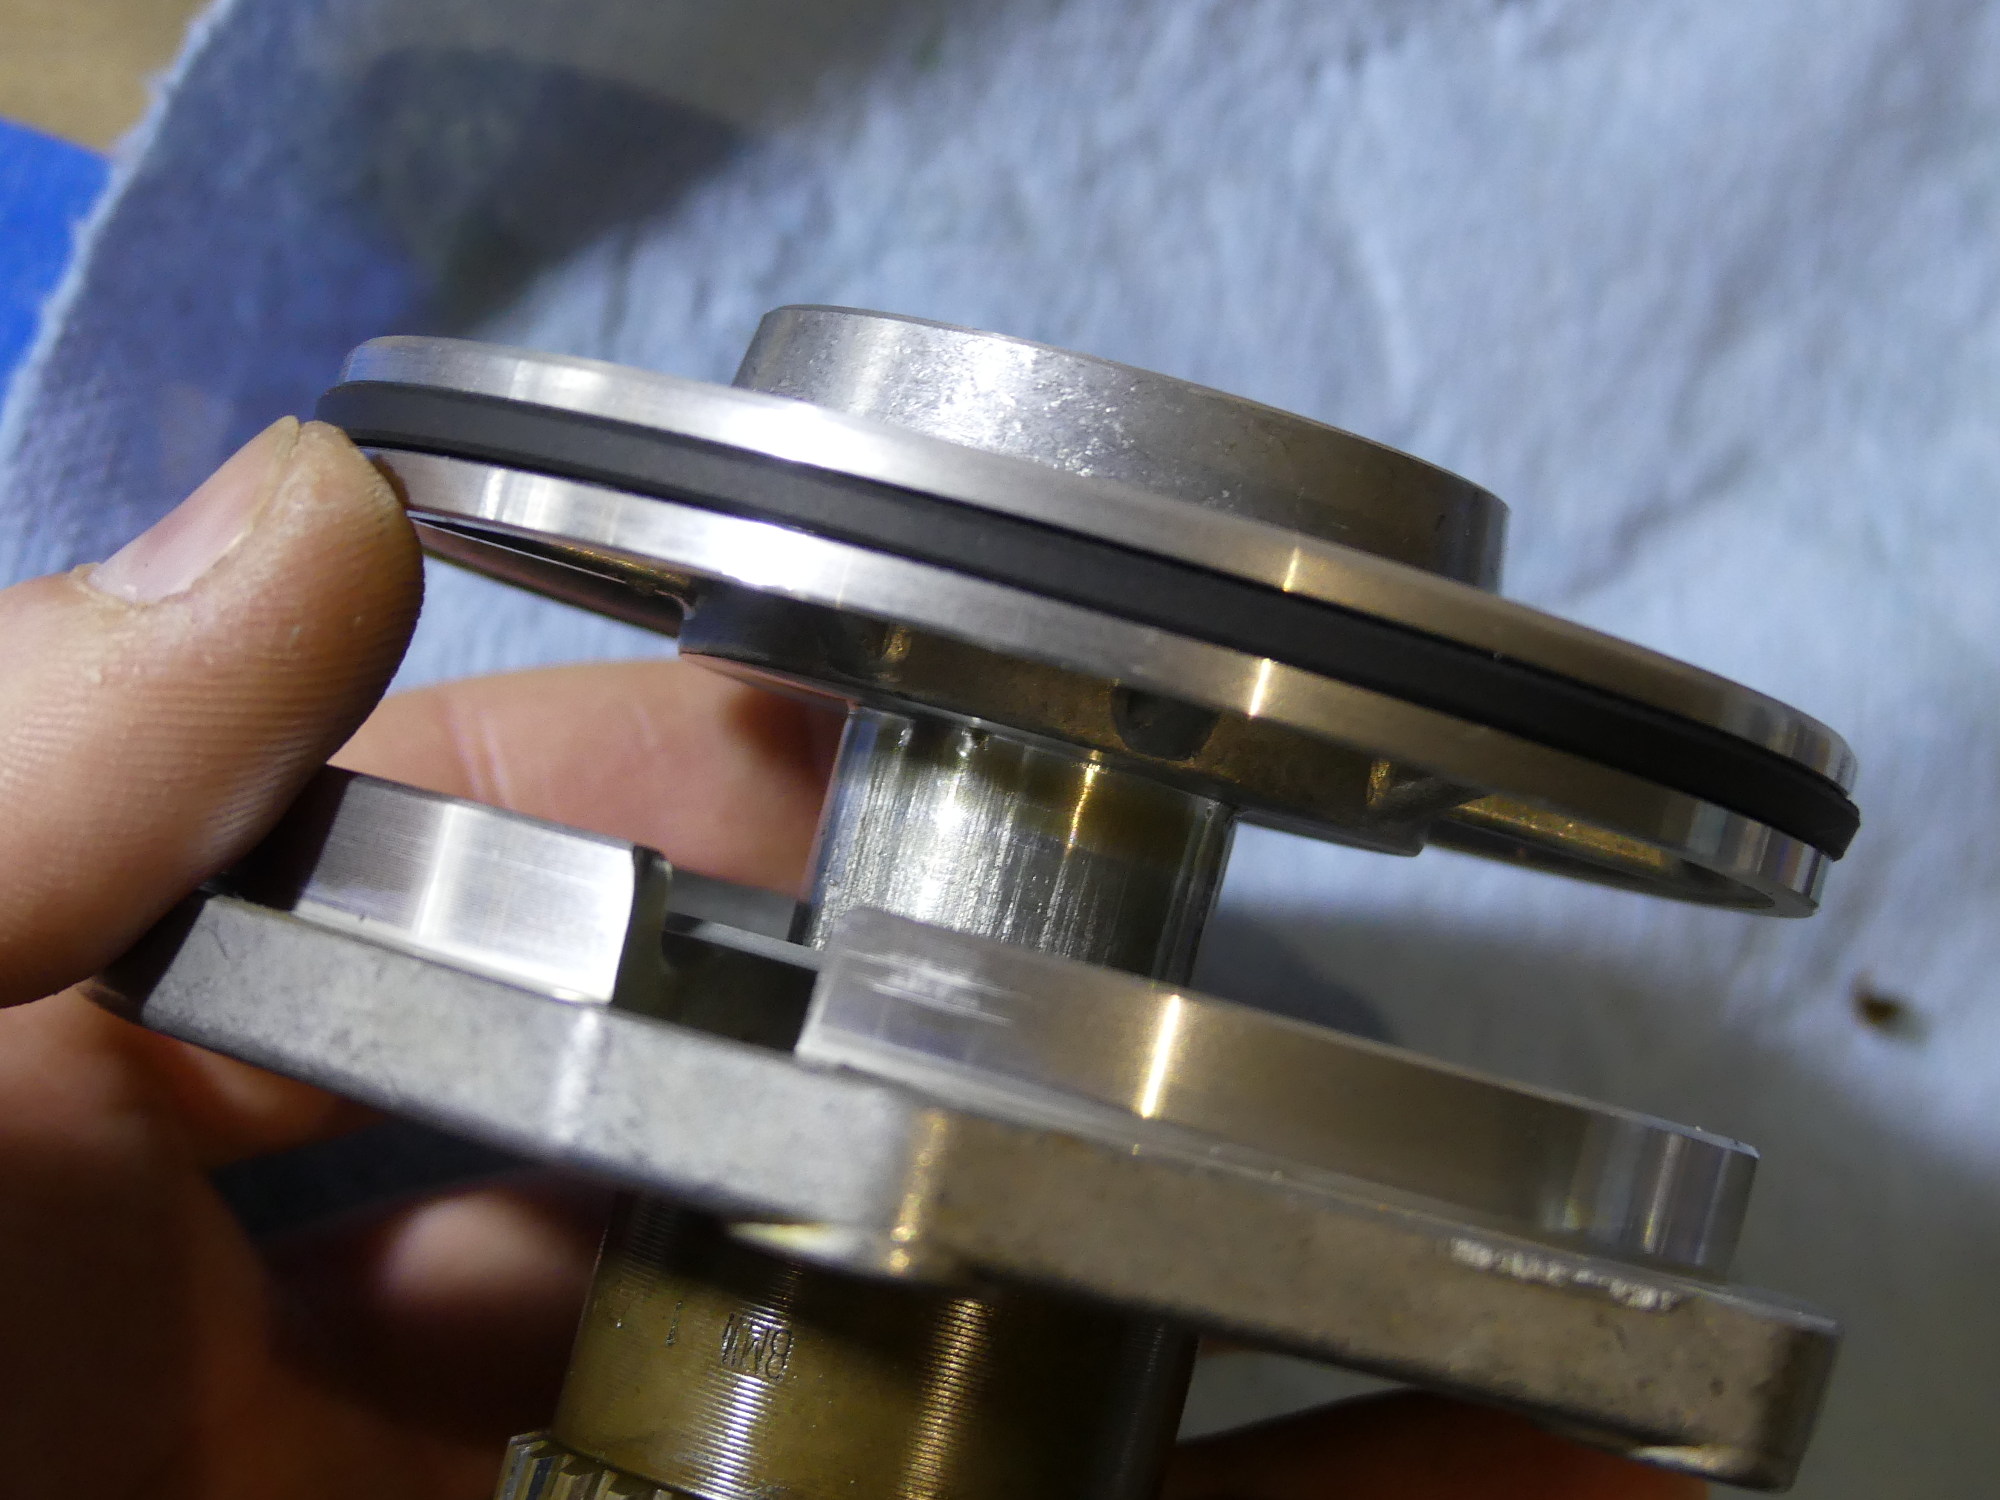 Here you can see how the newly installed seal (which is installed on top of a new o-ring) sits proud of the piston edge. This is prior to the resizing process. |
 The instructions also make reference to a bevel in the housing. If you click on this to look at the high resolution image and examine the shiny area just below the green arrow you'll see the bevel. |
 The VANOS rebuild is complete. Axial play and bearing preload appears to be optimal. I just need to ask Beisan systems why there is now little to no radial play. Some is apparently expected and necessary. |
Inspecting the unit prior to installation I noticed a good amount of radial (side to side) play and a bit of axial play (tilt) of the splined shaft / cup. After installation I noticed no axial play (as expected) but also no radial play. I also noticed when turning the splined shaft there was some mild resistance to rotation. The instructions specify that some radial play is "expected and necessary" and that some resistance to rotation indicates an appropriate amount of bearing preload and an "optimum fit". So the only question that wasn't answered by the extremely detailed instructions is "what if radial play is not present or extremely small?" I'll have to email Beisan about that.
Videos
Next Up
I've done all the work I can do until my machinist returns my reworked engine components, at which point I'll start the engine assembly.