


Tuesday, September 12, 2017
Engine Components Return From Machinist
A bit over four weeks after I dropped off my parts at the machinist he called to let me know everything was ready so I ran over with the pickup. Before I loaded everything into the truck we discussed the details of the work he performed.
The first topic related to the cleaning of the block. I pointed out that I expected the sides of the block to be free of all original paint and rust and to appear as raw cast iron. When I asked him whether the block was in fact shot blasted as we discussed he said it was. I then suggested that perhaps the problem was they didn't keep it in the machine long enough. His only response was that he didn't typically tell the cleaning company what to do beyond "tank and blast it". So this is the result of two blunders -- first, crappy workmanship by the cleaning company, and lack of ownership or assumption of responsibility on the part of the machinist.
On the topic of cylinder boring he said that he bored and honed for 84.5mm as recommended by TEP and JE. With an 84.5mm bore his measurements of the pistons suggested that there will in fact be 2.5 thou piston to cylinder bore clearance. My initial measurements suggested 3.0 or 3.1 thou, but the machinist said a lot of this comes down to the technique and instruments used to measure the parts. Based on my very limited experience measuring the pistons, I think this in combination with the fact that the skirt coating makes consistent measurements difficult explains the differences in measurements. I do not plan to measure the pistons again, but of course I do plan to measure the bores to ensure they are consistently 84.5mm. I should point out that the machinist said he waited to let the block cool down before tackling the finish honing, so I am expecting the bores to be damn near close if not dead nuts on 84.5mm. I should know in a couple days whether my expectations will be met.
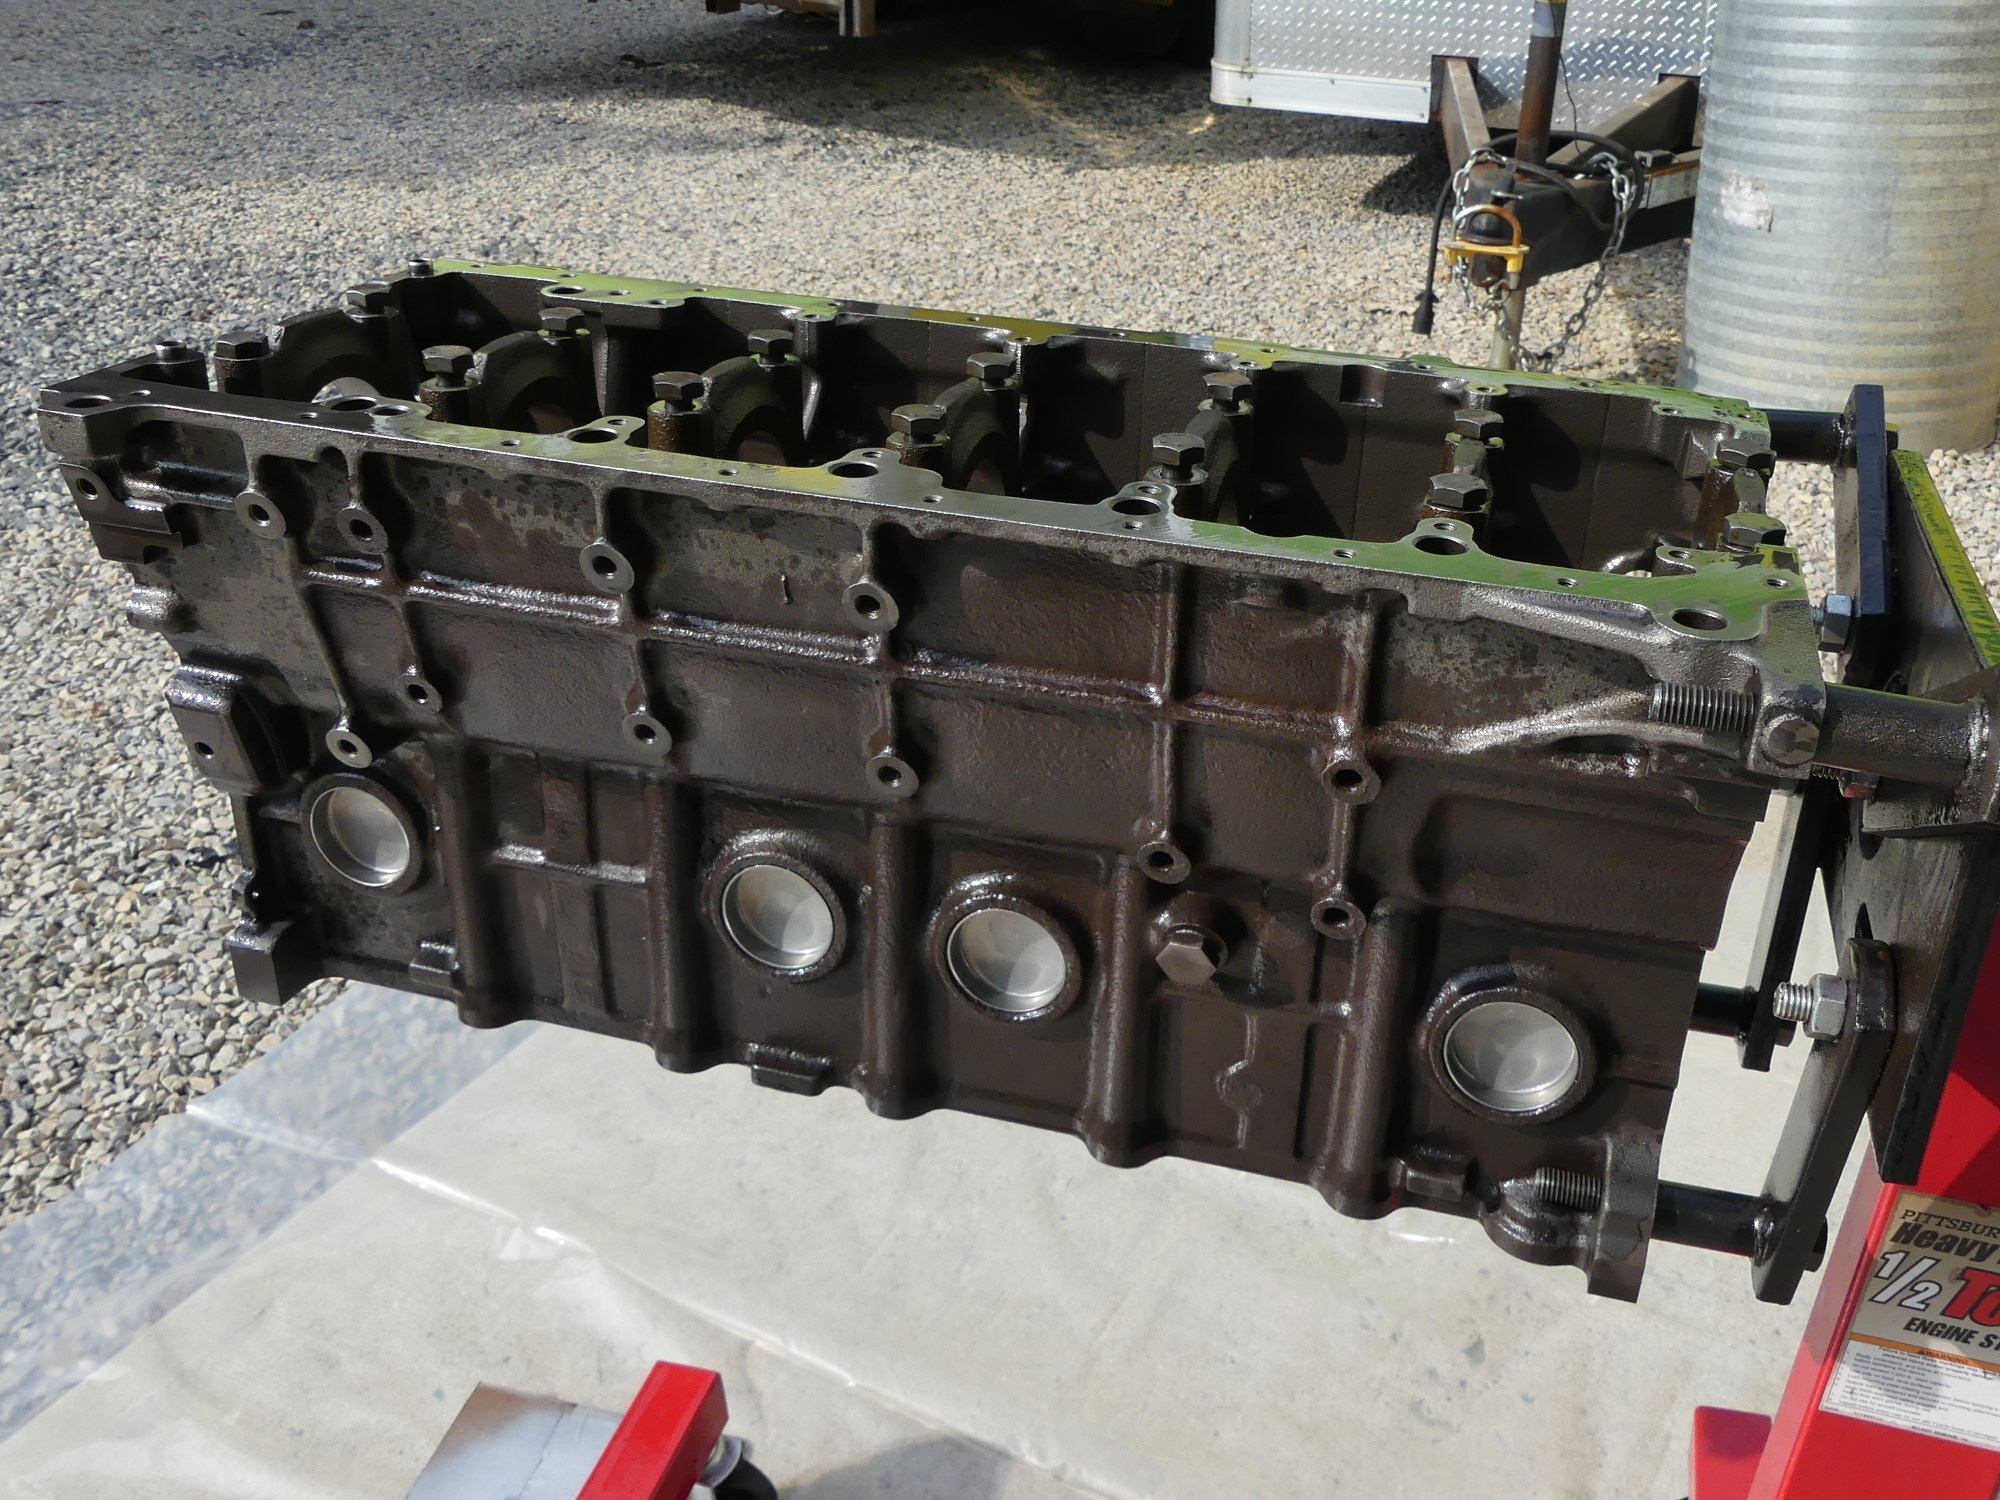
 Just off the truck, wrapped in plastic, my block returns to the garage for the build. The machinist rinsed the block prior to delivery so it was delivered "dry". I wound up rinsing it one more time prior to priming. |
 This clearly shows how much cruft was left behind on the exterior of the block. The interior was a bit cleaner, but I didn't even want the interior cleaned, particularly by shot, as it tends to roll off the sharp edges milled into the mains. |
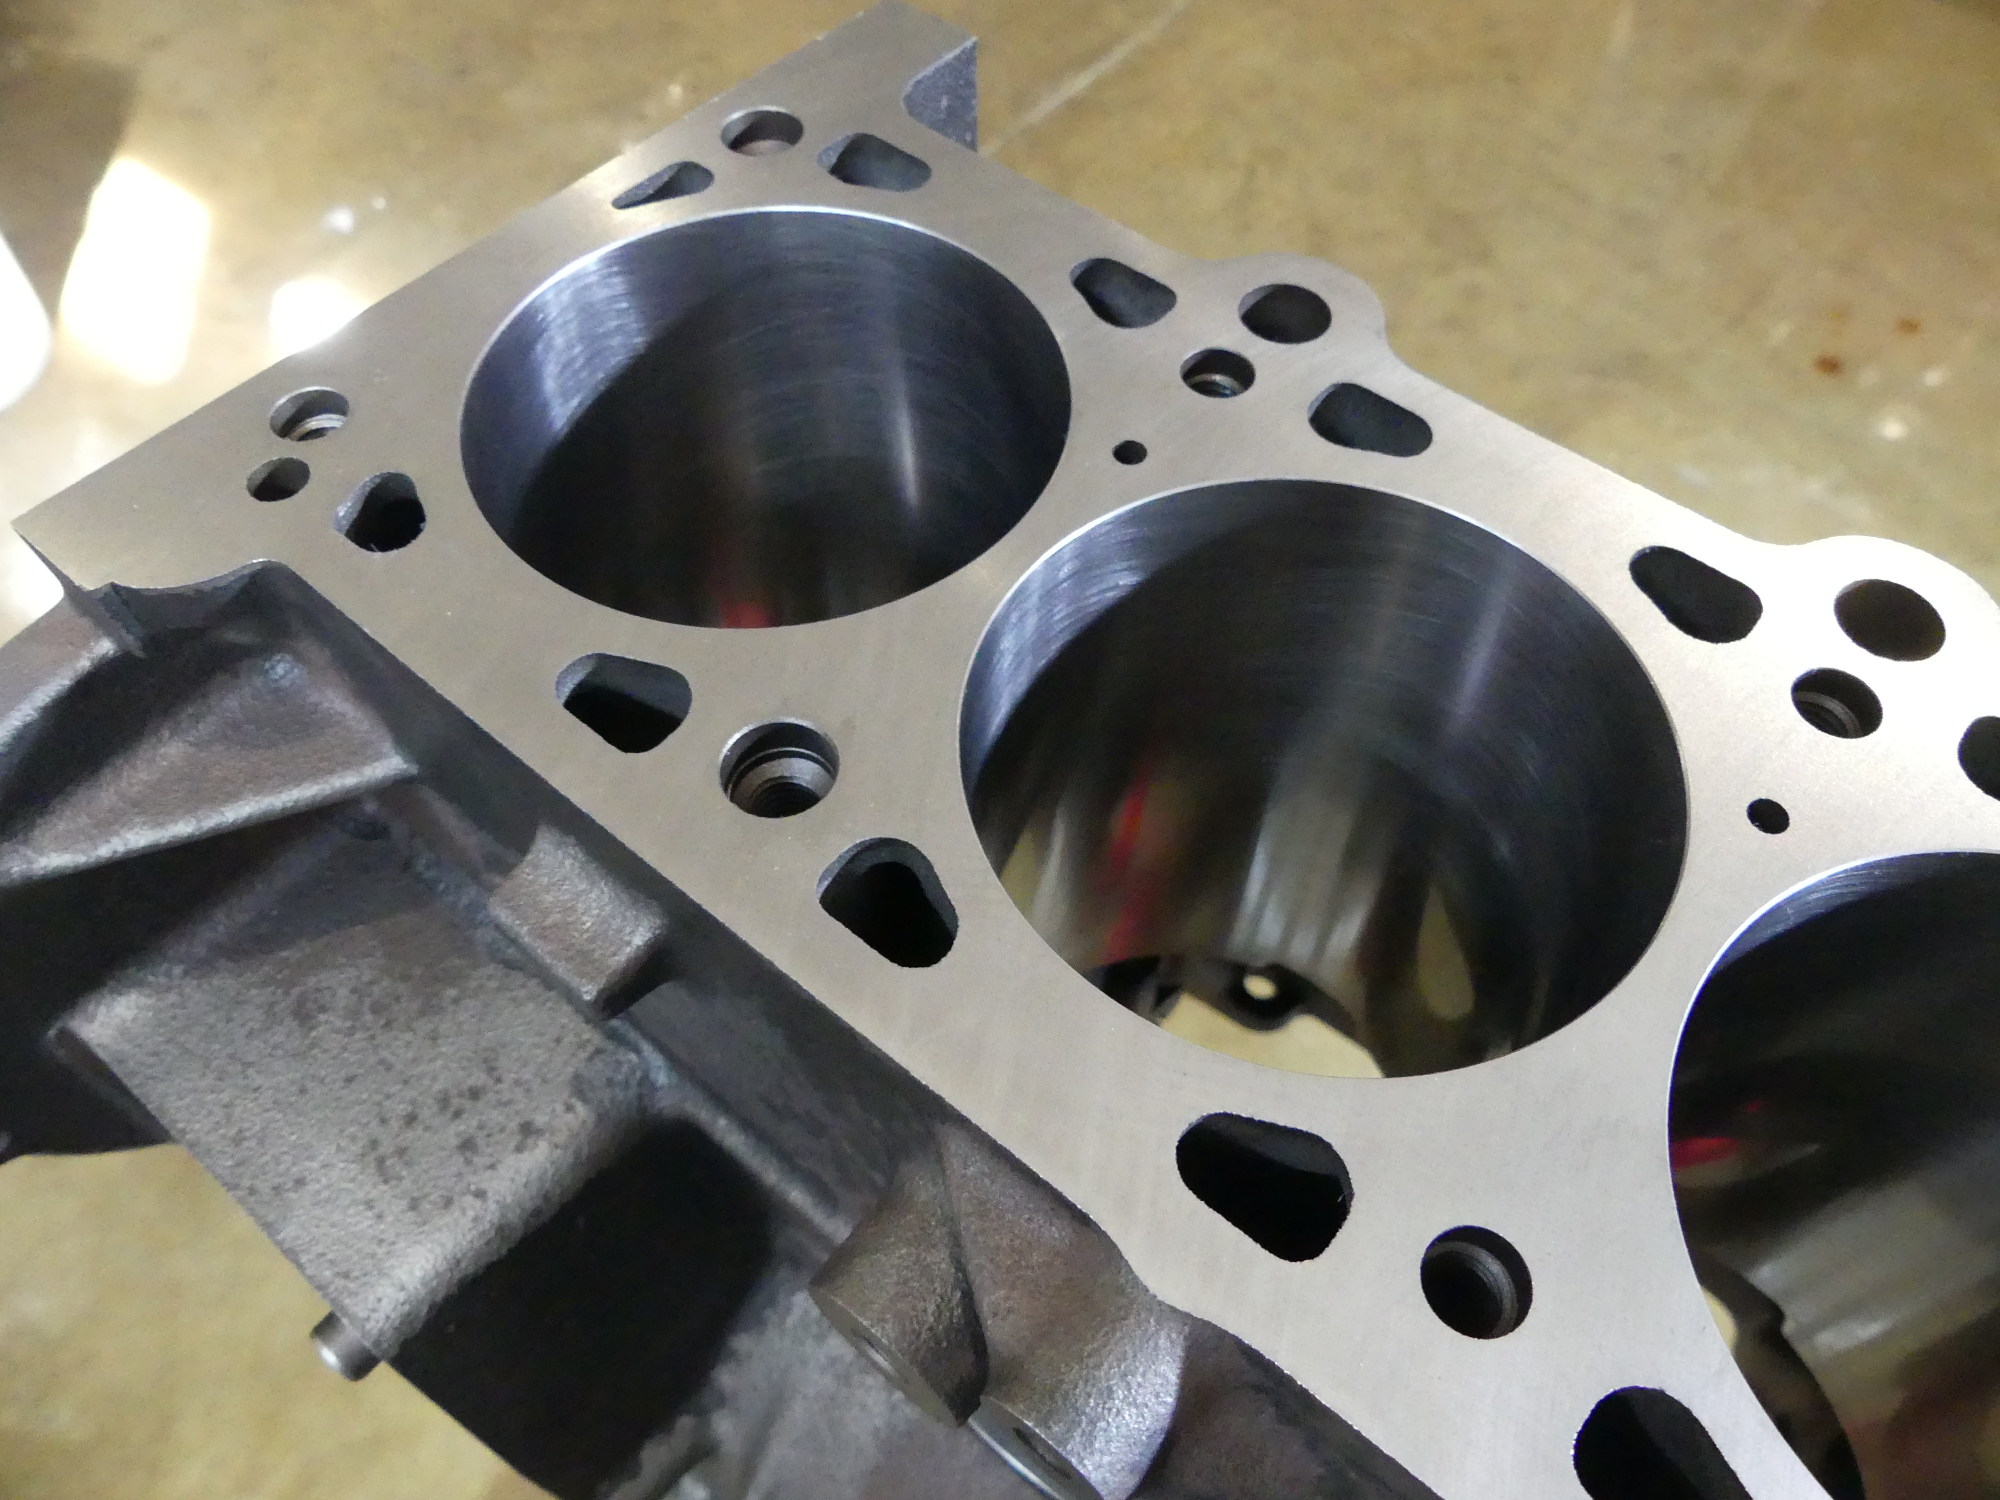 The deck was nicely refinished with only 4 thou removed. There are a couple areas outside the gasket (not shown here) that show the remnants of mild corrosion but those are unimportant. |
I then asked him to confirm that he applied a plateau finish to the cylinders and he said that he did apply that finish, but without going too far as a lot of people tend to do, particularly in race motors. As he explained, a plateau finish must strike a balance between chopping off the peaks that result during the honing process (which results in faster ring seating and more power earlier in the break-in process) and providing a sufficient valley to capture oil for normal and expected lubrication of the cylinder.
When I asked him for any tips on break in he said the number one guideline is to use a proper break-in oil and not a synthetic. He also confirmed my suspicion that most of the time they seat the rings with with a few dyno pulls, where the brake is applied to maximize loading on the engine while the engine spools to redline, creating maximum heat and pressure. Of course, my engine won't be dynoed prior to installation, but I can approximate the dyno pulls by carefully selecting a gear and doing several full throttle pulls in that gear. I'll talk more about this when the time comes. If you're wondering whether this differs from BMW's recommended break-in procedure, it most certainly does.
The topic of break-in naturally led to a discussion of the rings. He said that every JE ring he has ever seen has required trimming, but that this is far better than so called "pre-trimmed" rings designed for a specific bore because in his experience they typically result in inconsistent gaps across the set. This is due to manufacturing tolerances of the rings as well as minor differences in bore dimensions as a result of the machining process. I am now planning to buy a ring filing tool. My preliminary evaluation of that market reveals a clusterfuck of epic proportions -- stupidly designed, difficult to use, and unreasonably expensive manual tools on the low end, and ridiculously expensive powered tools that do the job reasonably well but not well enough to justify their price, particularly for the DIYer who builds one engine every 20 years. If there is a market in desperate need of innovation, this is it.
He then showed me the rods and said they were all straight as expected and the new pin bushings were honed to 3 to 4 ten thou clearance. It turned out that all of the rods were balanced to within a half of a gram. Four of the rods were very close (within a tenth of a gram) but two were a bit farther out. A similar pattern emerged with the pistons. I had labeled the rods and pistons 1 to 6 and he referenced that numbering when recording the weights but he suggested I mix and match the pistons and rods to achieve the most uniform assembly weights possible. I am planning to use the numbers he provided to come up with the initial matching and then use a digital scale to confirm the numbers. I doubt my scale is particularly accurate in absolute terms but it should be sufficient in relative terms to help me arrive at six closely weighted assemblies. Of course, we're talking tenths of a gram here, so I'm reasonably confident that even if I did nothing and randomly selected the parts to create the assemblies I'd easily meet my spec of ± 2 grams, to say nothing of BMW's maximum of ± 4 grams.
Although the crank was wrapped in shrink wrap for the trip home I was able to inspect the journals to find them much smoother than before. Although hard to believe, the machinist said that even after polishing, the crankshaft measured to "yellow" specs "give or take a tenth" so I am expecting to use yellow bearings for most positions. Of course, the bearing ranges only differ by a couple tenths so the devil is in the details. I will obviously need to measure the crank to more precisely select the correct bearings for each position.
The final invoice was for a mere $15 over the original estimate, which, as I have said before, was $1200, or $200-300 over what others quoted me. This was a good thing since I wasn't in the mood to discuss any increase in cost, particularly considering it took him over twice as long as his original "worst case" estimate to complete the work and the block wasn't cleaned to my satisfaction.
Block Prep and Priming
Although the machinist applied a preservative oil at some point in the machining process it was removed during the final rinse prior to delivery so at this point the block was dry and time was of the essence. My top priority was to rinse, mask and prime the block so that it would not continue to rust.
I donned the same Tyvek suit I used during the body degreasing effort, put on nitrile gloves, and safety glasses before I once again used my spray wand to apply mineral spirits under pressure to rinse the block. I looked carefully at the initial runoff and while it was quite clean I did notice a slight brown tint at first, indicating it was likely removing some of the flash rust. Once done with the solvent I dried the block with compressed air to get ready for masking.
 Yet another rinse, this time with mineral spirits. Water based degreaser would have been a very bad idea because it would have taken forever to thoroughly dry and promoted yet more rust. |
 Oddly satisfying was the masking of the deck. I achieved this by rubbing the side of a fresh box cutter knife over the sharp edge. I then simply pulled the scrap of tape away. |
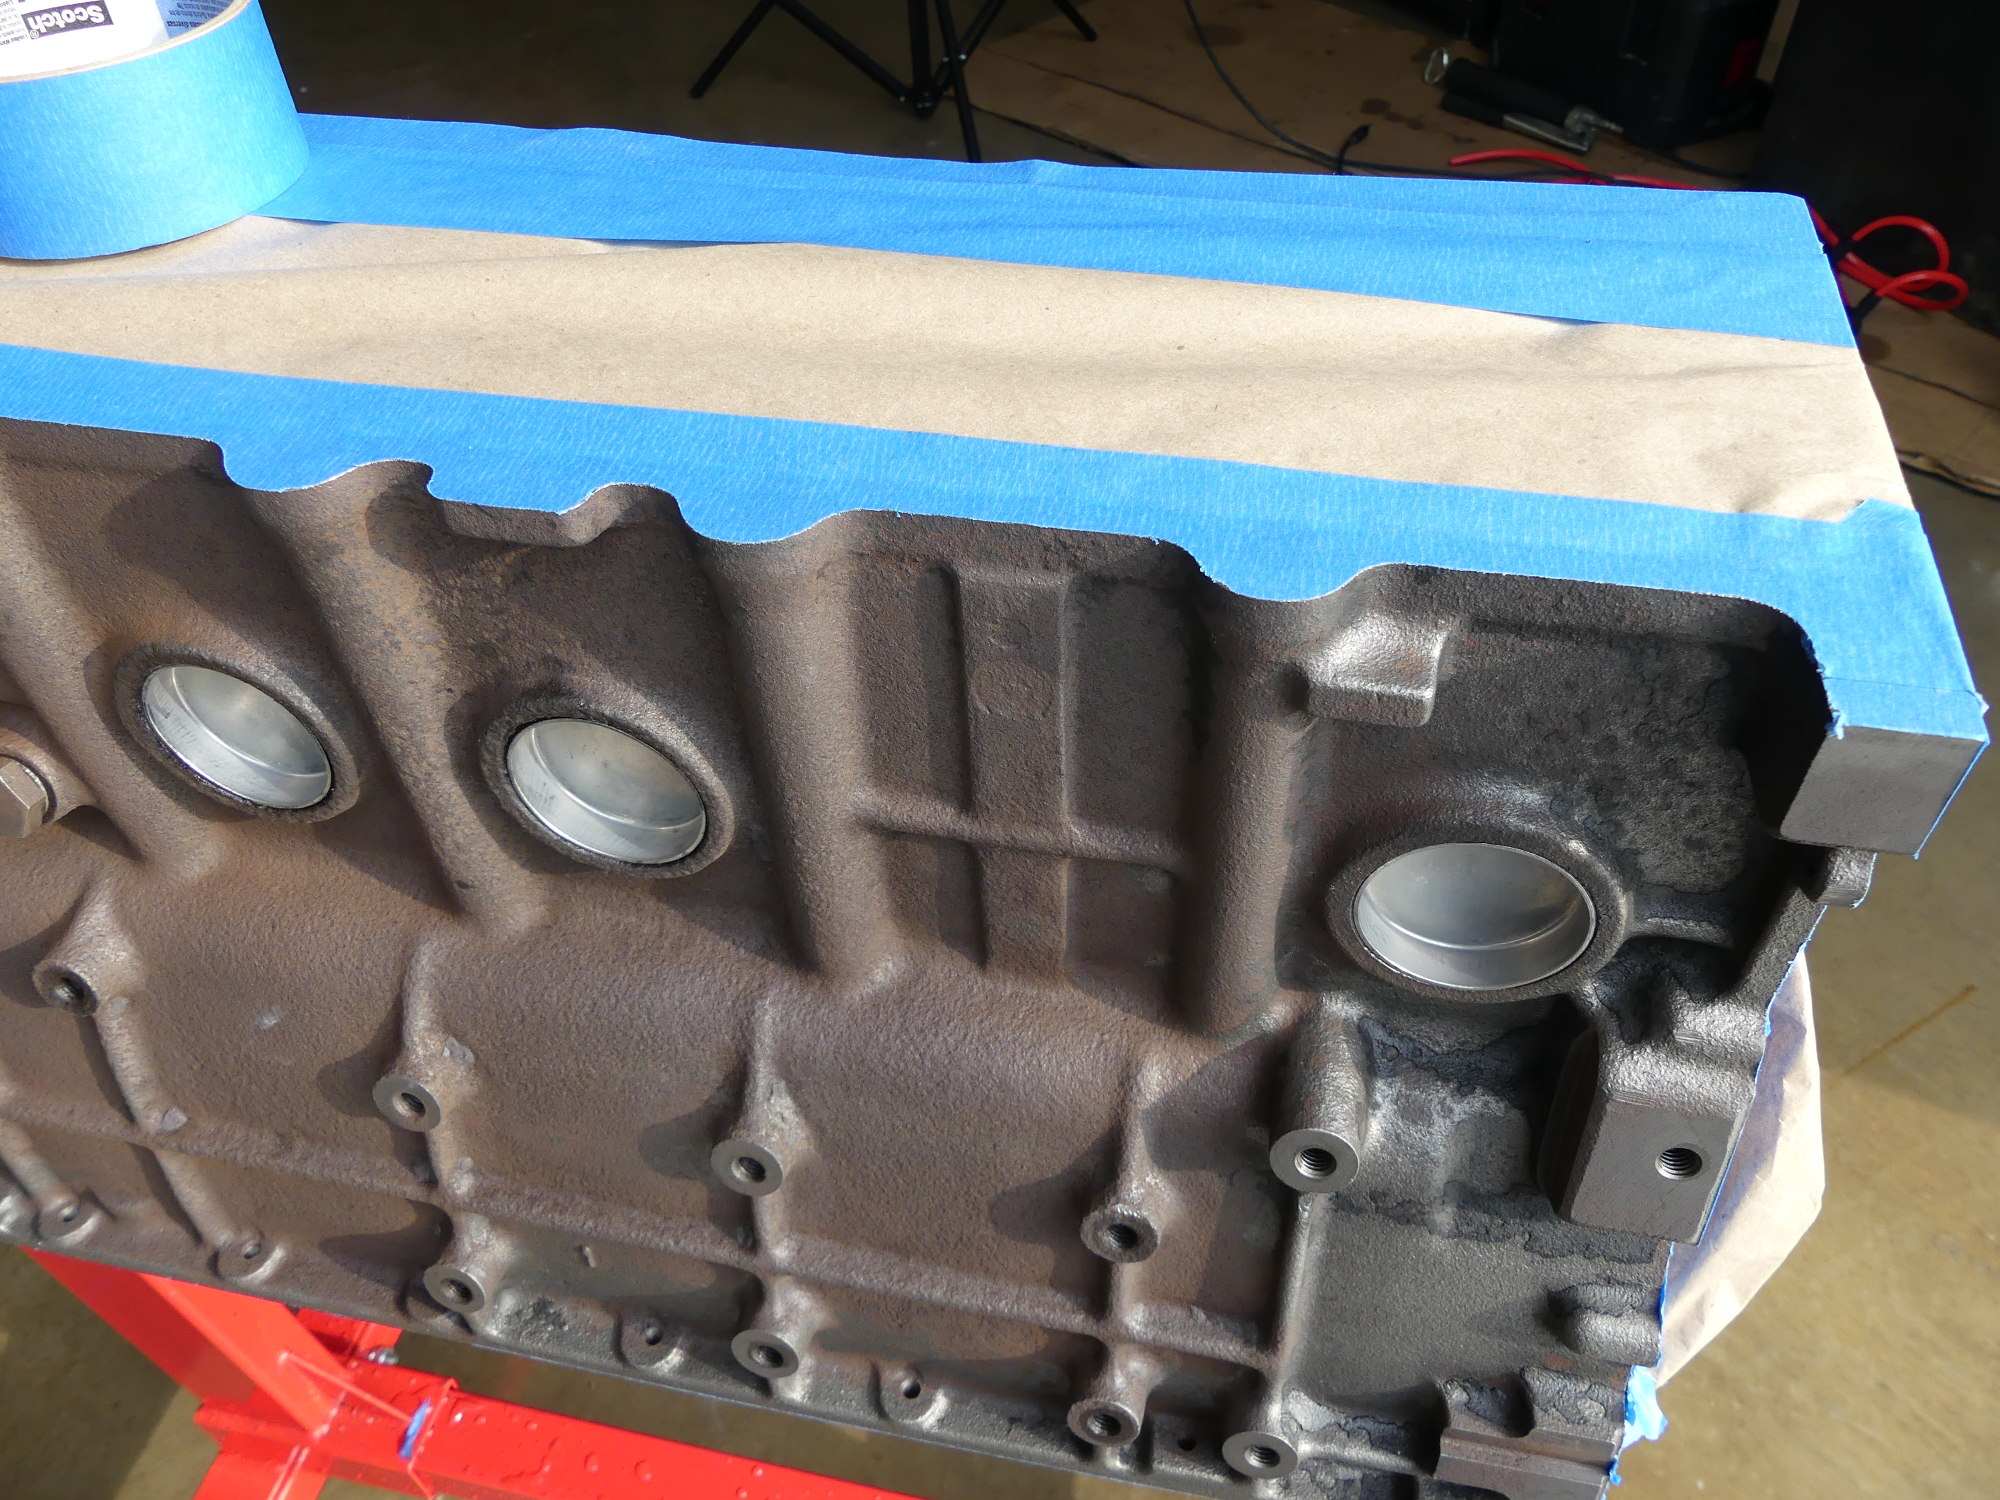
 The masking turned out to be more elaborate than I expected. I've covered only the bosses / threads I know will be used. The others are left to acquire paint for corrosion protection. |
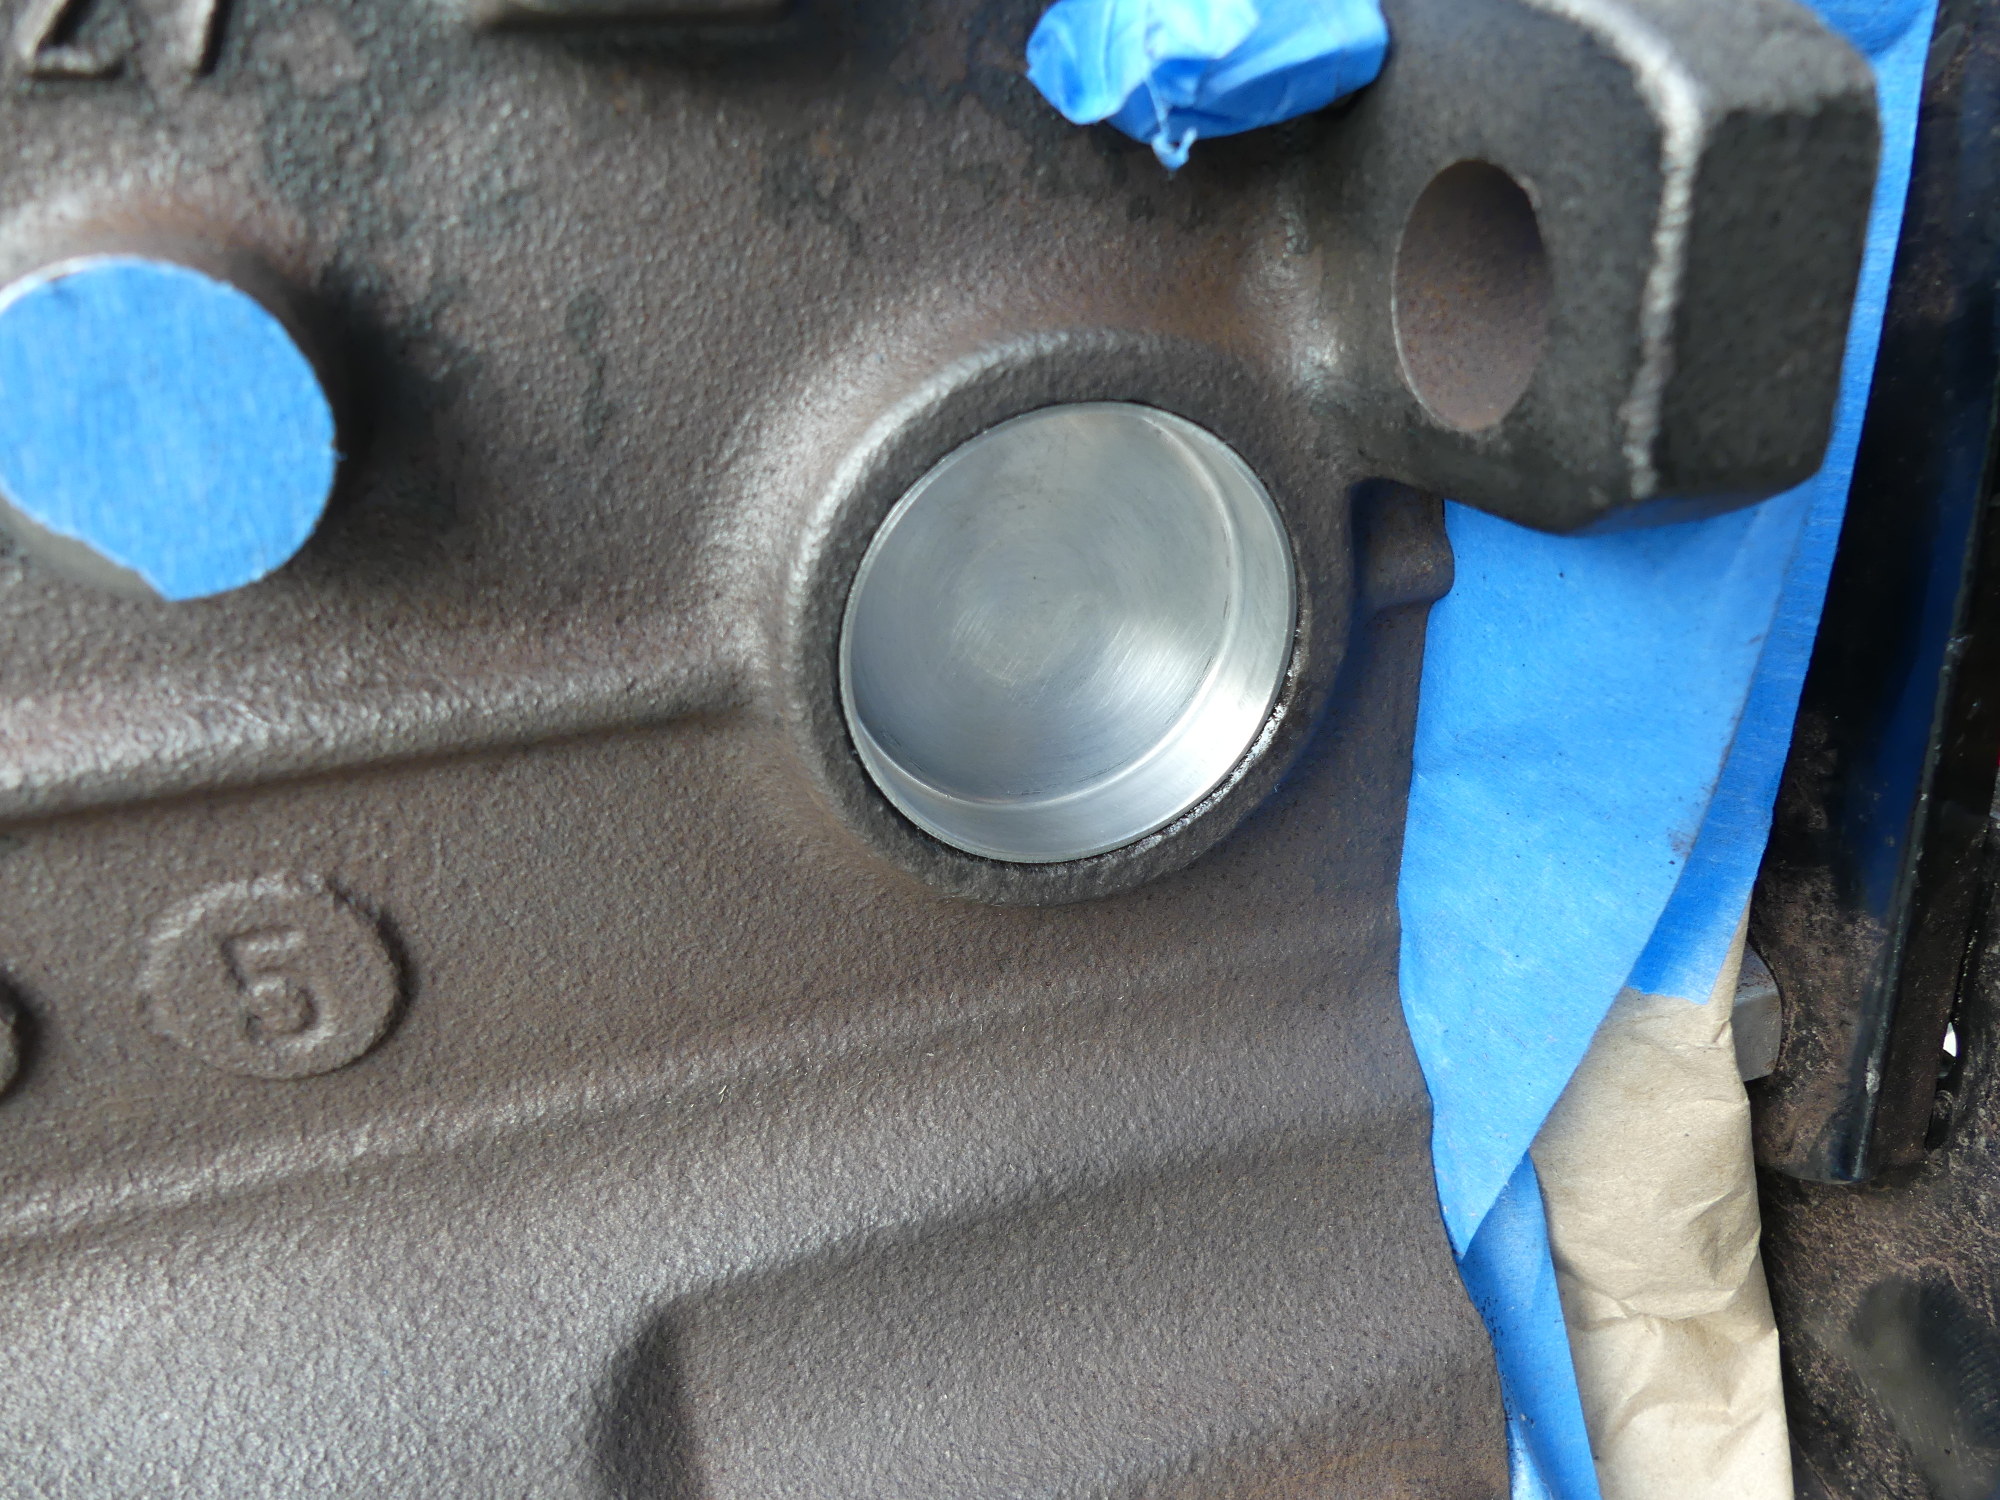 I've seen a lot of repainted blocks with paint coming off the freeze plugs, and my assumption is that they were not scuffed and cleaned with solvent, as all of my plugs were by this point in the process. |
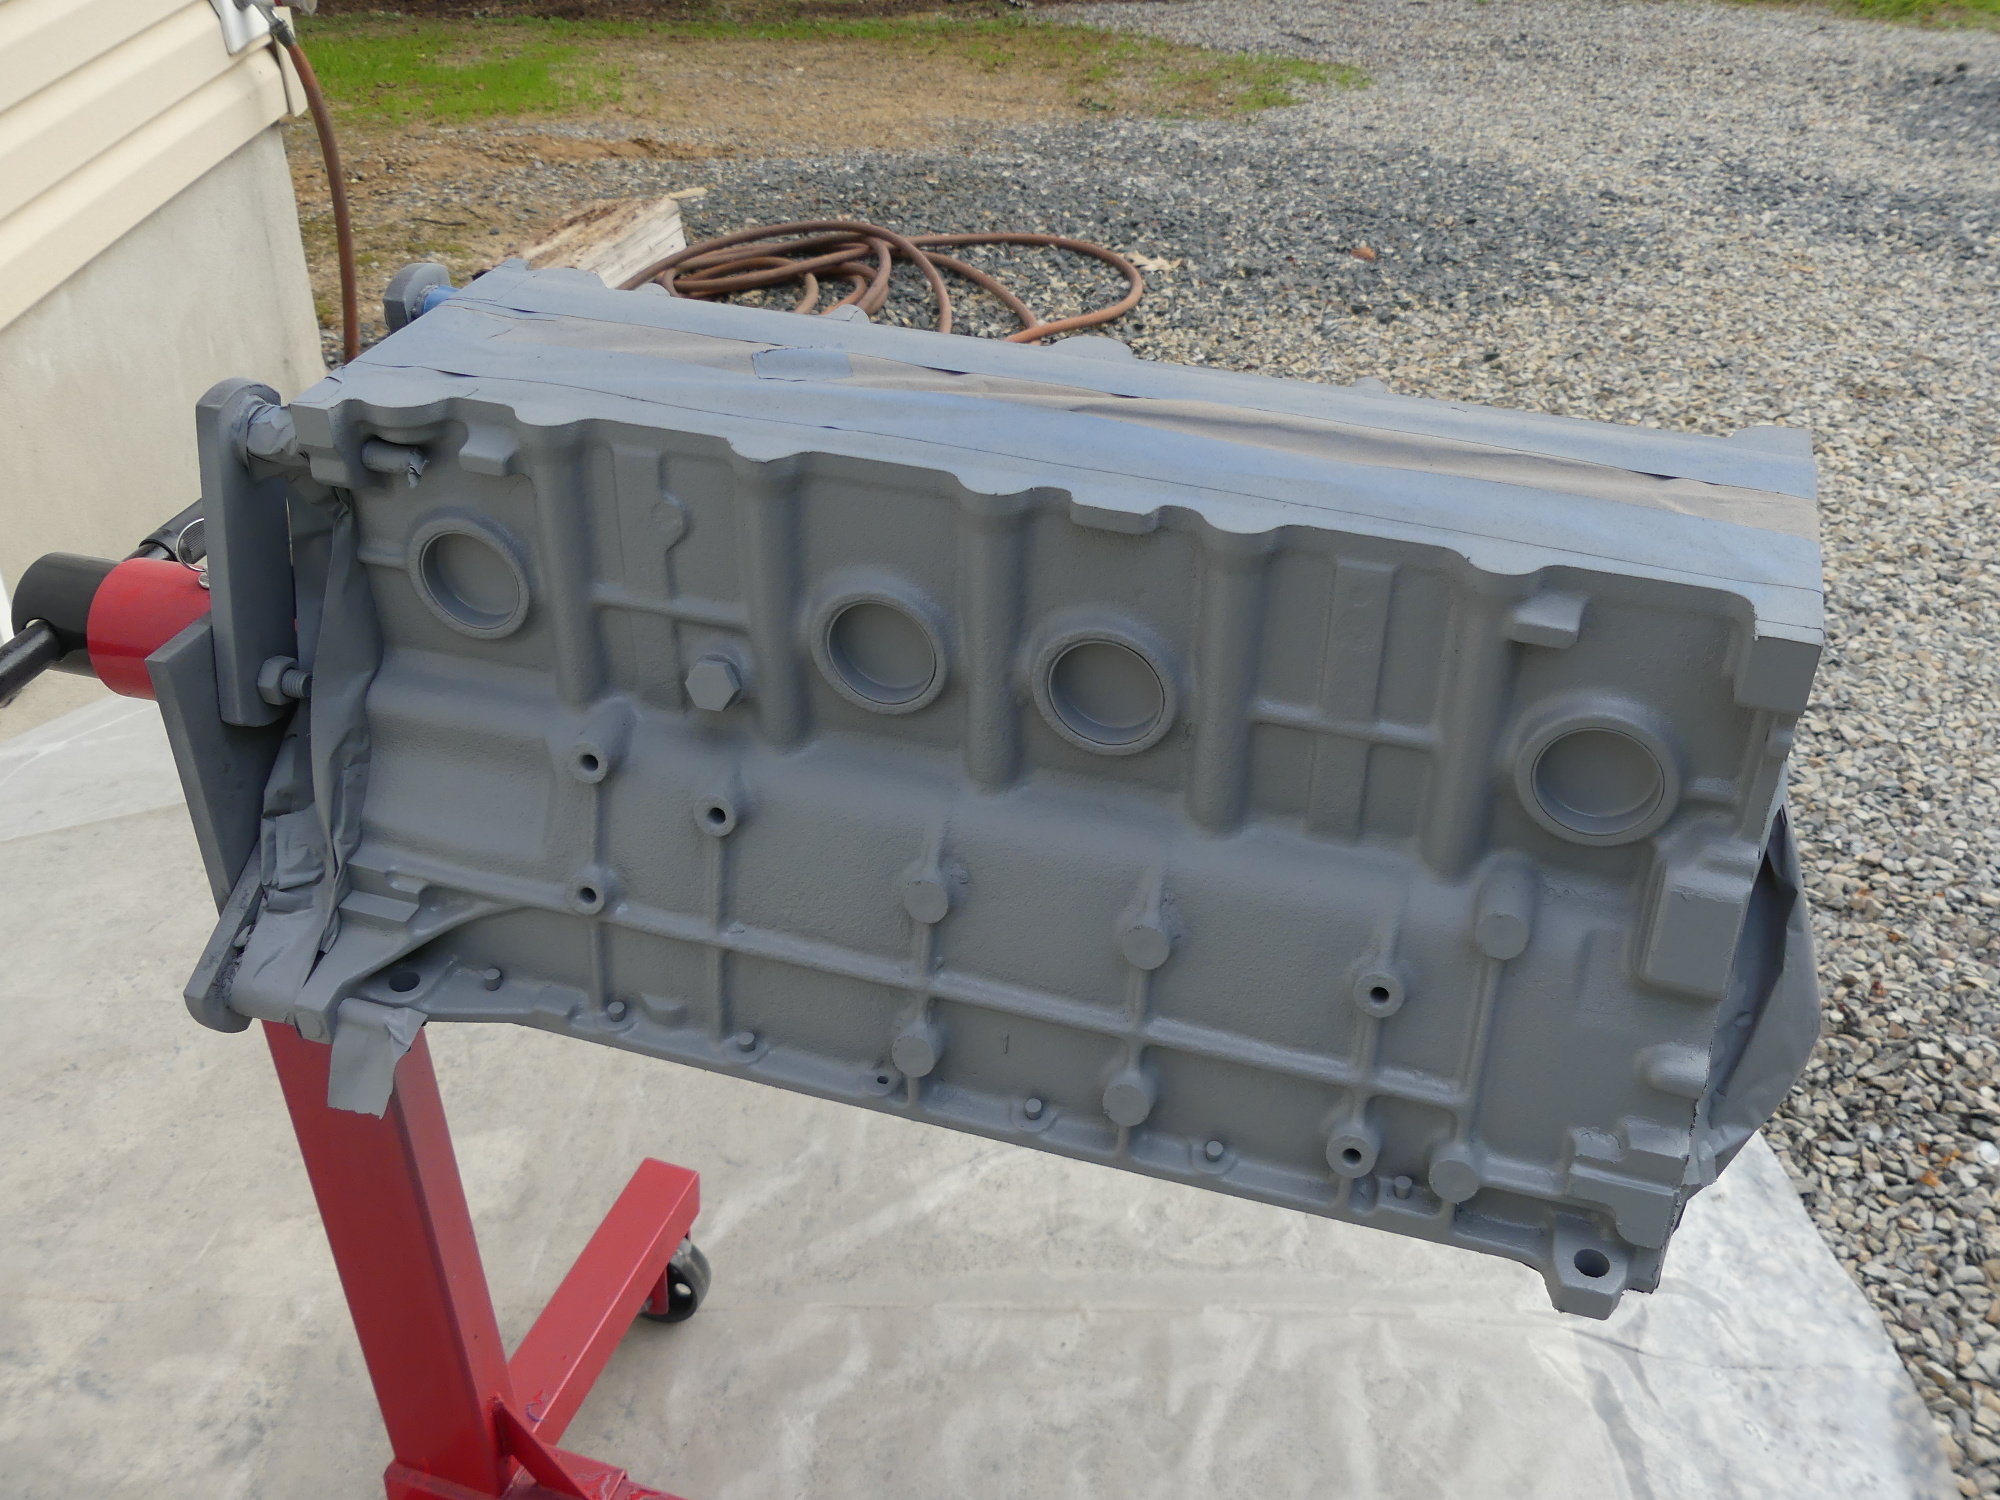 The exhaust side of the block with primer applied. The Eastwood primer goes on wet as expected and then quickly cures to a flat finish. Note the small silicone pegs in each of the oil pan through holes. |
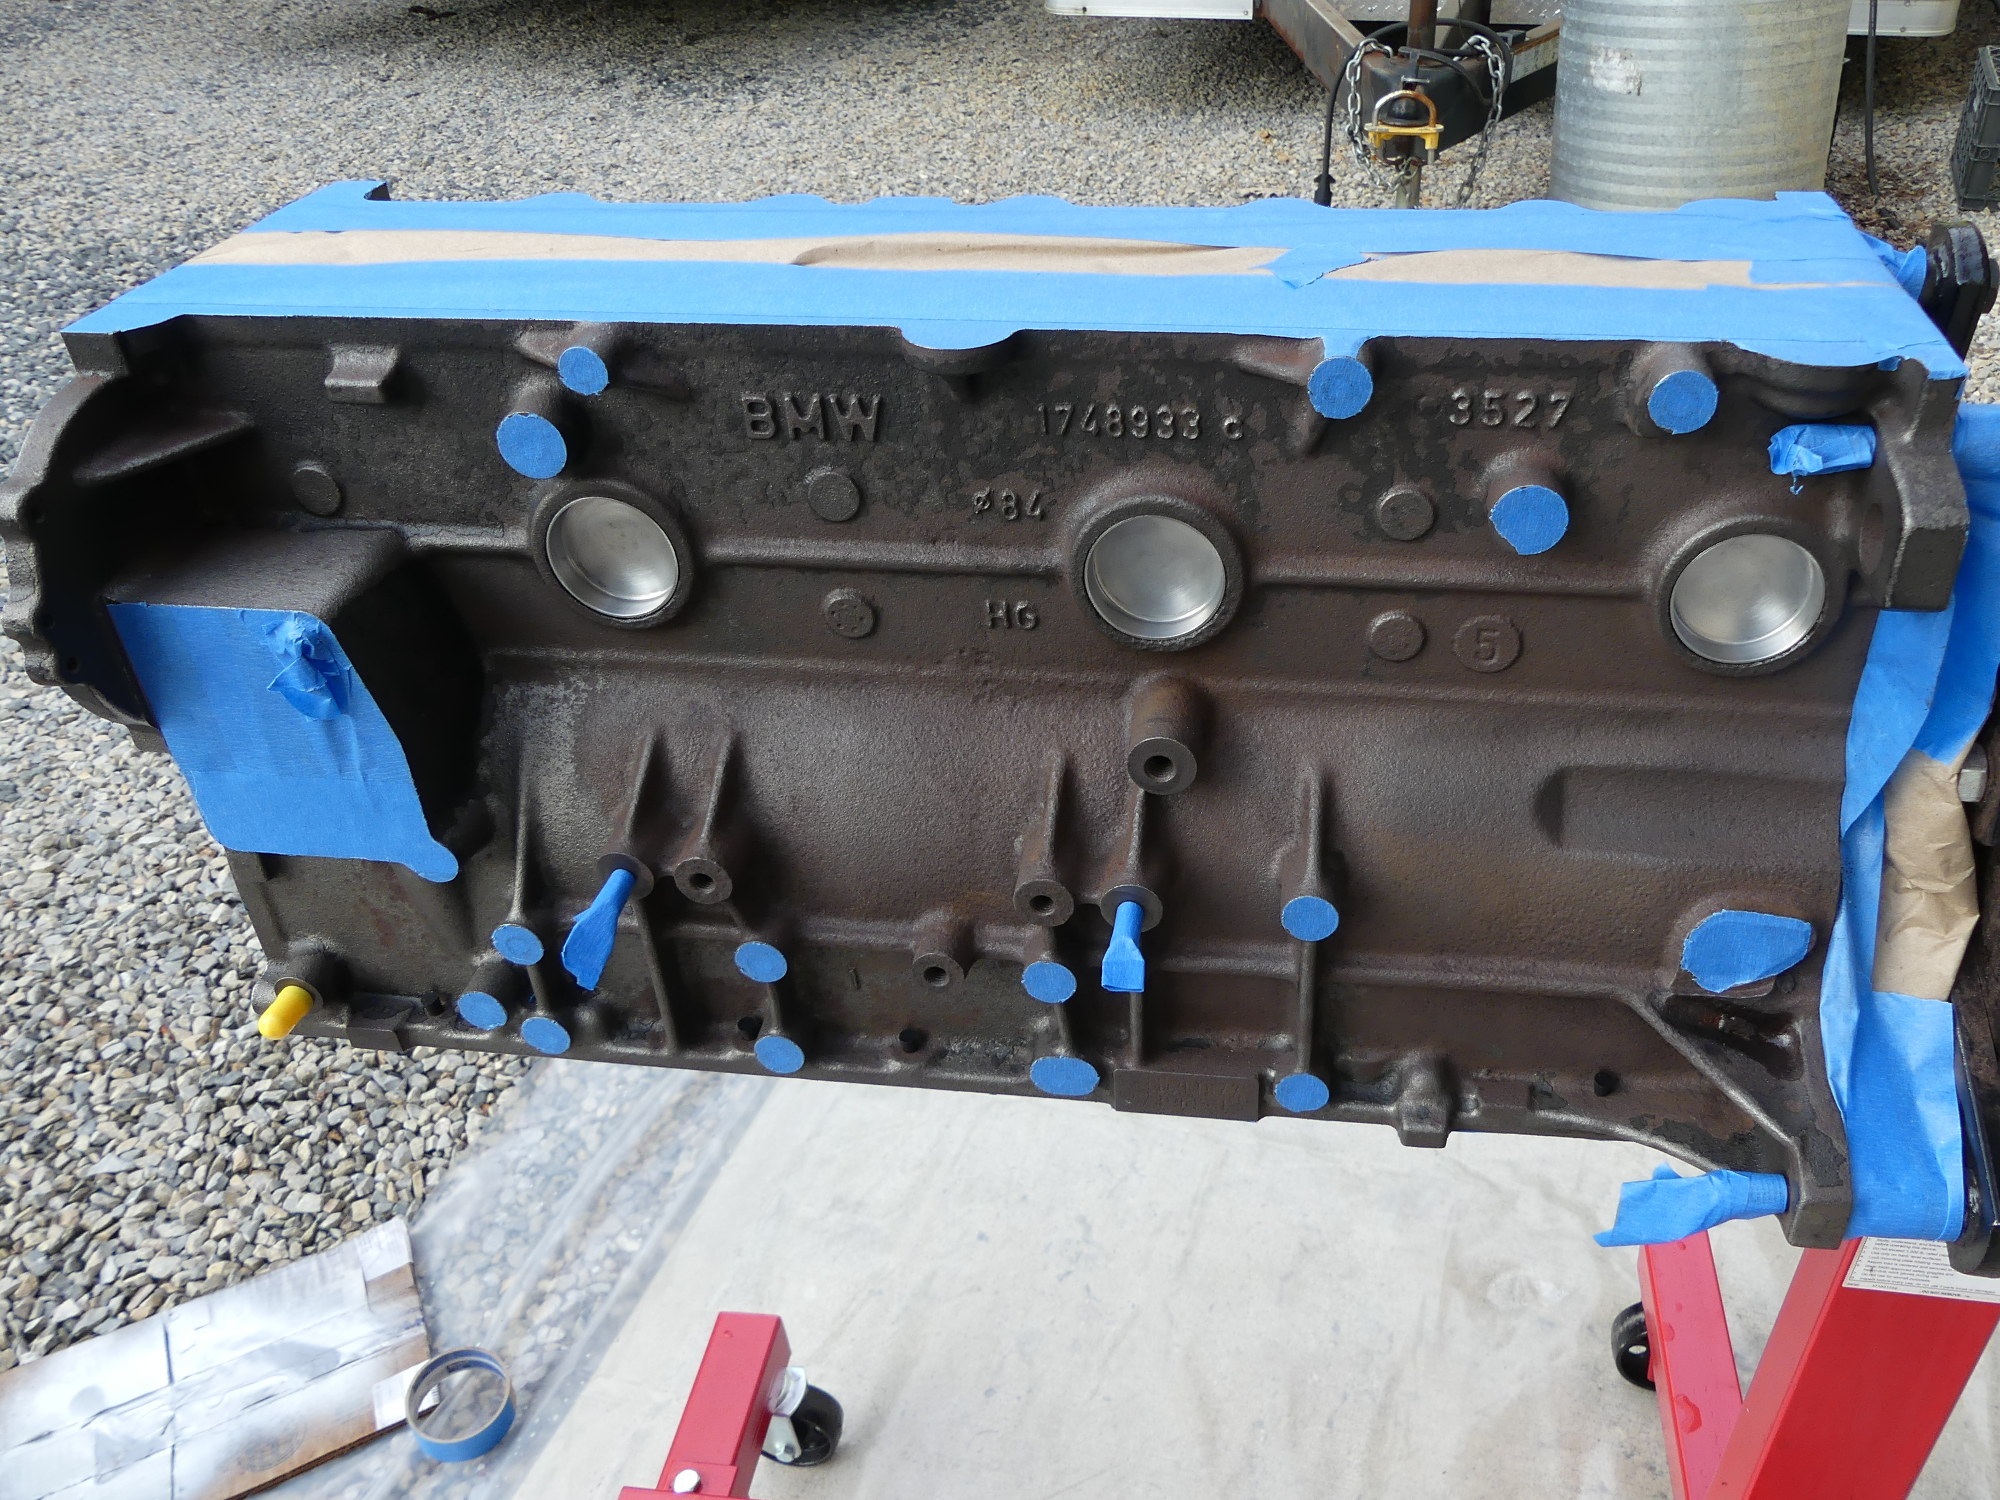
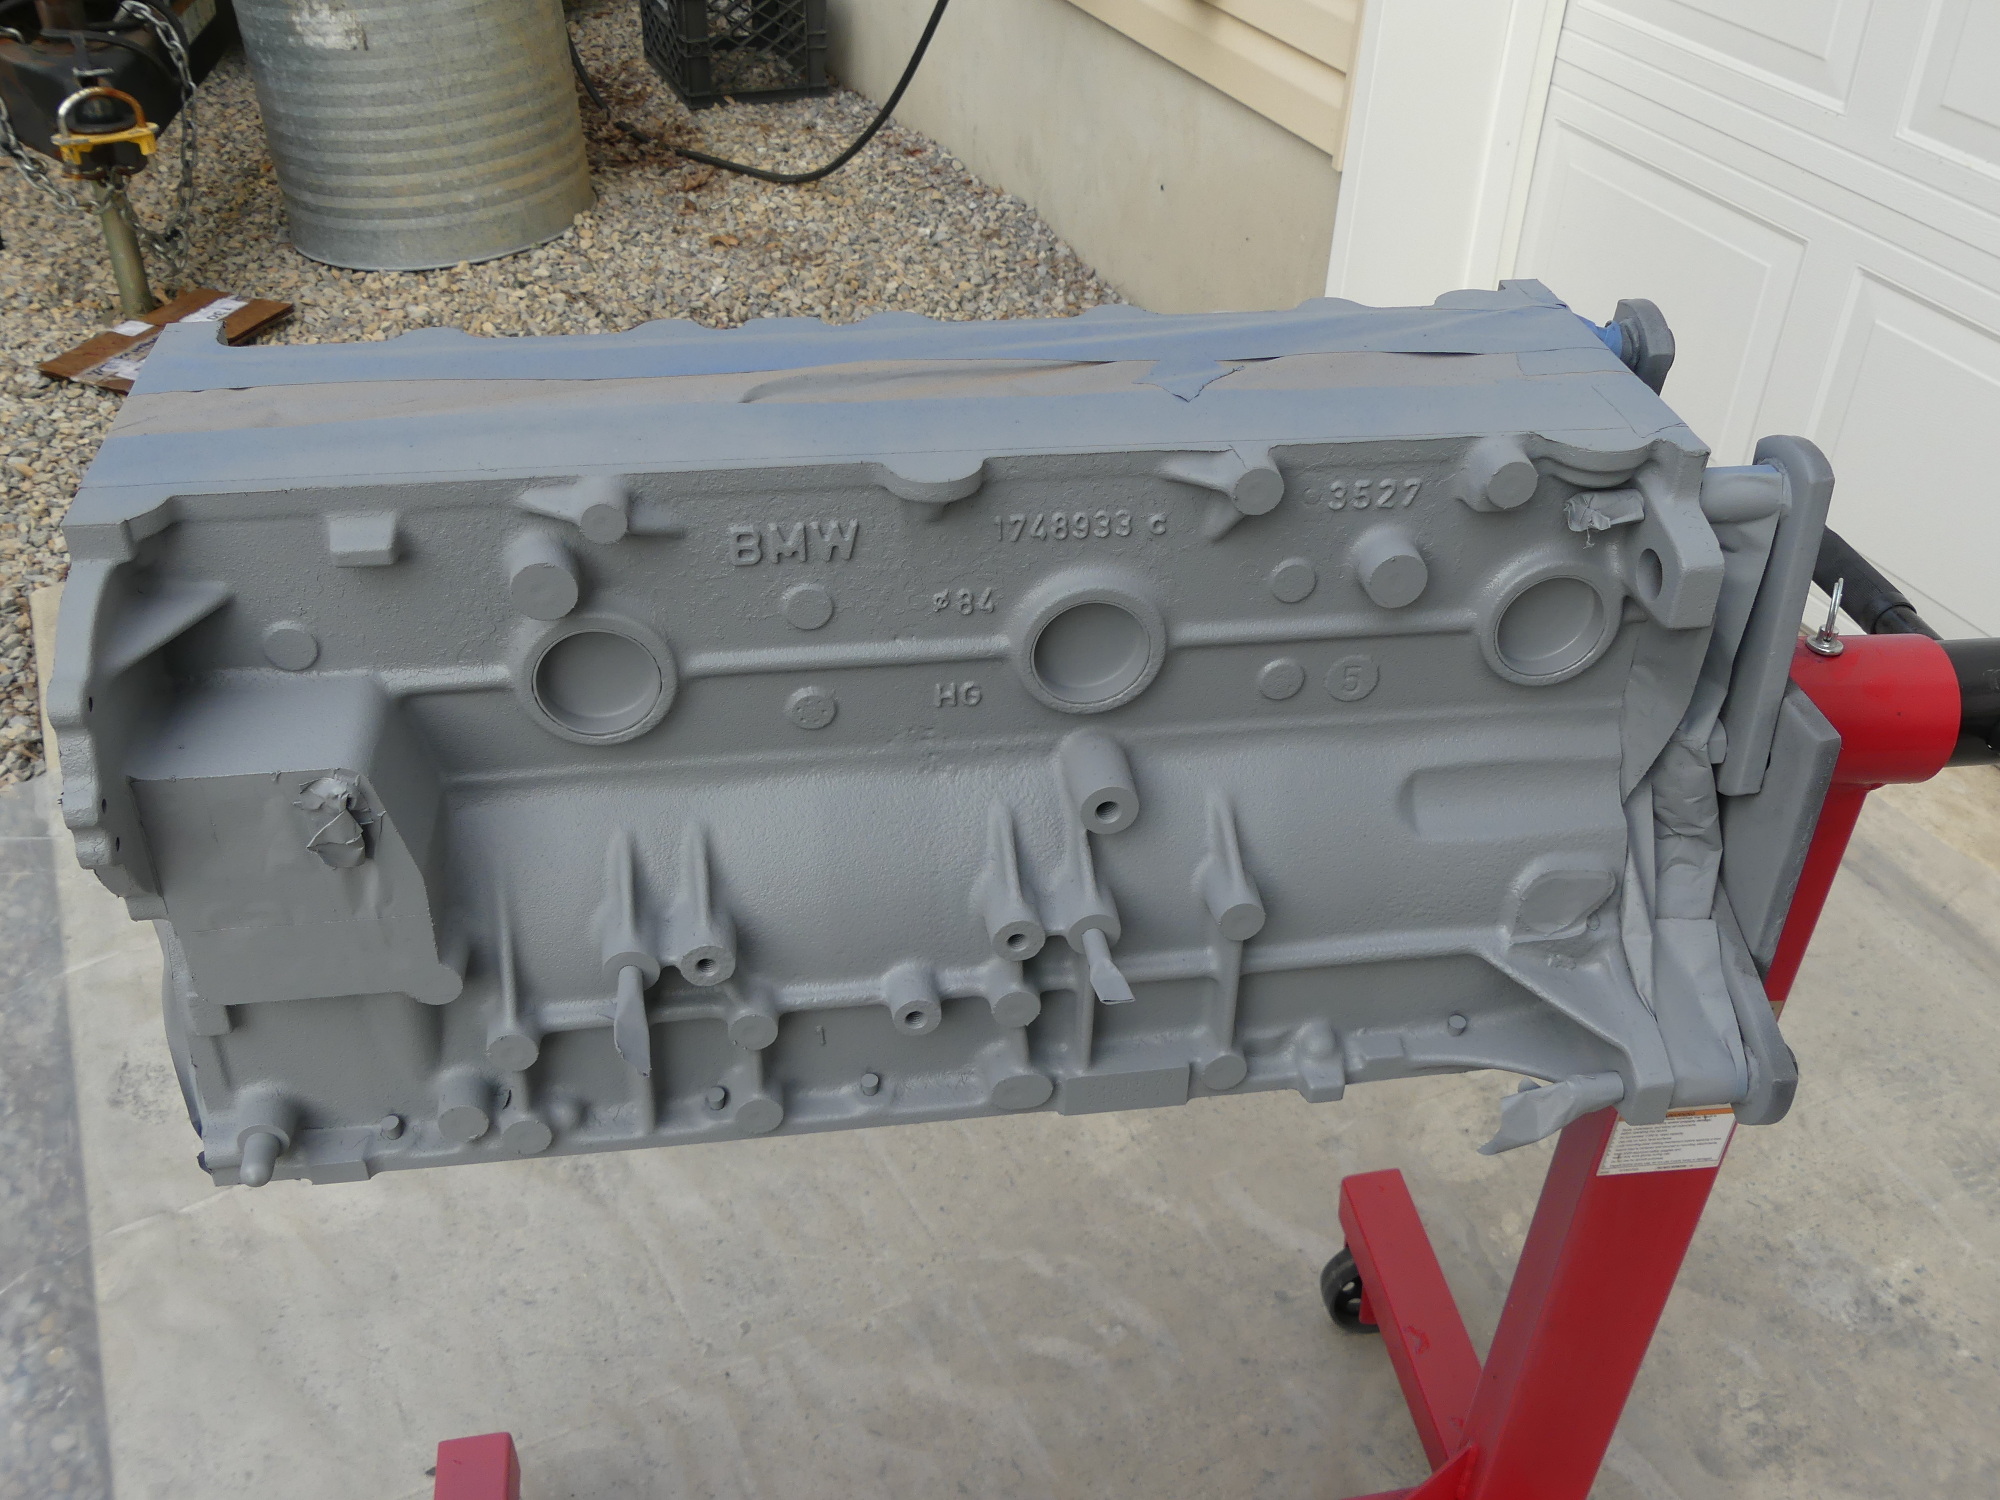 Better lighting on the intake side better represents the the end result. As a catalyzed paint the primer requires at least 30 minutes before the top coat is applied. My top coat will go on around 12 hours later. |
The masking process took nearly an hour and used nearly an entire roll of blue tape as well as a modest amount of brown masking paper. As you may be aware, not all of the holes threaded into the block are used in all applications and so it was with my M52. As a result I masked only those bosses that I expect to use to attach the engine mount supports and other brackets. I did not mask off the various bosses and threads that are not used in my installation, mostly to discourage further corrosion in those areas.
Once the masking was done I rolled the block out on the concrete pad, donned a respirator with VOC cartridges, closed the garage door to prevent any odor or overspray from entering and then got down to the business of priming the block. For this I used Eastwood's high temp Aerospray 2K primer. I followed the directions, which included shaking the can for two minutes, puncturing the activator cannister, and then shaking another two minutes before applying the paint in long strokes along the block.
I applied a very thin coat at first, waited a few minutes until the appearance changed from slightly wet to flat, and then applied another thicker coat to ensure complete coverage. A few minutes after that I rotated the engine in the stand to ensure I got a few hard to reach areas and applied another light coat from a different angle to get any areas that may have been shadowed. That consumed almost all the paint in the can. The remainder will be usable tomorrow for any touch-ups I may require but as the pot life is 24-48 hours I'll have to use it relatively quickly. What I can report at this point is that one can is certainly enough to apply 3 thin coats on two faces of a BMW block. I am also reasonably confident that had I wanted to paint the front and rear faces of the block (I'm not advocating that, by the way), I could have done so with the same can.
In deference to my brother, who recently complained about the various smells in his garage left behind by a cocktail of paint, mineral spirits, brake cleaner and degreasing agents I left the block outside for 15 minutes to offgas as much as possible before pulling it inside and setting off for home.
Next Up
Tomorrow I'll pull the block outside again, apply the top coat, and start measuring the crank while I wait about 24 hours for the paint to fully cure.