


Do-It-Yourself Tire Replacement
for the Cessna 172
Page 1
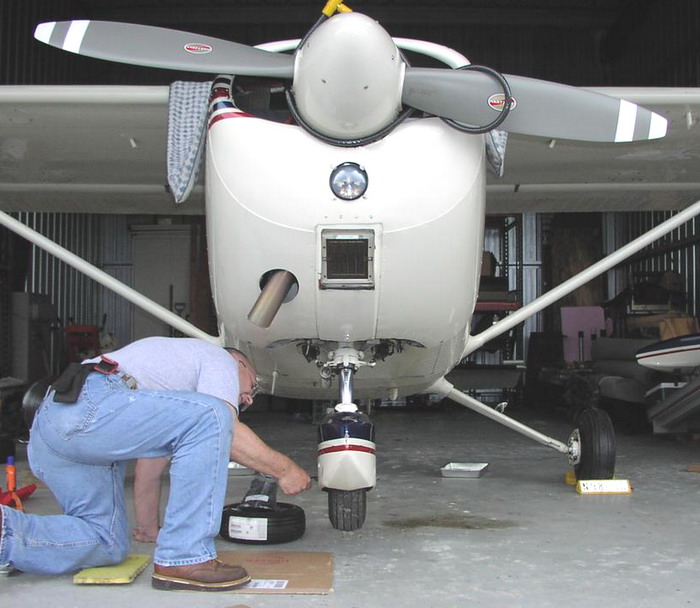
Removing the nosewheel in prep for tire replacement
Courtesy of Part 43
14 CFR Part 43 defines the standards and practices by which civilian aircraft are to be maintained, including those maintenance procedures an aircraft owner may legally perform without direct A&P supervision. One of items on that relatively short list is "Replacement of Tires".
After 6 years, 600 hours of flight time, and perhaps 500 landings, it was time to do tires on the 172. As usual, I called Marty to discuss our options, thinking that I'd drop by one morning and let him do the work. He quoted us roughly $640 in parts and 3 hours of labor (a bit over $200), or a total of roughly $850 for the job. All things considered, I felt this was a reasonable amount, but since my partner would be paying half of the bill, I had to get his buy-in.
Not far into our phone conversation later that day he suggested we do the tires ourselves this time. Because of the nature of the job, the tools required, and my crazy schedule, I urged him to allow Marty to do the work, but he remained convinced that we could do the job quickly, safely, and for the right price. I eventually relented, and offered to contribute one Saturday's time to the process.
Choosing a Tire
Like car and truck tires, aircraft tires come in all different types and sizes. Our 172 takes 6.00-6 tires on the main wheels and 5.00-5 tires on the nose. I got this information directly from the sidewall of the existing tires and backed it up with Marty's expert knowledge.
I happened to notice that the existing main gear tires were 8-ply while the nose wheel was a 6 ply. In spite of the added weight of the 180HP / CSP conversion (which actually requires higher than typical pressures in all three tires), Marty told us that 6 ply tires are sufficient for a much-heavier Bonanza, so we decided on 6 ply tires all around. For our application, the 8 ply tires would get us nothing more than a slightly higher price.
When it came time to choose a brand of tire, I have to admit my partner and I fell back on our experience with automotive tires. We've had very good experience with Michelin tires (in fact, I have a set of their high-end Pilot Sport A/S on my BMW), so the question then came down to whether to buy Michelin's "Aviator" low-end tire or their more expensive "Air" tire. Practically speaking, we didn't find the differences between the tires to be significant enough to warrant the purchase of the "Air" over the "Aviator", but they weren't that much different price-wise, so we decided to splurge on the better tire. In for a penny, in for a pound, as they say.
Choosing a Tube
In contrast to modern automotive tires, aviation tires of this type require a tube. Not all aircraft tubes are created equal, however. All tubes lose air over time due to the material's inherent porosity, but tube manufacturers typically offer a better "anti-leak" tube made of a material that resists leakage in this manner. Michelin calls their anti-leak tube the "Air Stop". GoodYear has an equivalent. And the "generic" brand (Aero-Classic) sells their "Leak-Guard" units.
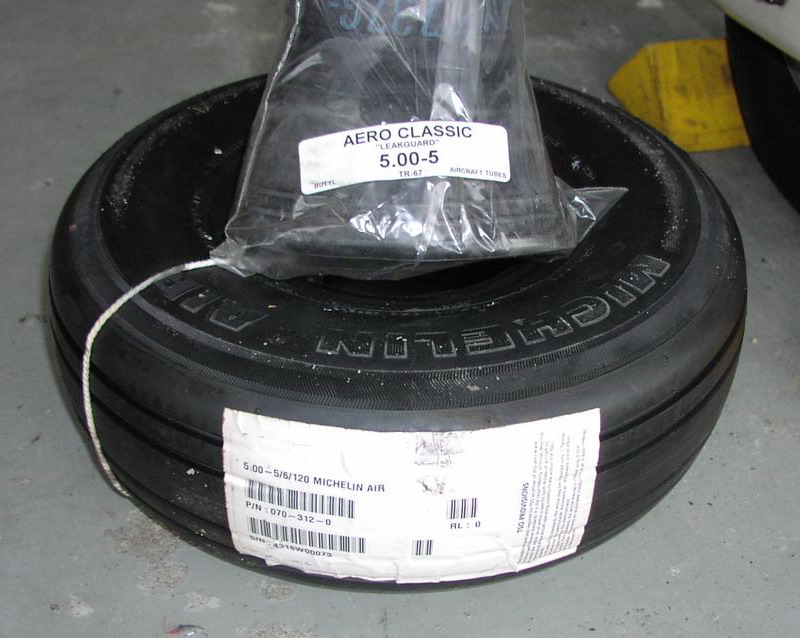 I found tube prices surprisingly uniform across
both manufacturers and type (anti-leak vs. standard). Based on a
recommendation from Marty and Desser, the company from which we
purchased the tires, we decided to go with the Aero Classic
Leak-Guard units, which cost $38 for each of the main gear and
$46 for the nose. I'm not sure why the smaller nose gear tube was
more expensive, but I speculate it might have something to do
with its specialized valve stem. The main gear tube valve stem
exits the tube at roughly a 45 degree angle and is referred to as
a "TR-20". The nose gear tube, however, has a special
right-angled valve stem referred to as a TR-67.
I found tube prices surprisingly uniform across
both manufacturers and type (anti-leak vs. standard). Based on a
recommendation from Marty and Desser, the company from which we
purchased the tires, we decided to go with the Aero Classic
Leak-Guard units, which cost $38 for each of the main gear and
$46 for the nose. I'm not sure why the smaller nose gear tube was
more expensive, but I speculate it might have something to do
with its specialized valve stem. The main gear tube valve stem
exits the tube at roughly a 45 degree angle and is referred to as
a "TR-20". The nose gear tube, however, has a special
right-angled valve stem referred to as a TR-67.
To do or not to do brakes...
Marty told us at the last annual that we'd need new rotors by the time the next annual rolled around. Since installing new tires requires the disassembly of the two-piece wheels and the brake rotors, we figured this would be the perfect time to do the brakes. However, we ultimately decided against doing brakes for a variety of reasons not important to this discussion. We did, however, come to the realization that there are different types of brake rotors available both in terms of finish and the size of the mounting holes.
Some rotors come with 1/4" bolt holes, while others (like our 172 with OEM wheels) use 5/16" bolts. Make sure you get the right kind for the particular wheels on your aircraft, as you CANNOT buy the smaller units and simply drill out the holes or the strength of the rotor will be compromised.
As far as finish goes, Marty recommends the standard Cleveland painted steel (around $130 ea), while I'm partial to the nickel plated Rapco ($80), primarily because the nickel plating should resist corrosion far better than the painted steel on the non-rubbing surfaces. Painted or plated, all disks ultimately wear down to raw steel on the friction surface, so buying either will result in rust or corrosion if the plane isn't flown, so my take is buy whatever you like, and fly the airplane regularly enough to keep the friction surfaces clean and dry.