Do-It-Yourself Tire Replacement
for the Cessna 172
Page 2
Tools (Argh Argh Argh)
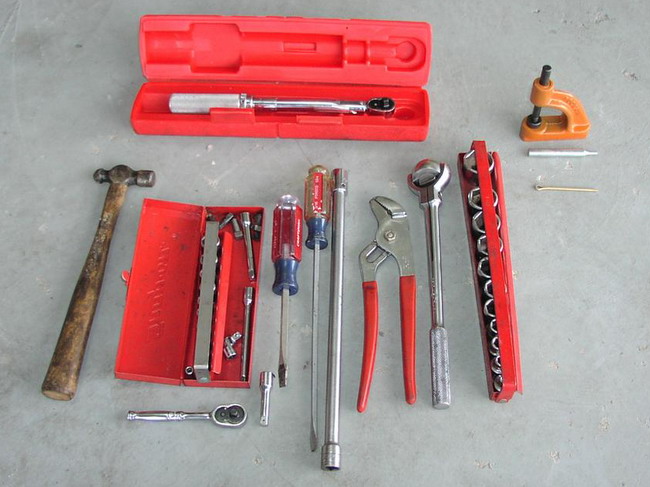
Most jobs, including this one, would be impossible to do without the right tools. Most of those depicted are pretty obvious to anyone who's done any kind of mechanical work (and if not, you probably shouldn't attempt a tire replacement!), but the interesting ones are as follows.
At the top center is a SnapOn 150 inch/lb 1/4" drive torque wrench. This ain't your father's Chevy you're working on. "Tight but not too tight" might work on some things, but wheel bolts isn't one of them. This wrench cost about $100 when it was bought in 1999. The other oddity is the brake rivet press shown at the top right. It turned out that we wouldn't need this, but I hadn't seen one before, so it was nice to know what to look for next time when we do the brakes. Next to the rivet press is a main wheel cotter pin, included in this picture for size reference.
One of the most important tools is not pictured, however -- a box of rubber gloves. It's absolutely essential to keep grease and other petroleum based products out of direct contact with skin. I am sometimes amazed at what people will allow to touch the largest organ of the human body. It will readily absorb chemicals and send them right into the blood stream. I mean, there's a very good reason those nicotine patches actually work. Protect your skin! 'Nuff said.
Let's Get Started
The first thing we did was remove the main wheel pants. The nose wheel pant cannot be removed without pulling the tire first, so we just left that as is for the moment.
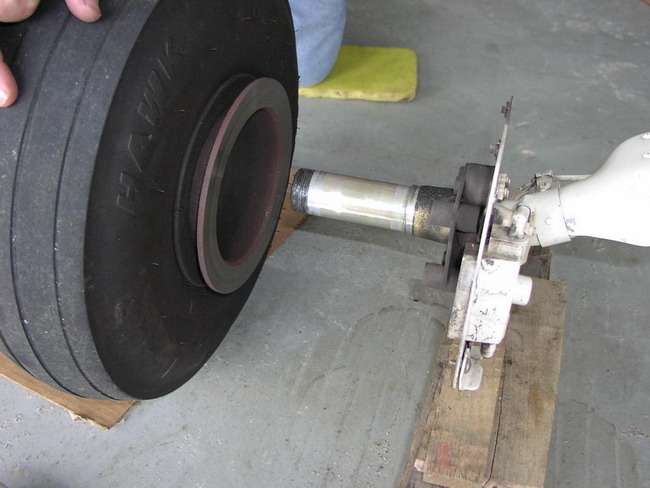
We decided to start with the left main gear and proceeded to jack it up a couple inches -- just enough to get the tire off. While we weren't fortunate enough to have a nice set of tripod aircraft jacks available, my partner did have access to a simple ratcheting mechanical jack. Right or wrong, safe or not, we used protrusion on the wheel retaining nut (pictured below) used to mount the wheel pant and proceeded to raise the wheel just enough to wedge some wood blocks under the inboard wheel pant support. Once the wood was in position, we lowered the jack and the aircraft onto the blocks.
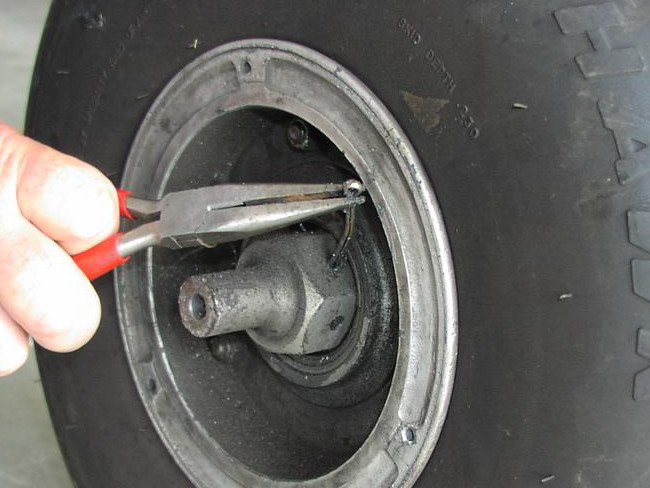
Next, we began by removing what appeared to be a 3/32 x 2" cad-steel cotter pin. You'll note that the pin is bent perhaps 20 degrees at its center. This is essential to clear the rim. Once removed, incidentally, the cotter pin is officially garbage. If you were stuck doing a tire swap out in the wilderness and in a bind, I'm sure it could be reused, but I'd change it as soon as I returned to civilization.
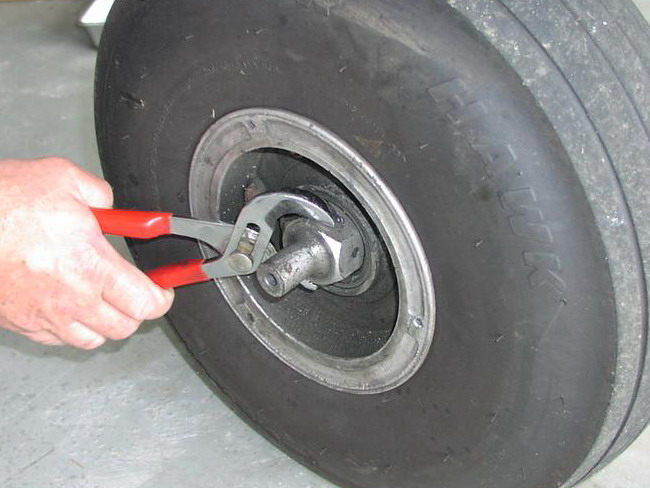
We then removed the jeezus nut with a Channel-Lox pliers. The nut loosens like any other -- counter-clockwise. Note that because the holes in the nut and the shaft must align for insertion of the cotter pin, it's not uncommon to find the nut a bit loose. Now, I'm not talking about more than 1/8 of a turn here, but that's loose when it comes to bearing preload...and that's exactly what you're adjusting when you tighten it. Too loose obviously isn't good, but too tight isn't good either. The basic idea is to strike a balance between the two extremes and pick the most appropriate alignment of the holes. It's easier to do than to describe.
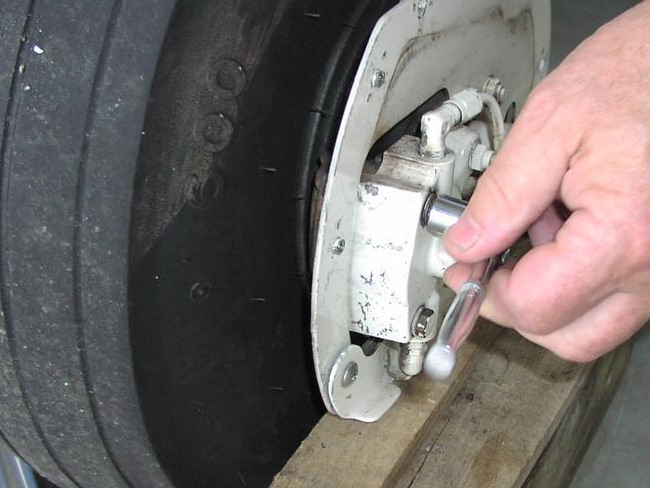
Once the retainer nut is removed, the tire won't yet come off because the outer brake pad is still attached to the caliper and will prevent the rotor from moving outward. We fix that by removing two bolts on the front, inboard side of the caliper.
Below we're removing the top bolt. The other bolt is directly below it. As viewed from this perspective, the lower bolt is just above the bleeder screw and to the left of ratchet handle.
After we pulled those two bolts, the outboard brake pad came off. This freed the wheel, which we then pulled off and readied for disassembly.