


Do-It-Yourself Tire Replacement
for the Cessna 172
Page 3
Wheel Disassembly
One of the great things about the wheels of the 172 (indeed, most aircraft) is that they're two piece units. This makes it relatively easy to remove and replace the tires and tubes. The 172's wheels are fastened with three bolts and steel locking nuts that must be removed before the wheel will separate.
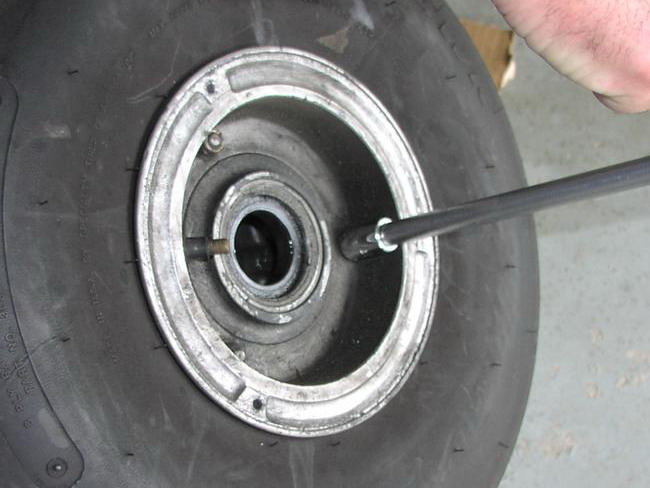
Of course, before getting ahead of ourselves, we used a valve extractor to pull the air valve from the filler nozzle and let the air out of the tire. To do otherwise would invite serious bodily injury -- and while this is not intended to be an instructional article, it bears repeating -- LET THE AIR OUT BEFORE YOU LOOSEN THE BOLTS!
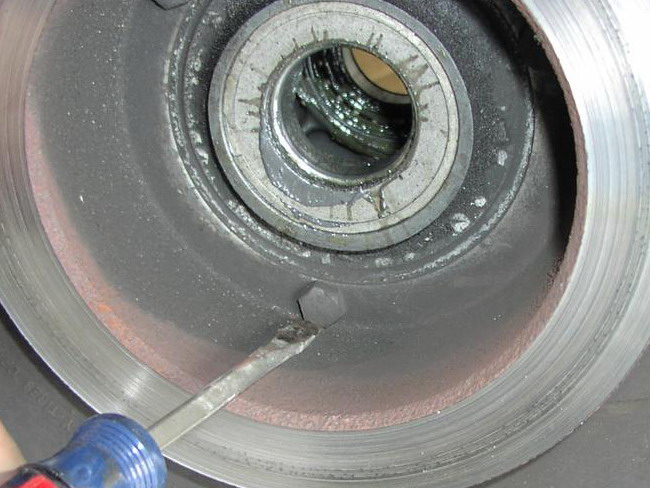
A common 7/16" socket wrench was used to loosen the bolts from the front of the rim, but as you can see below, the clearance between the rotor and the bolt head would not allow the use of another socket. A crescent wrench wouldn't work either because it wouldn't fit inside the inner diameter of the rotor. An offset wrench might have worked, but we had what did -- a simple flat-blade screwdriver wedged between the rotor and the bolt head.
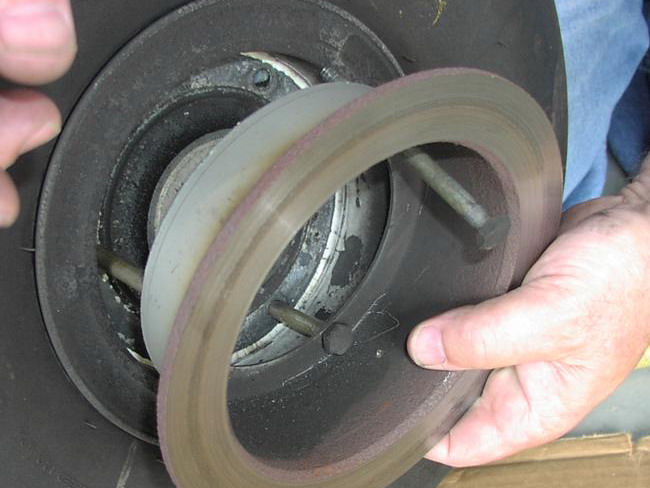
With all three bolts loosened and the nuts stored in a safe place, we pulled the rotor from the inner half of the wheel.
I once helped replace a tire on a DC-3 when I was 17, working at the local airport mowing the lawn with a large tractor. The only reason I became involved is because the owner of the aircraft (also an A&P) had been having trouble breaking the bead on one of the aircraft's LARGE main tires and saw me not as a man of experience that could give him insight as to what to try next, but as a semi-competent driver of a piece of heavy machinery.
I "mowed" over to find three guys jumping up and down on the tire to no avail. A couple minutes later, I found myself mowing not grass, but a DC-3 tire. The large rear wheel of the mower tilted precariously over the edge of the tire, I moved it back and forth until the bead was broken on one side...then the other. Before everyone was finished celebrating, I pointed out that we had another bead to break. That took considerably longer for some reason, but the tire eventually succumbed to the owner's ingenuity, my abusive clutch work, and the sheer weight of the John Deere.
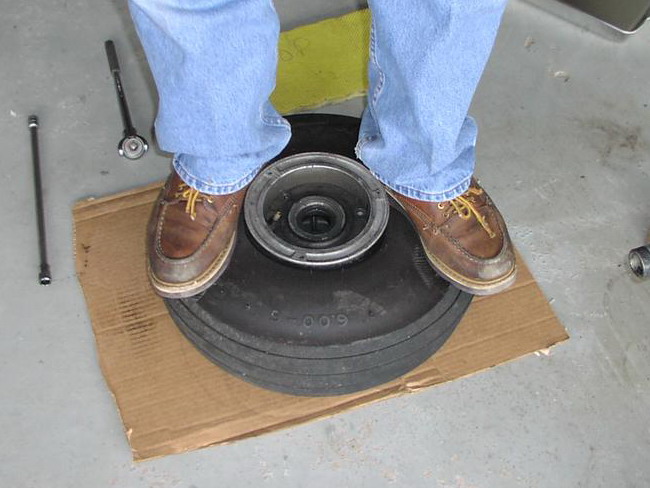
Fortunately, the tires of the 172 put up much less of a fight. A single person jumping up and down about six times is all that it took to break the bead seal and free one half of the rim from the tire. We then flipped the tire over and repeated the process.
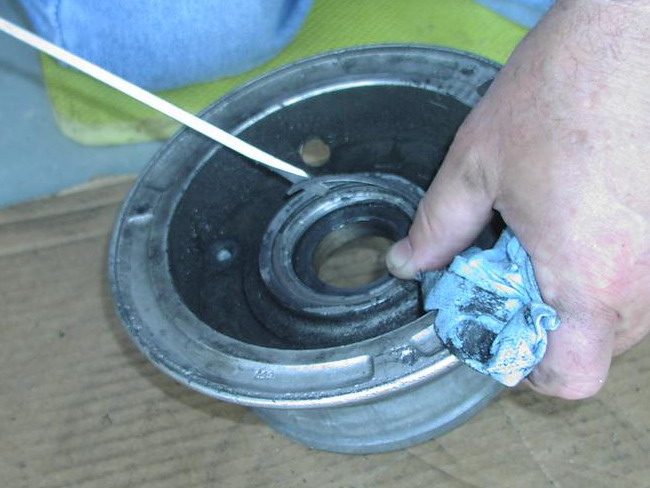
Whenever you remove tires, it makes sense to regrease the wheel bearings. Each wheel has two sets of tapered roller bearings -- one on the outboard half of the rim and the other on the inboard half. Each bearing, in turn, is secured by a retainer clip. One end of the retainer clip is slightly tapered, which makes it easy to get a small flat-bladed screwdriver between the clip and the rim in order to pry it toward the center of the rim and eventually up and out of the slot in which it rides.
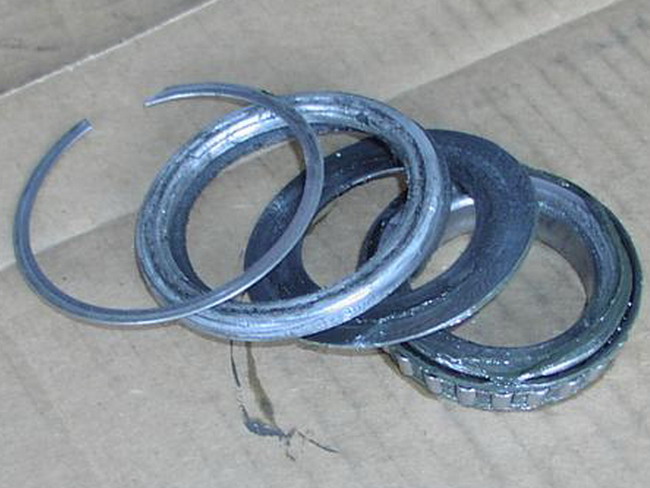
Once the retaining clip is removed, the remainder of the bearing assembly can be removed. As shown below, the assembly consists of the clip, a combination metal & felt bearing seal (the felt is facing downward in this picture), a large flat washer, and, of course, the bearing itself. Note the orientation of all components -- that's the way they came out, and the way we put them back in.
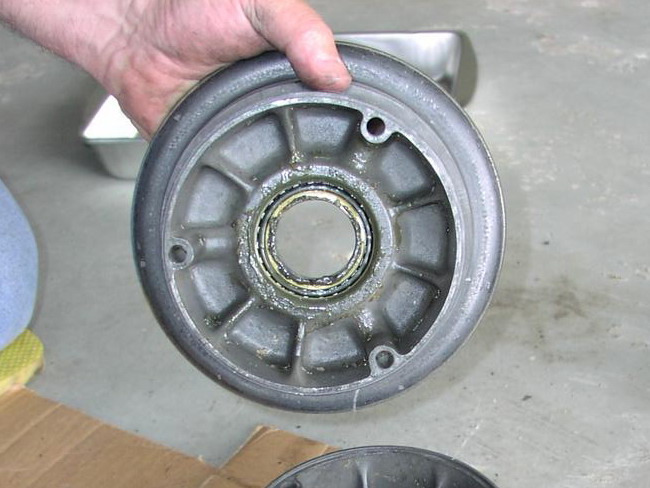
Following is a picture of the rear of one of the wheel halves -- before we cleaned it up. See all that grease? Some is normal. Too much is not. This is one of the main reasons not to overgrease the bearing. You don't want excess grease pooling in the rim and eventually making its way through the seam between the two halves and onto the tube. You'd really have to go overboard on grease to make that happen, but let's just say this was the cleanest of the rim halves we found.
While its possible to use a regreaser to press new grease into the bearing and flush out the old, since we do this so rarely, we regreased the old fashioned way -- with a dollop of grease in one hand and the bearing in the other. If you look closely, you can see the fresh grease coming out of the bearing -- that's what you want to see. As I noted above, however, you'd typically want to clean any excess grease off the bearing or it will make a mess inside the wheel.
